How to Make Pumpkin Puree (The Easy, Homemade Way I Do It Every Fall)
Learn how to make pumpkin puree at home with simple steps, the best pumpkins to use, storage tips, and troubleshooting based on real, lived-in experience.
If you’ve ever cracked open a can of pumpkin and wondered why it tastes a little… bland, you’re not alone. I used canned pumpkin for years until I finally started growing my own pie pumpkins. Once I tasted the difference, I never went back. Homemade pumpkin puree just hits different. There’s a natural sweetness to it that canned pumpkin never quite gets.
Let me show you how I make pumpkin puree at home and what I’ve figured out after doing this a bunch of times. Whether you’ve never made pumpkin puree before or you just want yours to taste a little better this year, I’ll walk you through the whole thing.
What Kind of Pumpkin Makes Good Puree?
If you’ve ever tried to puree a carving pumpkin, you probably already know the truth: not every pumpkin is meant to be cooked. The right pumpkin makes all the difference, and it’s honestly half the battle.
Small pie varieties really are best
I’ve worked with everything from five-pound sugar pumpkins to the giant “oops, I forgot to check that corner of the garden” pumpkins, and the smaller varieties always produce the best-tasting puree, hands down.
- Sugar pumpkins (a.k.a. “sweet pumpkins”) are my top choice. Smooth flesh, naturally sweet, and just the right amount of moisture.
- Pie pumpkins another one that works really well. They’re very similar, just with a slightly denser flesh.
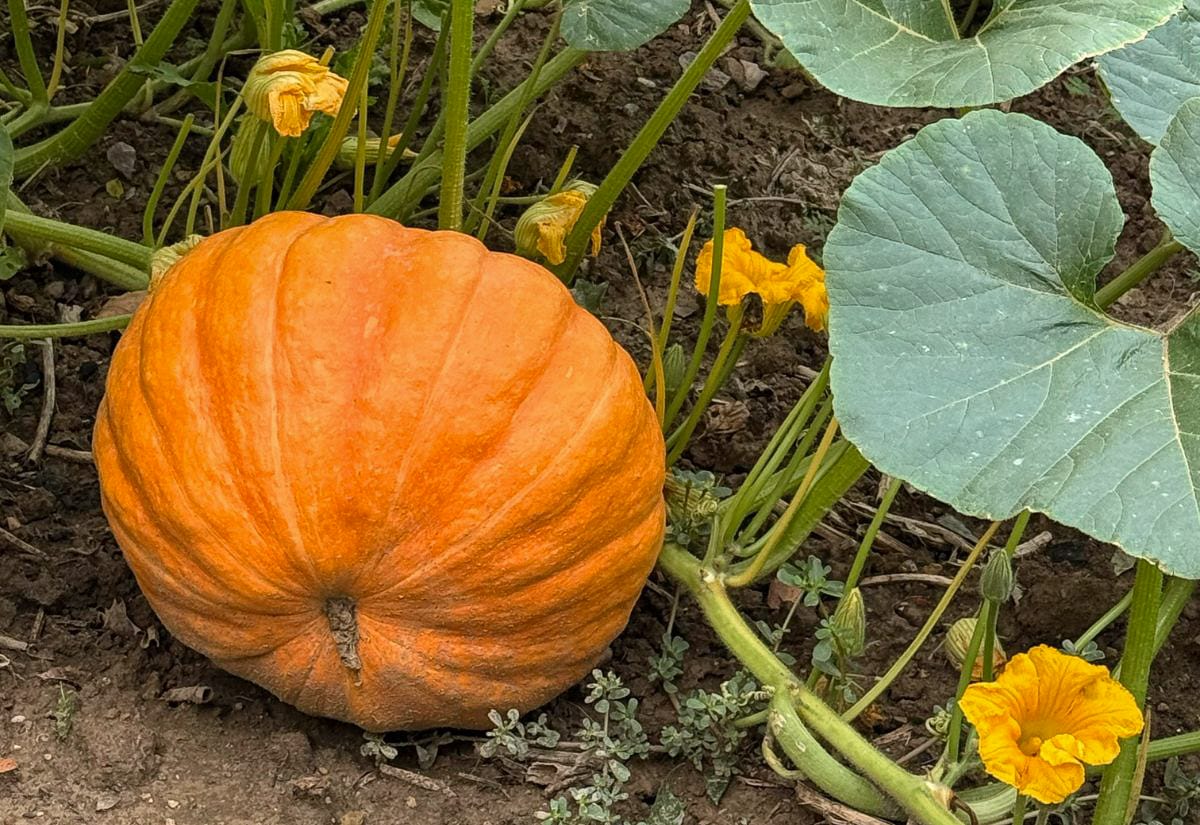
You can use other varieties, especially if you grew them yourself, but anything grown for carving tends to be watery, stringy, or just kind of bland, honestly. When in doubt: small, heavy-for-its-size pumpkins are your friend.
Tools & Ingredients
I like to keep things simple when I cook, and pumpkin puree is as basic as it gets. You’ll need:
- 1 small pumpkin (5–8 pounds is ideal)
- Sharp knife
- Roasting pan or baking dish
- Blender or food processor
- Spoon for scooping
- Cheesecloth (optional, for thickening)
That’s honestly it.
How to Make Pumpkin Puree
It takes about two hours, start to finish, but most of that is just waiting for the pumpkin to cook. I usually do this on a chilly fall afternoon when the oven heat feels like a bonus.
Prep the Pumpkin
Preheat your oven to 350°F. Slice the pumpkin in half from top to bottom. I always pop the stem off first. It makes it way easier to cut.
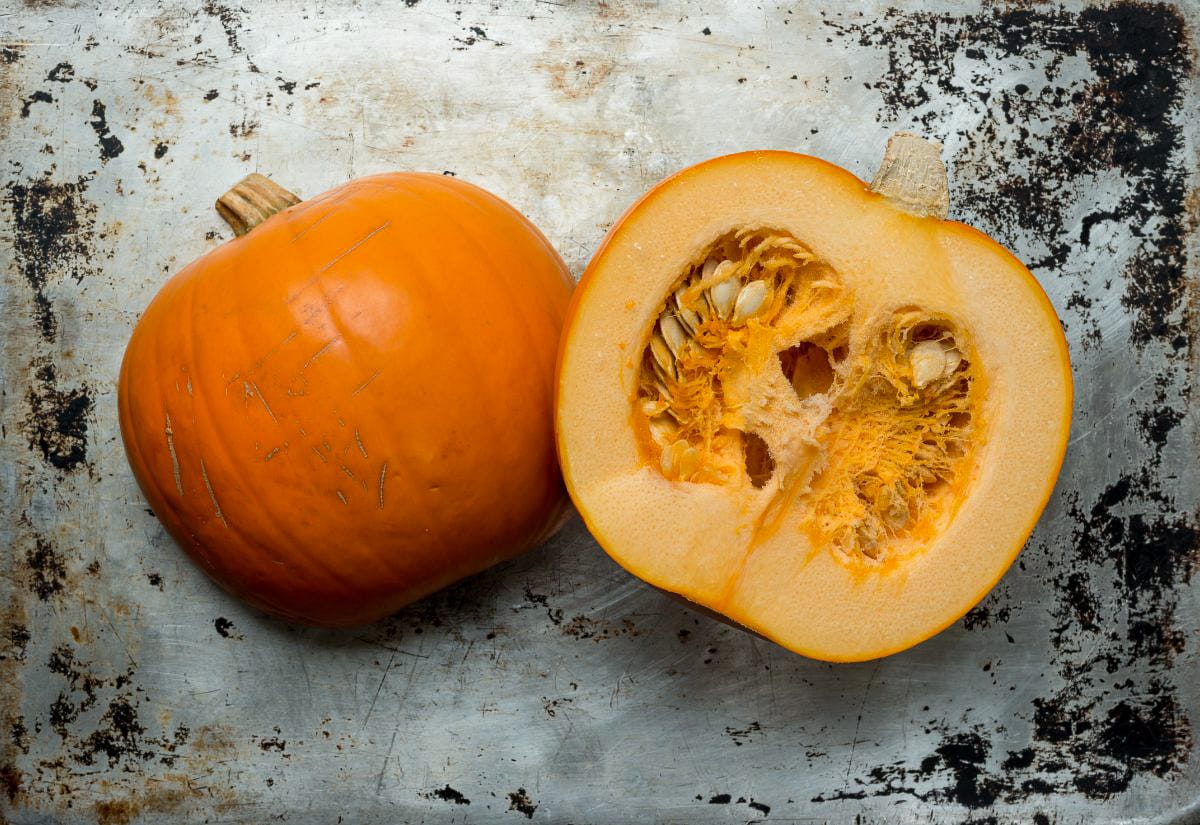
Scoop out the seeds and stringy guts. This part gets the chickens all fired up. I save everything but the seeds for them. If your pumpkin has a soft spot from sitting on damp soil (happens to me every time), cut away the damaged area. As long as the rest is firm, you’re fine.
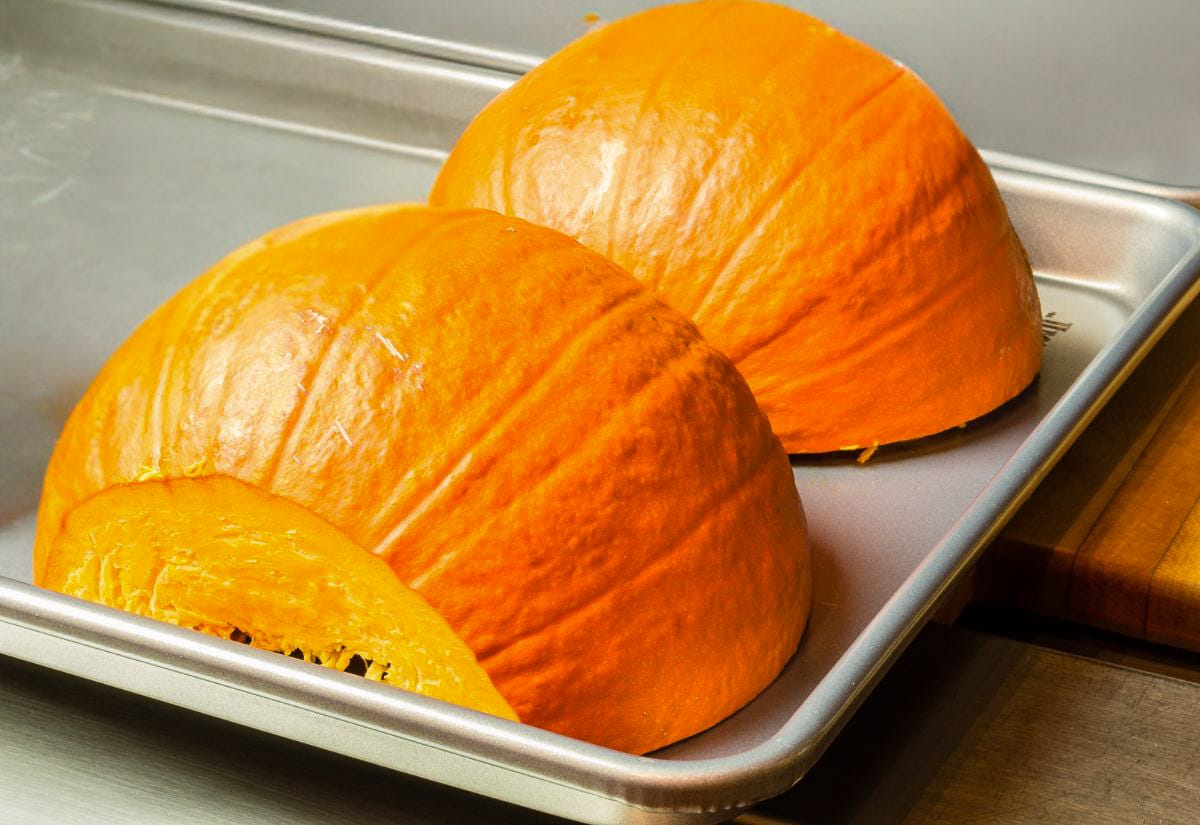
Roast Until Tender
Place both halves cut-side down in a baking dish with 1 inch of water. Roast for 45–60 minutes, checking at the 45-minute mark.
When a fork slips easily into the skin, you’re good to go. Larger pumpkins may take a little longer, and sometimes one side cooks faster than the other (which happens all the time).
Cool & Scoop
Let the pumpkin cool until it’s comfortable to handle.Scoop the soft flesh away from the skin and transfer it to your blender or food processor. Something that’s made this easier for me is to scoop side-to-side instead of digging downward. You’re less likely to tear the skin and accidentally bring tough pieces into the puree.
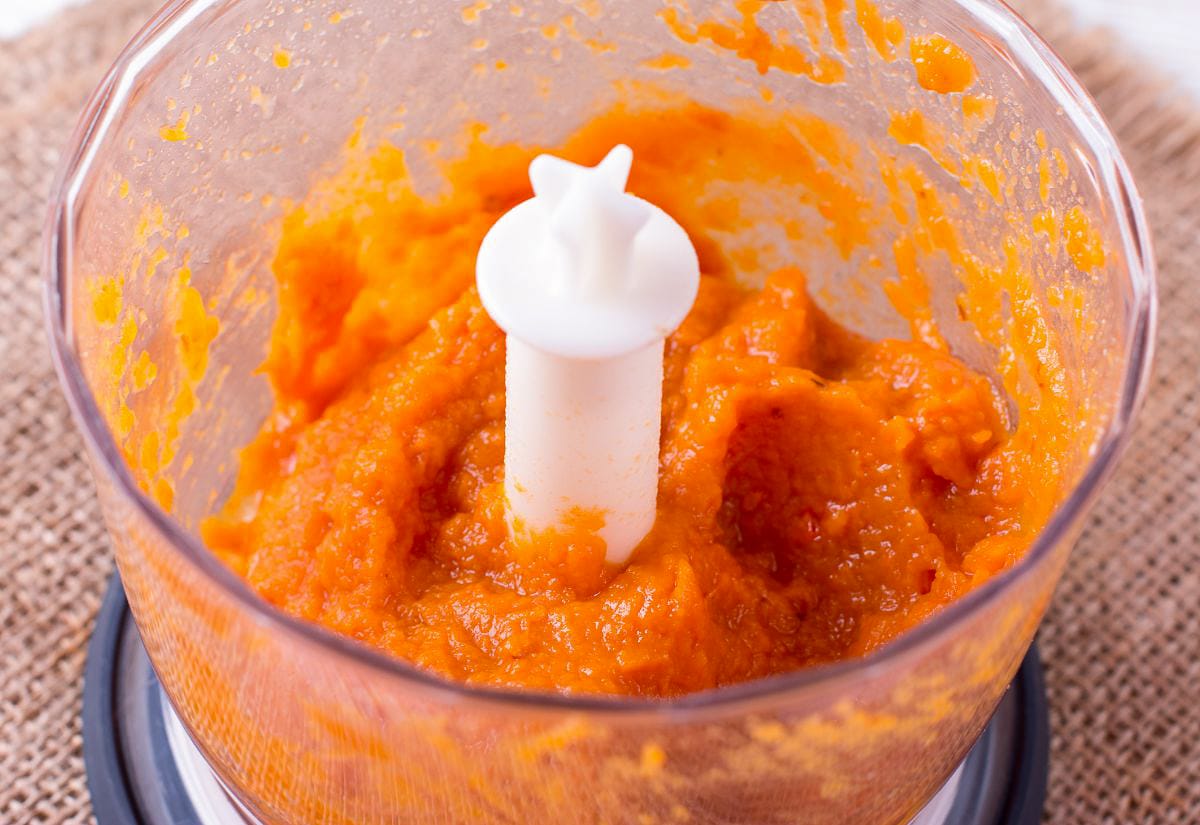
Blend Until Smooth
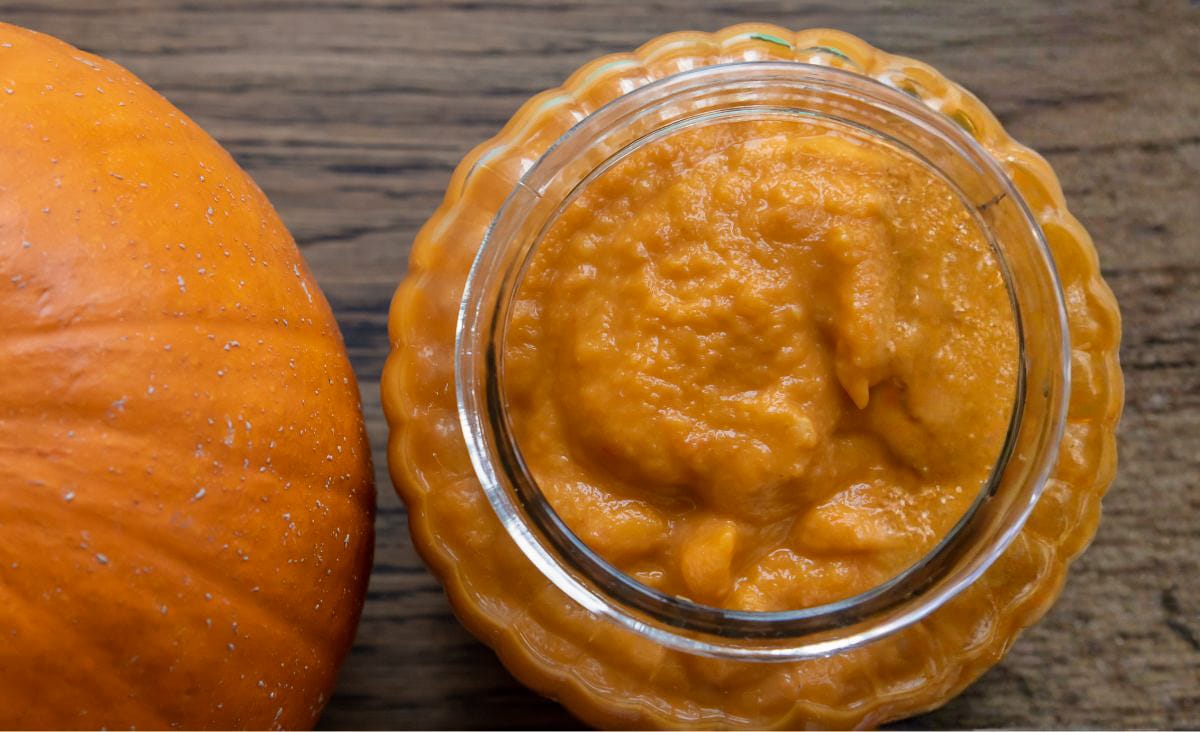
Blend until it’s completely smooth. If you’re baking with it, you may want to strain excess moisture through cheesecloth for 10–15 minutes. For soups, chilis, and sauces, I like the extra liquid. It deepens the flavor and saves me from thinning everything later.
Other Ways to Cook Pumpkin for Puree
Any of these will get the job done. I’ve tried them all depending on how chaotic the day is.
Baking (No Water)
Cut the pumpkin into larger wedges, place on a baking sheet, and roast dry. This brings out more sweetness and gives you a richer, deeper flavor.
Microwaving
When I’m short on time (or patience), microwaving wins. Cut the pumpkin into smaller pieces, add a splash of water, and cook in short intervals until fork-tender.
Just go with whatever matches the kind of day you’re having.
How to Store Homemade Pumpkin Puree
Once you start using pumpkin puree, you’ll always want more on hand.
Refrigerator: Store in a sealed container for up to 1 week.
Freezer: I freeze mine in one-cup portions so I can grab exactly what I need. Use freezer bags or containers, leaving a little room for expansion. Frozen puree stays good for 6–9 months.
Signs It’s Gone Bad: If it smells sour, turns watery and separated, or has any mold… toss it. Homemade pumpkin puree doesn’t have stabilizers like canned pumpkin, so you’ll know when it’s off.
What to Do With Pumpkin Guts
Don’t toss them. They’ve got plenty of uses.
- Roast the seeds for snacking
- Feed the guts to chickens (full of nutrients)
- Add to stock or broth for a nutrient boost
- Compost the rest (breaks down fast and enriches soil)
If your kids or grandkids help scoop, this is where the fun usually happens. Mine always turned it into a full sensory activity.
Troubleshooting Homemade Pumpkin Puree
These are the problems I run into all the time…
Why is my pumpkin puree watery? You probably used a variety with higher water content. Strain it through cheesecloth or simmer it on the stove to thicken.
Why is the texture stringy? Some pumpkins are naturally more fibrous. Blending longer helps, but choosing pie varieties is the real fix.
Why does my pumpkin puree taste bland? It was likely harvested a little early or just isn’t a sweet variety. Roasting longer deepens the flavor, and a tiny pinch of salt can wake it up.
Why is my puree pale instead of bright orange? Pumpkins vary a lot. Homemade puree is usually lighter than canned, and that’s nothing to worry about. If the pumpkin was ripe and tender, the color won’t affect the taste or how it works in recipes.
Why did my pumpkin puree separate in the fridge? Homemade puree doesn’t contain stabilizers, so a little separation is normal. Just give it a quick stir before using.
Pumpkin Puree Substitutes
I always think I have plenty… until I’m halfway through fall baking and it’s gone. When I run out mid-recipe, these are the swaps I use.
- Butternut Squash: The closest match in both flavor and texture.
- Sweet Potato: Sweeter, thicker, great for baked goods.
- Canned Pumpkin: Works perfectly in any recipe.
- Mashed Carrot: Best for soups and sauces, not so much for baking.
Questions About Homemade Pumpkin Puree
Here are a few things people usually ask once they start making their own puree.
Pin this pumpkin puree guide so it’s easy to come back to when the pumpkins roll in.

Making pumpkin puree at home is one of those simple kitchen projects that pays off all season long. You get better flavor, better texture, and that little “hey, I actually made this” feeling every time you open the freezer or stir it into a soup.
If you give it a try, let me know how it goes or, better yet, tell me what you’re making with it. Pumpkin muffins, pumpkin pie, pumpkin pancakes, even pumpkin cookies… it all sounds good to me.
Easy Homemade Pumpkin Puree (From Real Pumpkins)
This post may contain paid links. If you make a purchase using the links in this recipe, I may earn a commission.
Equipment
- 1 Sharp Knife
- 1 Roasting pan or casserole dish
- 1 Metal spoon
- 1 Blender or food processor
Ingredients
- 1 Pumpkin 5-8 lbs
Instructions
- Preheat your oven to 350°F (175°C).
- Cut the pumpkin(s) in half from top to bottom, removing the stem.1 Pumpkin
- Scoop out the seeds and stringy bits using a metal spoon. Save seeds for roasting if desired.
- Check for imperfections in the pumpkin flesh, removing any undesirable sections.
- Compost the pumpkin guts or use them for other purposes.
- Place the cleaned pumpkin halves open-side down in a roasting pan or casserole dish with 1″ of water.
- Bake in the preheated oven for 45 minutes to an hour or until the pumpkin flesh is tender when pierced with a fork.
- Allow the pumpkin to cool, then scoop out the flesh, leaving the skin behind.
- Add the pumpkin flesh to a blender or food processor and puree until smooth.
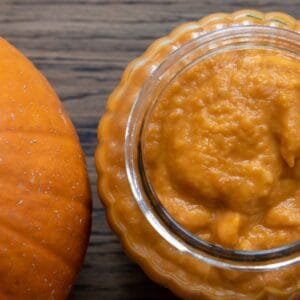
- Transfer the puree to airtight containers or glass jars for storage.
I ended up with a chemical burn from cleaning pie pumpkins. Next time I pull guts, I will be sure to wear gloves. It took a month or more to get my skin back to normal.
On my goodness! Do you have a sensitivity to them? I’ve never heard of that happening before.