Perfecting Your Chick Brooder Setup and Lockdown Process
To hatch chicks, you need to learn the brooder setup and lockdown process. Understand what your chicks’ ideal environment is from the start.
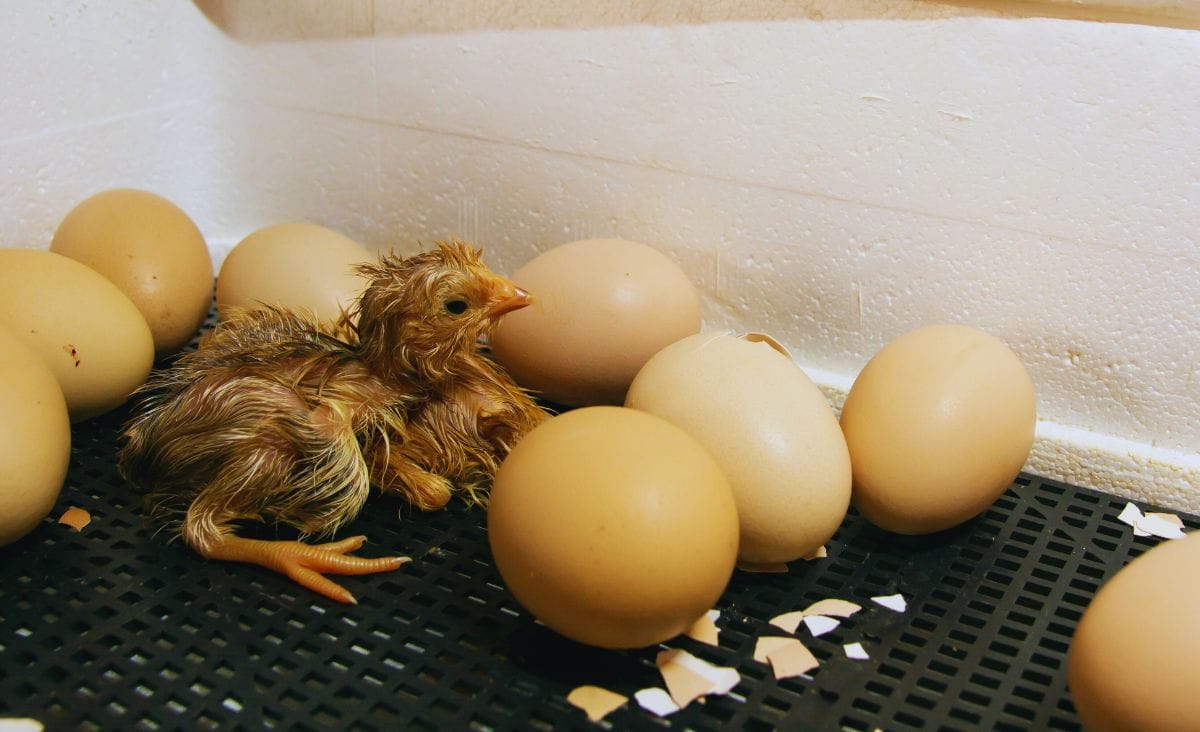
For a homesteader, one of the best things that can happen is welcoming a new life into the world. It does not matter if you have raised chickens before or if this is your first time. Watching those first pecks through the eggshell is always exciting. To make hatch day even more magical, you need to carefully prepare for two important steps: setting up a safe and secure brooder for the chicks and learning how to lockdown your incubator.
This post will show you how to create the best environment for your soon-to-be-baby chicks, from choosing the best brooder to making sure your incubator is ready for the important lockdown phase. With my expert tips and useful advice, you will not only help the eggs hatch, but you will also set the stage for the healthy and happy growth of your chicks.
So let us go over the basics of setting up a chick brooder and the art of incubation lockdown so you are ready to care for and welcome your new feathered friends.
Chick Brooder Setup Essentials
On the homestead, getting ready for the chicks to come is a fun time. After 18 days of incubation, it is time to set up your brooder. This is an important step to make sure your baby chicks do well from the moment they break through their shells. No matter if you use a 20-gallon Rubbermaid plastic tote or make do with cardboard boxes you already have, the brooder should be comparable to the number of chicks you’re expecting. Too small, and it gets dirty quickly; too big, and chicks struggle to stay warm.
Brooding Supplies You’ll Need
- Heat Source: A heat lamp shield with a 75-watt bulb suffices, though red heat bulbs may cut down on pecking and stress since the chicks can’t see red light.
- Brooder Cover: Essential for keeping adventurous chicks in and prying pets or toddlers out. Opt for breathable materials like hardware cloth.
- Feeding and Watering Containers: Trough-style feeders and mason jar waterers are excellent choices. Adding glass stones to the water for the first couple of days prevents drowning.
- Thermometer: Opt for a brooding-specific thermometer to monitor temperature changes accurately.
- Brooder Bedding: Start with paper towels or an old towel for the first week, then transition to pine shavings or sand. We’re big fans of brooding and raising chickens on sand. You can see the benefits of sand in this post. With the wrong bedding, your chick may end up with spraddle leg from slipping. Spraddle leg is usually treatable, but here’s what you need to know about the timing for treatment.
Tip: Considering the heat lamp’s potential risk, a brooding heat plate is a safer alternative if it is within your budget. If you choose a lamp, ensure it is securely mounted and inaccessible to children.
Choosing the Right Location for Your Brooder
To help you pick the best place for your brooder, here are some important things to think about:
Temperature Stability
For chicks to do well, they need a stable, warm place to live, especially in their first few weeks. As temperature changes can be harmful, pick a spot away from drafts, air conditioning vents, and direct sunlight. As long as they stay dry and have good airflow, basements or insulated sheds can provide stable conditions.
Safety from Predators and Pets
It is very important that your chicks are safe from animals that might eat them or pets that are just curious. Possible dangers, such as rodents, cats, and dogs, should not be able to get to the brooder. Consider a room or space that can be easily secured or an area where pets are not permitted.
Ease of Access
It is very important to check on your chicks often, especially in the beginning. Pick a spot that is easy to get to regularly and will not get in the way of your farm or home life. This ease of access is very important for keeping an eye on the chicks’ health, getting more food and water, and keeping things clean.
Ventilation
Good air quality is very important for chicks’ health. The place you choose should have enough airflow to keep ammonia from droppings from building up, but not so much that it makes drafts. Adjust the windows or vents so that fresh air can flow in without blowing directly on the brooder.
Noise and Activity Level
While some activity can be good for chicks, too much noise and activity can make them stressed. You can help chicks get used to their new environment by putting them in a place that is both quiet enough to rest in and loud enough to hear everyday sounds.
Lockdown Procedure
As of day 18, the egg turner should be taken out of the incubator so that it does not affect the positioning of the chicks. Turn down the temperature to 98ºF and raise the humidity to 60–65%.
Putting the eggs in the right position is very important. Laying them on their sides encourages movement and interaction, which is needed for them to hatch at the same time.
Monitoring and Adjusting Humidity Levels
The right humidity in an incubator is very important because it affects both the development inside the egg and the chick’s ability to break free from the egg.
For the most part, the humidity should stay between 40 and 50% during the incubation period. During the last few days, which are called the “lockdown period,” it should rise to 60 to 65%. This rise in humidity makes the eggshell softer, which makes it easier for the chick to get out.
The best way to keep an eye on these levels is with a hygrometer, which gives accurate readings and comes in both analog and digital formats.
To change the humidity, either put more water on the incubator’s tray or use sponges to make the water’s surface area bigger, which raises the humidity. To lower humidity levels, on the other hand, less water in the tray or better air flow can help, but it is important to keep a delicate balance so as not to disturb the environment as a whole.
Once pipping begins, it is especially important not to open the incubator’s lid. Doing so can cause sudden drops in temperature and humidity, which can harm the remaining chicks. Adjustments should be made through designated channels that do not require opening the incubator, if the design allows it.
Post-Hatch Care: The First 24 Hours
To take good care of your chicks during their first 24 hours out of the egg, follow these steps and tips:
Leaving Chicks in the Incubator
After the chicks hatch, leave them in the incubator for a few hours until they are dry and fluffy. This period allows them to stabilize and gain some strength before moving to the brooder. Do not open the incubator; doing so could cause the humidity and temperature to drop, which are very important for the eggs that are still inside.
Transitioning to the Brooder
Once they are dry, carefully move the chicks to the brooder you have set up. The brooder should be pre-warmed (95ºF for the first week, decreasing by 5ºF each week thereafter). Create a gradient with the heat source so that the chicks can move toward or away from it as needed.
Read A Guide to Hatch Day: Day 21 of Incubating Chicken Eggs to learn more about what to expect on day 21 and troubleshoot things that might go wrong. It will help you get ready for when your new chicks arrive.
Frequently Asked Questions
If you’ve found value in this blog post and enjoyed reading it, why not share it with your Pinterest community? Pin the image below and spread the love!
To make sure your new chicks are healthy and safe, you need to set up a chick brooder and manage the lockdown procedure. If you give your chicks the right environment, care, and attention, they will do well, and you will be off to a good start with raising chickens.
Are you new to the fun and rewarding process of hatching chicks? Share your own tips or any questions you have about setting up the perfect brooder or managing the lockdown process—I’d love to hear about your experiences!
You mentioned using sand in the bin with the chicks, I have 3 week old chicks and I’m wondering if I can use regular play sand for them for grit. Or is there a special kind of sand you use? Thank you so much!
I’m planning to try and hatch a few eggs in an incubator but I don’t have a hygrometer or the thing that you put over the thing that you put water into… how will I know when to add water and will chicken wire work to set the eggs on in the lockdown process? If not where can I get the supplies?
Jessica
Have you dealt much with crossed beaked chickens? Of course my crossed beaked Lulu is my favorite chicken she loves to snuggle.
But I worry if I’m doing everything right for her. I have tried looking everywhere on how to take care of them and I find bits and pieces of good advice. I wondered if you might have any advice for me on that.
Thanks for the great info I’m just learning this whole chicken thing and it’s great I’m trying to research everything I can. I really didn’t think I could get as close to my chickens as I have. They each have their own personality plus I spoil them. Thanks again.
Deena
Thanks for the tutorial! I hope to do this one day 🙂 Thanks for linking up and sharing on Mostly Homemade Mondays!
Kelli @ The Sustainable Couple
http://www.thesustainablecouple.com
Love your blog… Waiting for hatching part 4! I do have 4 eggs right now under a broody hen and she is on her 20th day!
Best of luck with your hatch! Feel free to share fuzzy chick pics on our Facebook page 🙂
Entertaining read!! I had white knuckles and was on the edge of my chair hoping for a good outcome with the eggs! Thank goodness! My hubby doesn’t know it yet but he is getting me an incubator for my birthday this April:)
So for know I just ordered chicks ducks and turkeys! They arrived this morning. Yay! I will be posting my blog on building a chicken brooder out of wooden shipping crates later today after I get the final pictures!!
My husband buys me things all the time without knowing it lol. Keep me updated on your progress!
Hahahahahahahaha!
That makes me laugh & reminds me of my daughters!???
.