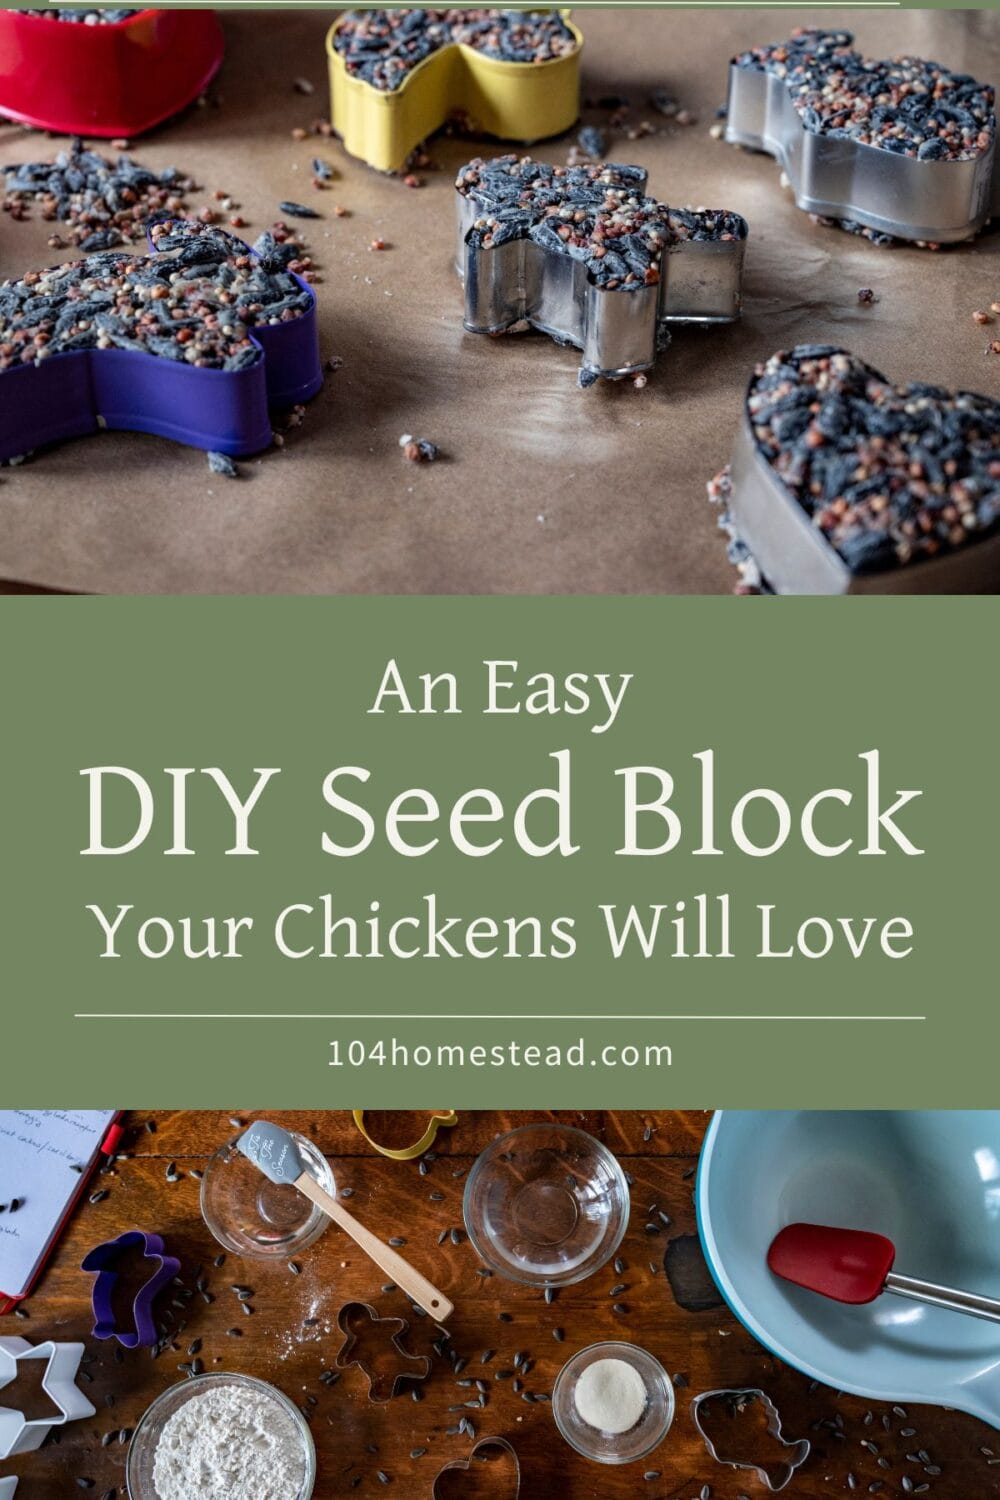
An Easy DIY Seed Block Your Chickens Will Love
Learn how to make all-season seed blocks for your chickens with my easy guide. Perfect for keeping your flock healthy and entertained!
Welcoming spring and the warmer months ahead, I often look for creative ways to nourish and entertain my feathered friends. Chickens thrive on variety in their diet, which not only keeps them healthy but also keeps them entertained.
I have a fun and easy project to share with you today that will add variety to your chickens’ food while also keeping them and you entertained for hours. Creating seed blocks that chickens can eat throughout the year is a thoughtful and practical way to give them a little extra nutrition. Alright, let us jump into this exciting project that will bring happiness to your homesteading spirit while benefiting your poultry.
All-Season Seed Blocks for Chickens
Using cookie cutters and store-bought bird seed, you can easily make a bird seed block for your chickens. It’s so easy that I can often recruit my kids to help me assemble them.
You can make these treats for your chickens at any time of year thanks to the use of gelatin instead of fat.
Ingredients:
Bird Seed Mix
When purchasing bird seed for making bird seed blocks, in addition to looking for high-quality and organic options, consider the following suggestions:
- Variety: Look for a mix that includes a variety of seeds, such as sunflower seeds, millet, cracked corn, and others, to provide a range of nutrients.
- No Fillers: Choose a mix that doesn’t contain fillers like wheat or oats, which might not be as appealing or nutritious for chickens.
Unflavored Gelatin
You’ll find gelatin in the baking section of the grocery store, near the puddings and jellos. If you plan to make bird seed blocks regularly, buying gelatin in bulk online or from wholesale stores can be more cost-effective.
Flour
The flour acts as a binder for the ingredients. I usually use all-purpose flour, but I’ve had success with rice flour or chickpea flour as well.
Honey
Think about the quality and origin of the honey you buy before you make chicken seed blocks. When possible, choose raw, unprocessed honey because it has more beneficial nutrients. You can support local beekeepers and get fresher honey by shopping at farmers’ markets. Keep in mind that you want pure honey, not honey with any added sugars or syrups.
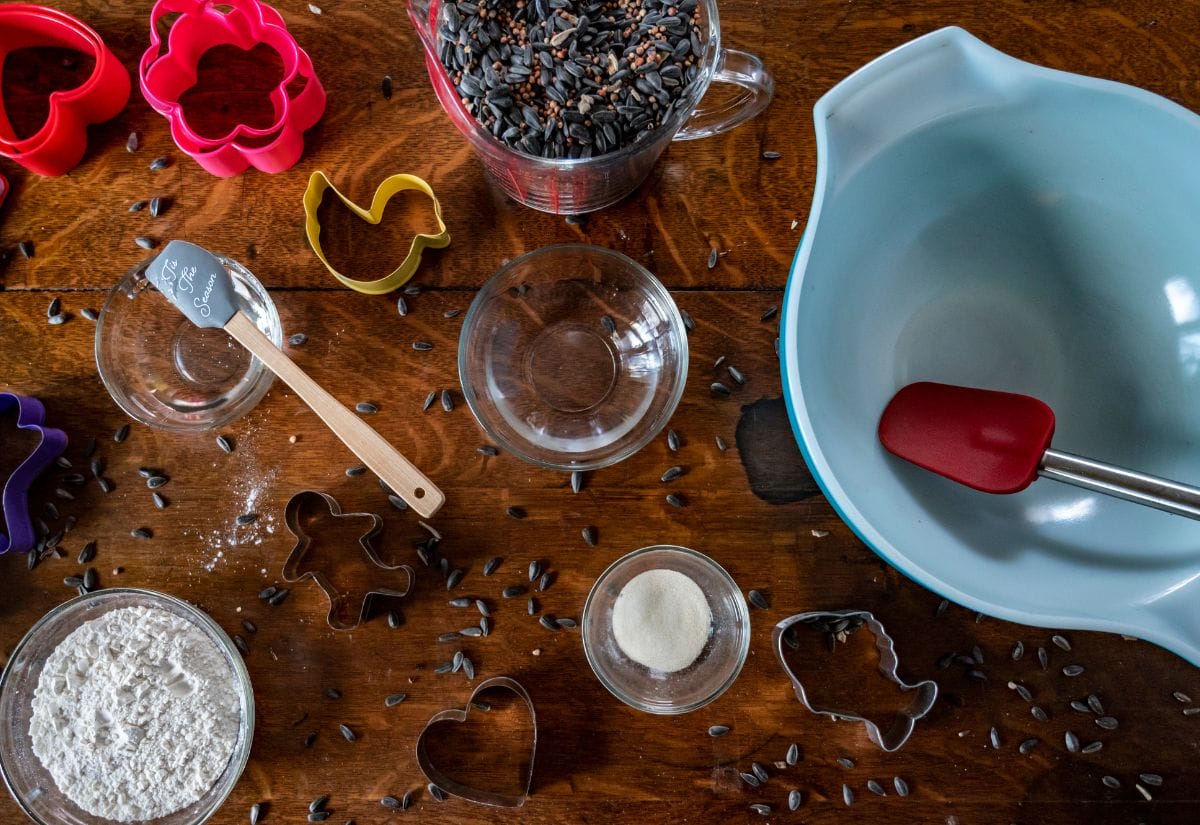
Supplies:
- Cookie cutters of various shapes
- Straws or small sticks (to create holes for hanging)
- Non-stick cooking spray
- Baking sheet
- Parchment paper
- Mixing bowl
- Saucepan
Steps:
In a saucepan, combine water and gelatin packets. After combining water and gelatin in the saucepan, whisk gently to ensure no lumps remain. Keep the heat low to prevent boiling, as high temperatures can reduce gelatin’s setting ability. Once fully dissolved, remove from heat and let it cool for a minute before combining with the dry ingredients.
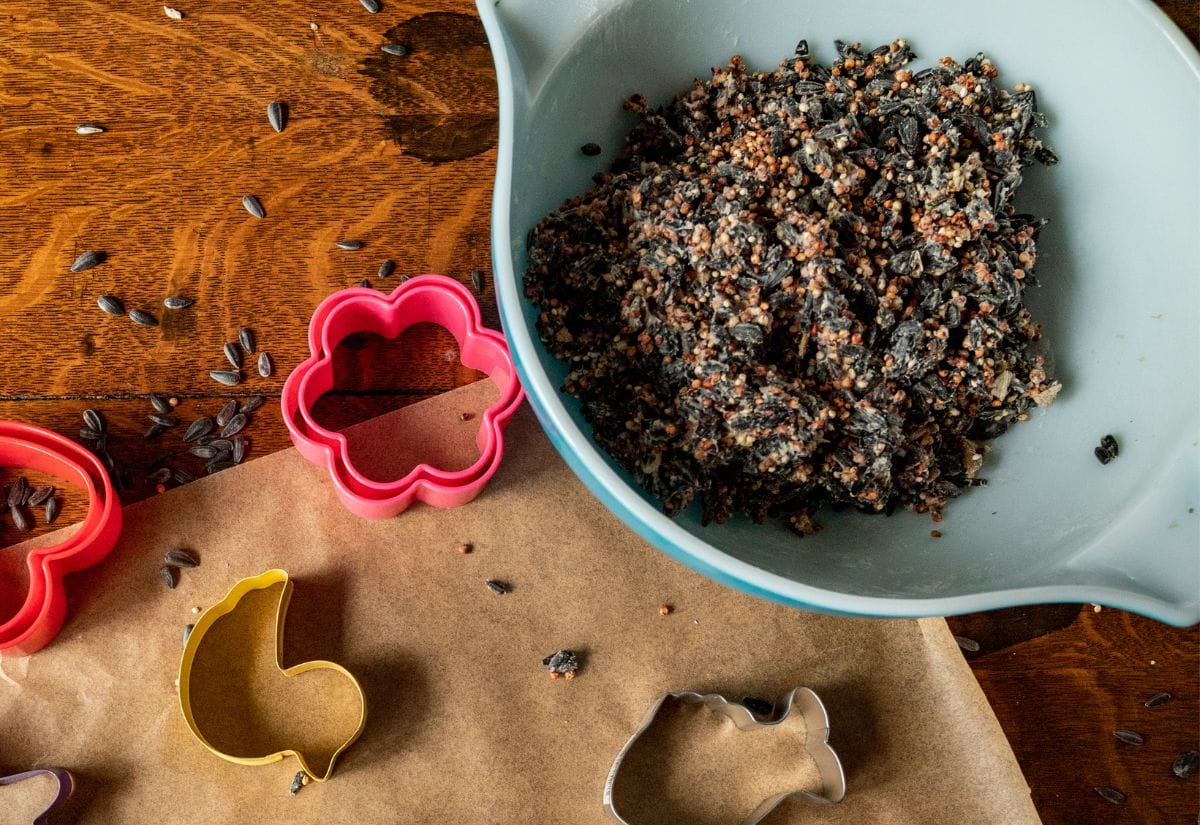
In a mixing bowl, combine the bird seed, flour, and honey. Top the bird seed mixture with the gelatin mixture. Mix with a sturdy spoon or spatula until every seed is coated.
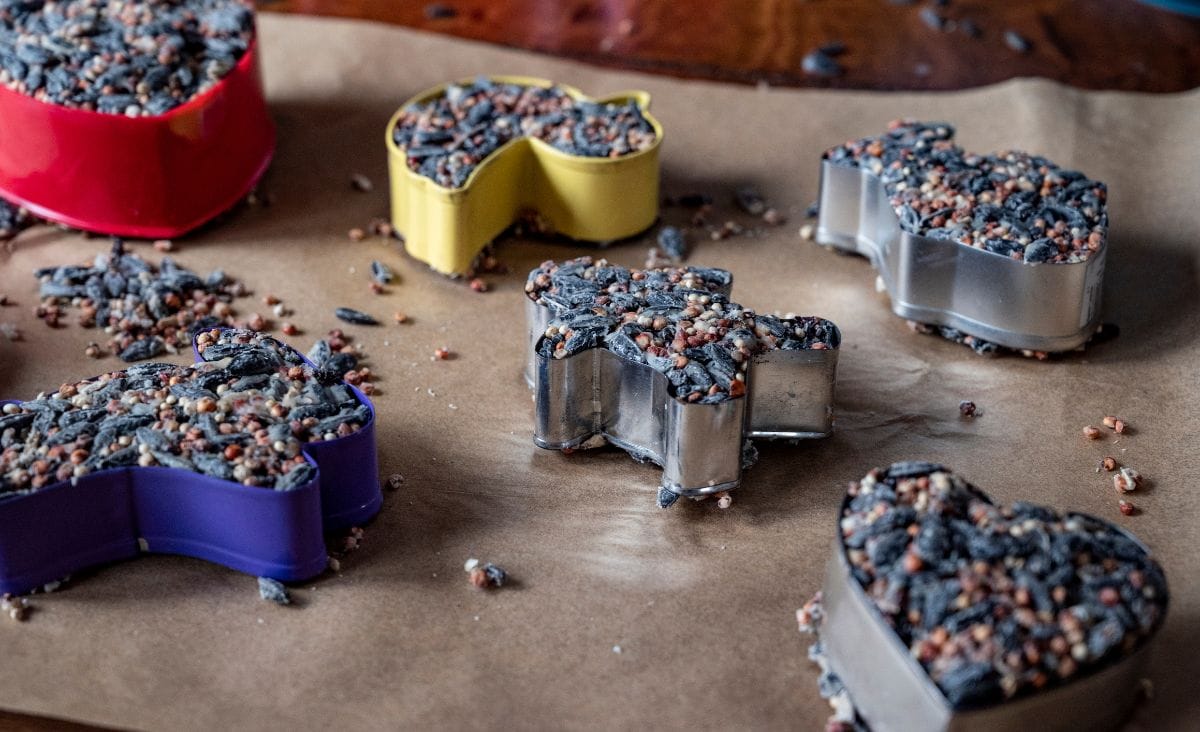
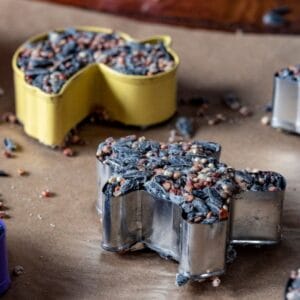
Line a baking sheet with parchment paper and set the cookie cutters on top. Coat the interior of each cutter with nonstick cooking spray. Fill up each cutter with the bird seed mixture and press it in firmly. Wearing gloves if you like, press the mixture down with the back of a spoon or your fingers to compact it as much as possible, removing any air pockets that could make the blocks crumble. Make a hanging hole in each by inserting a straw.
Do not disturb the blocks while they set; they should take at least a few hours at room temperature to harden. It may be helpful to place them in a slightly warm oven (turned off after preheating) to remove moisture and speed up the setting time if you are in a humid environment.
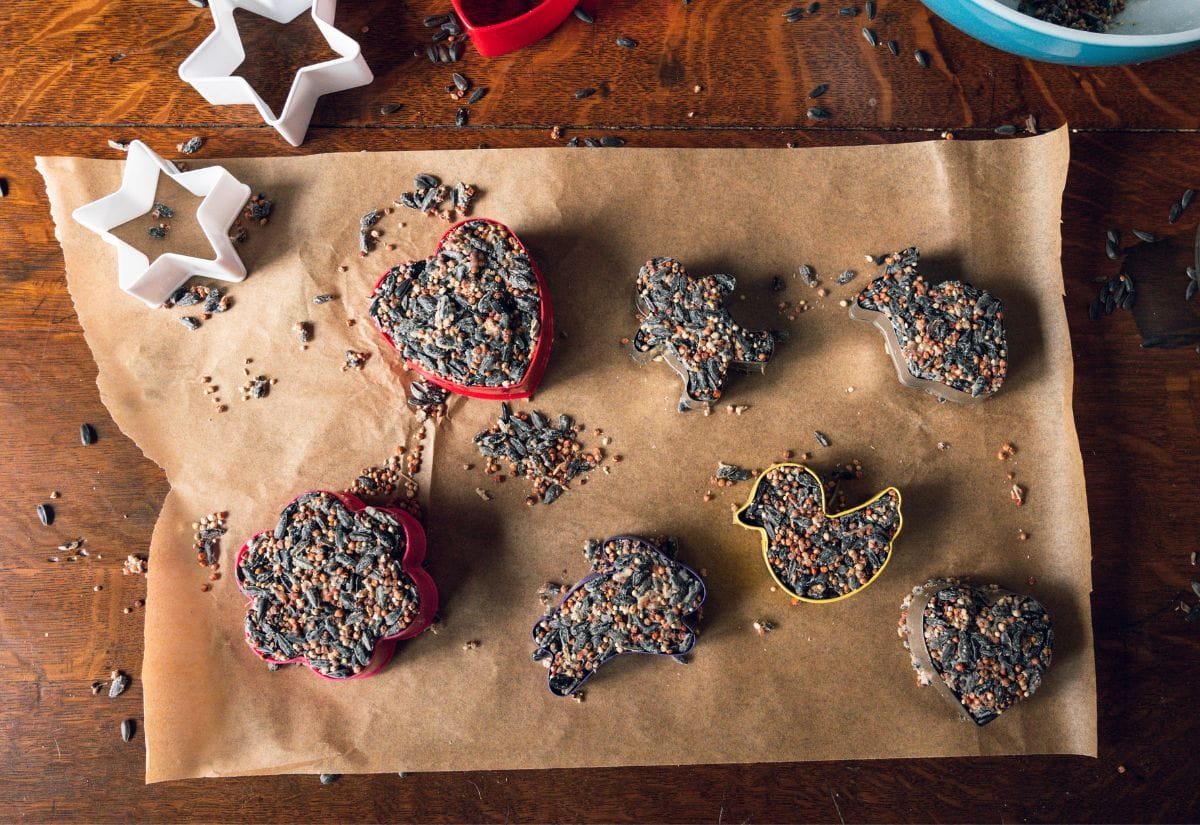
Now for the final touches. Carefully remove the blocks from the cutters once they have set. If the blocks become stuck in the cookie cutters, you can loosen them by gently running a thin knife or spatula around their edge. Pull out the straws, twisting them slightly to remove them and leave a clean hole. Use a skewer to re-pierce if the hole closes.
Customization Ideas
Chicken seed blocks are not only a great way to entertain your hens; they also allow you to cater their treats to their individual tastes and dietary requirements. Here are some ways to personalize your seed blocks to make them more attractive and nutritious:
Herb Infusions
Incorporating herbs into your seed blocks can provide health benefits beyond basic nutrition. For example:
- Antioxidant and antibacterial, oregano may help protect against infections.
- In addition to being a natural insect repellent, mint can help with digestive issues.
- Basil has anti-inflammatory qualities and is a good source of many vitamins and minerals.
Nut and Fruit Mix-Ins
For healthy feathers and more energy, try adding chopped nuts like walnuts or almonds. These nuts are a great source of healthy fats and protein. Dried fruits, like cranberries or chopped apples (be careful they are not sweetened or sulfured), are a good source of natural sugars for energy and antioxidants to ward off illness.
Mealworm or Insect Add-Ins
You can make your seed blocks even more protein-rich by mixing in some dried mealworms or other chicken-safe dried insects. When hens molt, protein aids in feather growth.
Grains and Legumes
To enhance the nutritional value of your seed blocks, consider adding cooked grains such as quinoa, barley, or rice, as well as legumes such as lentils or peas.
Seasonal Specials
Use seasonal produce or holiday-themed shapes to create seed blocks that are perfect for any season. For instance, adding pumpkin seeds in the fall can provide a rich source of vitamins and minerals, including zinc for immune health and magnesium for bone strength. Your homestead and coop can get a festive makeover with the help of cookie cutters shaped like hearts for Valentine’s Day or trees for Christmas.
Troubleshooting Common Issues
While making your chicken seed blocks, you may experience some setbacks, even if you follow the instructions to a T. Here are solutions to some common issues:
- Blocks Not Setting Properly: Too much or too little gelatin could be the problem if your seed blocks do not set or are too crumbly. Make sure the gelatin is completely dissolved in water and thoroughly combined with the dry ingredients. A small increase in gelatin amount should improve binding if the issue continues.
- Mixture Too Wet or Sticky: A mixture that’s too wet can make it hard to form the blocks and lead to longer setting times. If your mixture feels too sticky, add a bit more bird seed or flour to achieve a firmer consistency. Remember, the mixture should be moist enough to stick together but not so wet that it doesn’t hold its shape.
- Blocks Crumbling When Removed from Molds: If your seed blocks crumble when you try to remove them from the molds, they may not have set long enough. Allow more time for them to harden completely.
- Holes Closing Up During Drying: If the holes for hanging your seed blocks close up as they dry, it’s usually because the straw or stick used wasn’t left in place long enough. To fix this, simply reinsert the straw or a skewer immediately after unmolding to ensure the hole stays open as it continues to dry.
- Attracting Unwanted Pests: These seed blocks are delicious for the chickens, but they could also be a magnet for pests like rodents. Hang the blocks at a height where pests can not get to them, and do not make more than your hens will eat in a short amount of time, to avoid this problem.
Frequently Asked Questions
Check out my extensive guide to chicken-safe plants for more ideas on how to improve your flock’s diet and environment with healthy plants.
If you’ve found value in this blog post and enjoyed reading it, why not share it with your Pinterest community? Pin the image below and spread the love!
In addition to providing a nutritional supplement, the time and effort put into making these seed blocks for your hens will help them in many ways. In addition to providing a healthy snack, these seed blocks will encourage your chickens to engage in more natural foraging behaviors. In addition to strengthening your bond with your homestead and its inhabitants, the activity itself can be a relaxing and enjoyable hobby.
Have you tried making homemade treats for your chickens before? Share your experiences and tips in the comments below!
Homemade Bird Seed Blocks for Chickens
This post may contain paid links. If you make a purchase using the links in this recipe, I may earn a commission.
Equipment
- 10-12 Cookie Cutters
- 1 Mixing Bowl large
- 1 Saucepan
- Straws or Skewers cut into 10-12 pieces
- Non-Stick Cooking Spray
- Parchment Paper
Ingredients
Instructions
- In a saucepan, combine water and gelatin packets. Heat over low until the gelatin dissolves completely.1 c. Water, 2 packets Unflavored Gelatin
- In a mixing bowl, combine the bird seed, flour, and honey. Pour the gelatin mixture over the bird seed mixture and stir until well coated.2 c. Bird Seed Mix, 1/2 c. Flour, 2 tbsp. Honey
- Place cookie cutters on a parchment-lined baking sheet. Spray the inside of each cutter with non-stick cooking spray. Spoon the bird seed mixture into each cutter, pressing firmly to compact. Insert a straw piece into each to form a hole for hanging.
- Allow the blocks to set by leaving them undisturbed at room temperature for a few hours or until hardened.
- Once set, gently press the blocks out of the cutters. Remove the straws, leaving the holes intact.