Sand Bedding for Chicken Coops: Why I’ll Never Switch Back
Switching to sand bedding keeps your coop cleaner, drier, and easier to maintain. Learn which sand to use, how deep, and how to keep it fresh.
When I first started raising chickens, I never gave much thought to what went on the floor of the coop. Pine shavings? Sure. Straw? Why not. But then the mud came. The smell came. And suddenly every trip to the water station felt like balancing on a slip-n-slide.
That’s when I discovered sand. Honest truth? Switching to sand bedding in my chicken coop was one of the best decisions I’ve ever made for my birds—and for my sanity. Clean feet, no stench, and a coop that finally felt like I had my act together.
If you’ve been wondering whether sand is a good bedding choice, which type to buy, or how to keep it working year-round, here’s what I’ve figured out since switching to sand back in 2013.
Why Sand Bedding Works So Well
Here’s the kicker: sand solves problems that traditional bedding creates. Pine shavings get soggy, straw molds, and everything starts smelling like a barnyard in July. Sand, on the other hand, dries out droppings, controls odor, and actually keeps chickens’ feet clean.
It also saves on feed because pellets sit right on top instead of disappearing into a deep litter. I’ll admit, I like that it makes the coop look tidier too. A clean, dry coop just feels better to walk into.
The Big Pros (And Why I’ll Never Switch Back)
Sand keeps the coop fresh by drying droppings quickly and preventing ammonia buildup. My hens had cleaner feet, fewer scrapes and sores (bumblefoot), and just looked more comfortable walking around. They also dust bathe in it constantly, which doubles as natural mite control.
Another bonus is climate. Sand stays cooler in the heat and doesn’t trap dampness in the winter. When it does come time to swap some out, you don’t have to haul the whole load to a compost pile all at once—that’s usually too much material in one go. I just toss some into the compost here and there so it doesn’t swamp the pile, and it helps break up all that heavy, clumpy mess. I’ve also used it to fill in muddy spots in the yard, add drainage to garden beds, or improve pathways around the homestead. If you have clay soil, mixing small amounts of sand over time helps loosen it and improve aeration.
If you’re new to building a hot, balanced pile, Composting for Beginners: The Ultimate Starter Guide shows you how to layer browns and greens so small additions of sand don’t stall the process.
Choosing the Right Sand for Your Coop
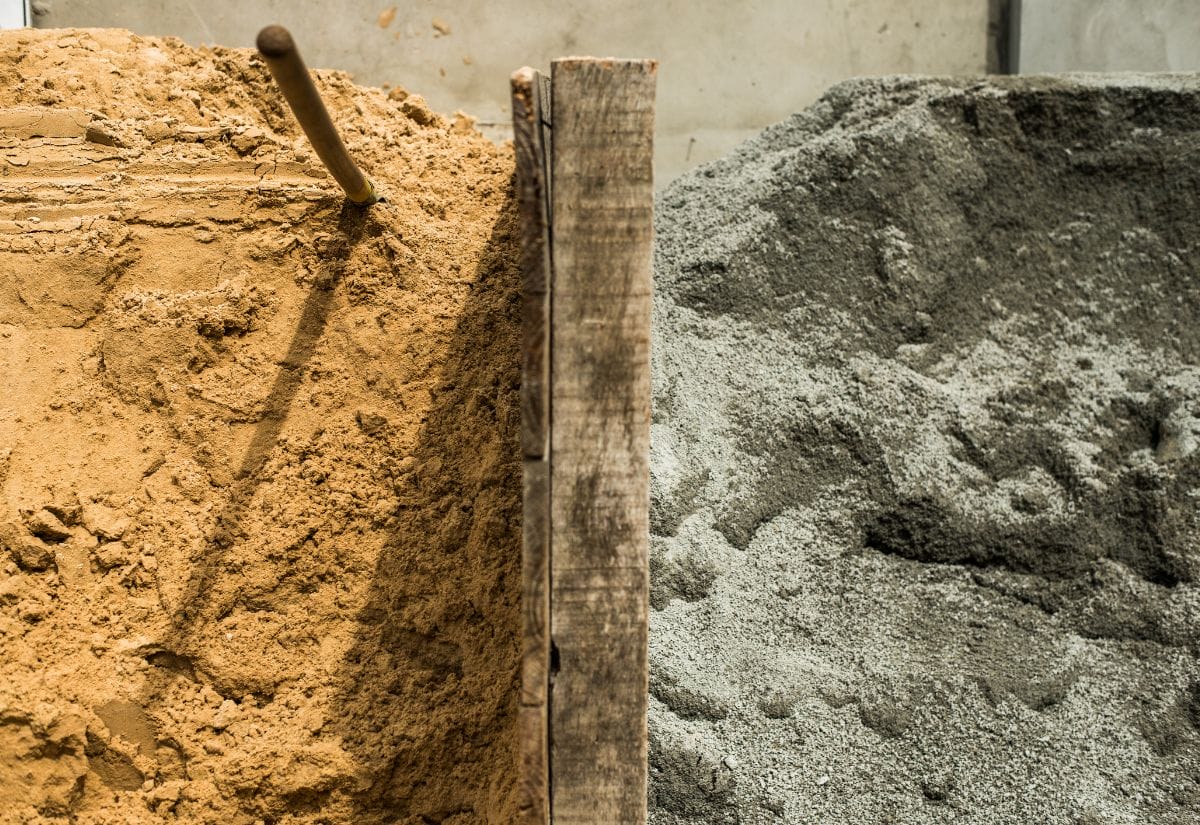
Not all sand is created equal. The kind you pick makes or breaks how well this system works.
Bank run sand is my top choice because it has a natural mix of fine and coarse particles. The pebbles keep it from compacting and help with drainage—perfect if you live somewhere wet. Construction sand is similar, affordable, and easy to find. All-purpose sand will work in a pinch, though its uniform grains tend to pack down faster.
Then there’s play sand. Don’t do it. It’s too fine, it turns to sludge when wet, and the dust can cause respiratory problems. Skip it and save yourself the frustration.
Tip: Buy sand locally if you can. Quarries, landscape suppliers, and sometimes even garden centers carry the good stuff. Delivery usually costs less than trying to haul it in your own truck. If you can’t find a local source, you might track down smaller bags of construction sand online—but honestly, if you need a full coop’s worth, buying local is almost always the better deal.
How Deep Should Sand Be?
Depth depends on your coop setup. In a raised coop with a plywood floor, three or four inches of sand is enough. On the ground or in an enclosed run, go six to eight inches so moisture drains properly. If your coop sits on soggy soil, lay down a few inches of gravel first. It makes a huge difference in preventing muck.
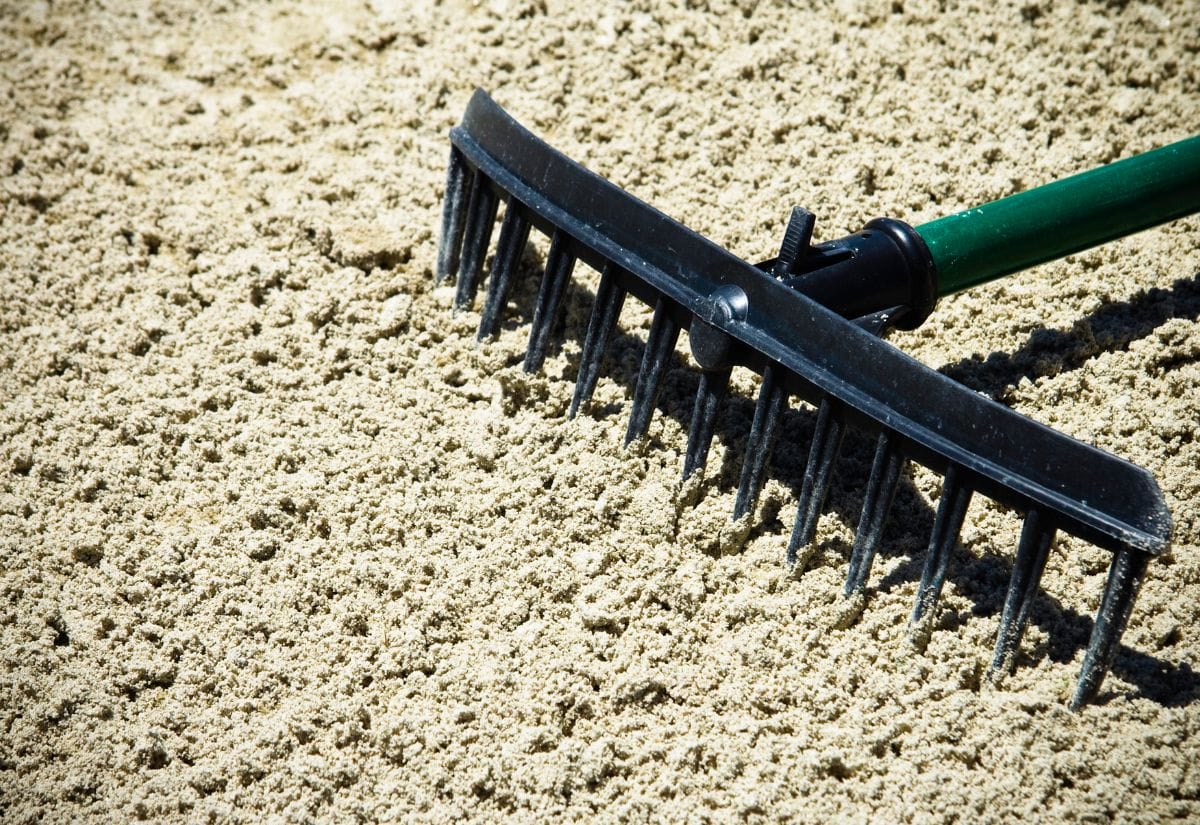
Cleaning and Maintenance
This is where sand really shines. I rigged up a stall rake with some hardware cloth, and now it works like a giant litter scoop. Cleaning takes me maybe two minutes, tops.

Seasonally, I sprinkle in wood ash during the winter or food-grade DE in the summer. Both help with pests. A couple of times a year, I freshen things up with pelletized lime or Sweet PDZ and add more sand where it’s packed down. Then, once a year, I do a full cleanout and start fresh.
If you’re setting up or tweaking your space, Roost to Run: The Elements of Perfect Chicken Coop Design walks you through smart roost placement, floor plans, and ventilation so your sand system works even better long-term.
Pro tip: Sand only works if you keep up with it. Neglect it, and it’ll smell just like any other bedding.
Troubleshooting Common Problems
If odor creeps in, it usually means the sand is too shallow or not draining. Adding depth—or refreshing under the roosts more often—solves it. In wet climates, sand can compact; raking helps, or you can lay down gravel before adding more.
Extreme weather poses its own challenges. In summer, sand can heat up in direct sun, so make sure part of the run is shaded. In winter, the surface layer may harden, but a deeper base keeps it from freezing solid.
Pests love damp bedding, so as long as you keep the sand dry, you’ll dodge most of those headaches. I keep a bag of food-grade DE on hand and a bucket of Sweet PDZ for freshening the run, but use it sparingly.
For a whole-yard strategy that keeps hens safer day and night, see Best Way to Protect Chickens from Predators in Your Backyard—it covers hardware cloth sizes, dig-proof skirts, and lighting that actually deters prowlers.
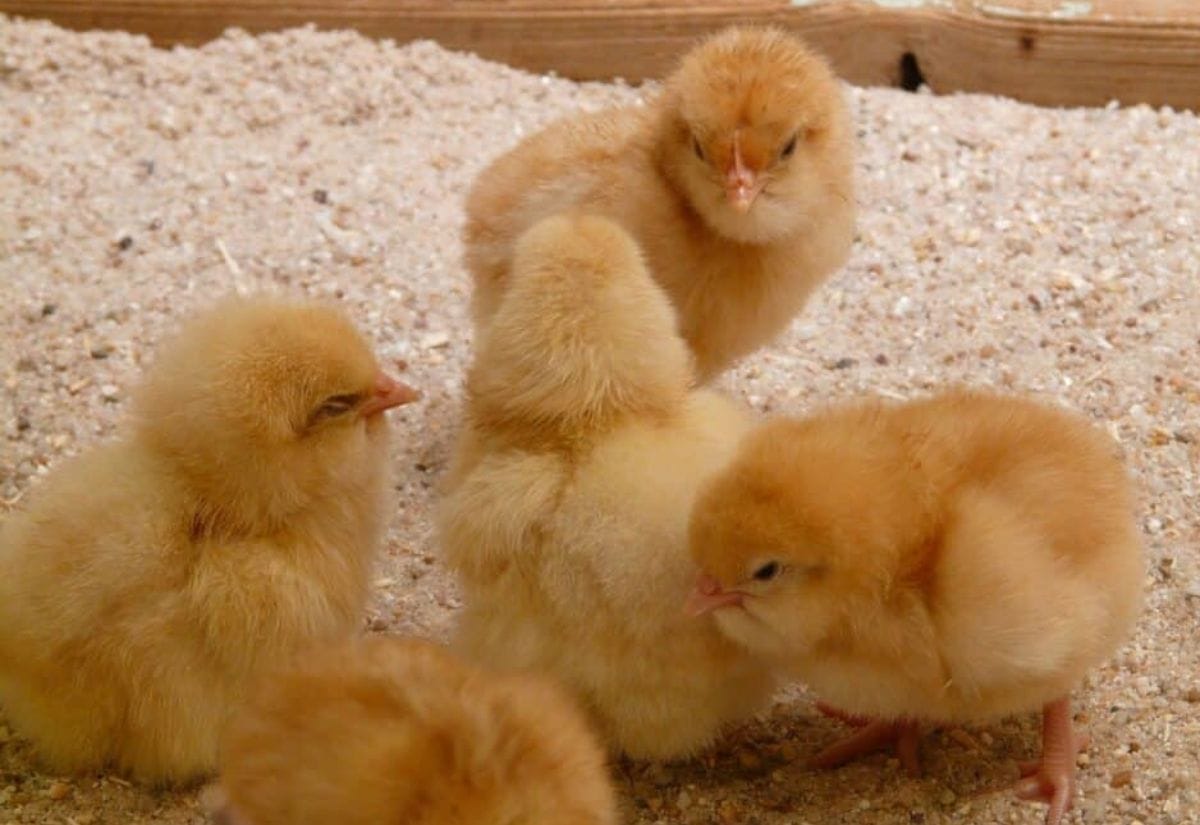
Using Sand in a Brooder
Sand works here too, though I wait a few days before exposing chicks directly. I usually cover it with paper towels for the first 2–3 days so the chicks learn what’s food and what’s not. Once they’ve got the hang of it, the towels come off and the sand helps hold heat, keeps water cleaner, and doubles as grit when I start offering little treats.
Frequently Asked Questions About Sand Bedding
People ask me the same questions about sand over and over, so let’s run through the big ones. These answers come from years of messy experiments and more than a few stinky cleanouts.
Save this guide to your chicken keeping board so you’ll have it handy when you’re ready to switch to sand bedding.

Switching to sand bedding made chicken keeping easier, cleaner, and—honestly—much less smelly for me. It cuts down on mud, keeps my birds healthier, and costs less in the long run than shavings or straw.
If you’re tired of slogging through mud and holding your nose every time you open the coop, give sand a shot. I don’t think you’ll want to go back. And if you’ve already tried it, I’d love to hear how it worked for you—share your experience in the comments or save this post to Pinterest so you can come back to it later.
We recently got chicks who have just gone into their coop (they’re now 9 wks). I’ve been using pine shavings since we got them at a few days old. Am seriously considering the sand. I called our local quarry today – the guy said to ask for Grade B sand (and it’s limestone) – I guess this is good – I have no idea.
We use contractor sand. Probably the same thing as grade b. It’s not play sand. We get ours at Lowe’s. 900 lbs is about $35.
I called a rock company and asked for River sand. Your sand should be very course with rocks. It’s heavier and doesn’t displace when walked on. Bagged sand isn’t.
I was curious how you keep the ammonia smell down in your coop with sand. I’ve been using sand in my coop which is a converted horse stall and it been hard to keep the ammonia smell down. I use catch trays under the roosts clean them daily and I’ve been turning the sand adding pdz but I’m still having no luck.
Why sand? Do the deep litter system. no smell, cost effective, healthy, beautiful compost in the end, not much work.
Use hemp it’s a great product in coop area and sand in their run area.
With sand in the pen/run, how do you shovel snow off of it in the winter without removing the sand?
Instead of shoveling make trails out of hay. The hay has bits to scratch and eat and it encourages the chickens to out walking. No shoveling involved.
You need to cover your run in the winter! Chickens should be shielded from the snow. They can get frost bite!
Awesome article! Thank you for the great suggestions! A couple of my bfs helped me rebuild a used playhouse. We converted it into the “Coop de la Poop”! It’s awesome! I already dropped some Koop Clean on the floor, although we did create a sandbox under their roosts! It never occurred to me to use it throughout!!???
So… anyway, after reading your article,I’ll remove the Koop Clean and get enough sand to cover the castle floor (10×12)!!
Aaaand… I’ll be using sand in the sweet lil nesting boxes we set up!!
So happy to read your article & subscribe!
Thank you!!
??
I live in Florida and sand is what my whole property consists of. I used sand in the coop and pine shavings in the house and boxes.
I never have any odor and clean my coop with a poop scoop. The claw kind. Pick up the leavings and the sand sifts through. I use a dust pan and brush for cleaning the shavings. Clean, happy chickens and easy for me.
Alot easier than picking up after my Great Dane.
Can you use the sifted poop in your Garden with some sand sticking to it?
I have a black gumbo and the sand is a good addition to the garden
Hi Jessica, This was a very useful article for me since my husband and I are in the process of building our house in Maine and hope to be in it in a few months. One of my first homesteading builds will be a chicken coop which is a must because I can’t eat store bought eggs anymore. Someone told my husband it could be that the feed has soy in it and I may be sensitive to it. My question is will this work where there is a lot of ledge underneath, do you think we’ll need a layer of gravel as suggested.
Great article. Just what I needed to know. I look forward to reading more of your work. Thank you.
Chicken raising is a very interesting job, I find your article very interesting.
Thanks for all of the great info! I am also a new(er) chicken owner. We had bantams years ago, but never did so much research as for this endeavor. We are having a new coop with outdoor run delivered in a couple of weeks and then the chicks will be coming shortly after. We plan on keeping the chicks inside for a few weeks while they are babies, but will move them to the coop when they are big enough. Thoughts on bedding in the coop for them while they are younger? I love the idea of the sand for easy cleanup, etc., but read what you said about them when they are young. Should I do hay or straw to start them out and then switch to the sand? I live in PA, so colder weather is coming (sadly) – so that will play a part in bedding for cold days/nights. Appreciate your info and reply!!
Thank you for the post! Can you comment on what adding the wood Ash does???
Thank you!
The wood ash helps them keep free of mites and fleas. 🙂
I was wondering, have you changed your mind on recommending using sand since this article was originally posted? I thought of using sand in the coop, but was told it can get stuck in the bird’s crop.
What do you think?
I am DEFINITELY trying sand in my coop!! Thanks
I looked at this website and her reasoning for not using sand makes no sense. She said no chickens live close to a beach so they wouldn’t come in contact with sand. I live in North Central Florida and own chickens, I can tell you the entire state of Florida is made of sand. We don’t have dirt, here only sand. We also have bugs and earthworms and everything else my chickens love to eat when they are free ranging in my yard. While I do put hay down in their coop and in their nesting boxes, there is sand under the hay. They move the hay and use the sand for their dust baths and they use it as their grit. They don’t just eat the sand to eat sand, they get some while eating bugs and when they spill their food on the ground and peck at it. I’m not for or against only using sand in a coop, but if you want to have reasons why you shouldn’t they need to be better than chickens aren’t around sand.
Thank you, I am in on the central west coast 1 mile from the beach and I like the sand idea. We have our first chickens in our trough and will put them in the coop soon. This article was a big help as was your comments from a fellow Floridian.
We have been using sand in our chickens coops and nesting areas . It is working out great. The eggs stay a lot cleaner and their run areas stay a lot cleaner.
Dont use sand because chickens arent at the beach..? That is the stupidest reason ever, how could she even say that seriously.
We live in South Texas and I have also used 3-4 inches sand over a dirt floor for many years. We take our trailer and load up at least a yard; need to add to it about 2x/year and sift it. Throw the poo out into your compost pile or turn it into your garden soil. The reason I like it is that it drains real well (coop on higher ground helps) and it doesn’t “cling” to you or the birds. When dry they can use it to dust themselves. My brother-in-law had used mortar sand to create a large camp site on the back of their property for family campfires, cookouts, etc and I learned to really appreciated how when my granddaughter would sit in it and bury her legs up to the hips in the sand (2 yo) it would just brush right off. It didn’t cling to her. Bank sand has too much clay in it. Play sand has its issues. Mortar sand works great for us.
I live in eastern Canada and I too have been using sand in the coop for over a year now. We love it! Clean up is a breeze (less than 10 minutes every few days) and no more work then the cat’s litter box. Some temperatures this winter went down to -20 and the sand did not even freeze! (we also have a raised floor off the ground) Covering around the bottom of the coop created a vacuum of warm air. That couples with the sand, I think, aided in keeping the coop warmer over winter. As we have a thermometer in the coop, it never got below 0 degrees, even at the -20 days! So both the sand and the covering worked as intended!
For the run,we decided to forgo the muddy mess (after the grass was gone) so we tried a 1-2 inch layer of pea stone instead. Love this concept also… I just go out every few days and spray down the whole area with a hose. The drainage and the run off slope of the area of the run work perfectly for this concept. As well, in the hot days of the summer, watering down the pea stones can cool the coop area more then 10 degrees! And my girls don’t mind it at all!
Myself and the girls are anxiously awaiting spring!
What is the lime for?
It counteracts the ammonia and cuts down on odor. It also helps balance the pH of the sand.
what do you use in the nesting boxes?
Construction Sand has glass in it. That’s why you cant use it in a sand box. Any ideas on this? I am going to try sand in my new coop.
We have cats (who are frankly scared of the chickens) and are worried about them treating a sand-filed coop as a litter box. Anyone have an experience either way, with this?
My cat is petrified of the chickens, so we haven’t had any problems.
Diatomaceous Earth only works as long as it doesn’t get wet. I’ve also heard it should not be used in the bedding because it can be inhaled by the chickens and cause respiratory problems.
That statement regarding DE is inaccurate. Diane the Earth is used in swimming pool filters as it filters smaller debris than sand. I’ve used DE for 10+ years in my pool filter as an additive and it works great. Needless to say, it’s always wet!
She is not incorrect. The DE in this case is not being used as a filter and as such is rendered useless with humidity rain ect over the course of a few days to weeks. If it WAS being used to filter you would be correct but because its not your point is invalid.
arent you supposed to use the food grade not pool kind
I just entered into backyard chicken project over the summer. We set up our coop in a grassy, half-shaded corner of the yard and surrounded it with a tall chicken wire fence and a netting top over the entire pen. Didn’t take long for the grass to disappear and we started covering the ground area with mulch and/or hay but the chickens were constantly moving it all off to the side. We now have sand running along one side of the pen and straw/hay on the other side. We also put sand on top of the coop since the girls like to fly & perch on the roof which absorbs their droppings and makes clean up a breeze with a small rake. I never have any problems with bugs or odor. We keep sand inside the coop as well which drys up their poop and again, easy to clean out and no odor.
I won’t find dry sand at this fine of the year, would you still go buy a truck load?
I’d wait until you can get it delivered dry. It just makes life easier to get it dry versus having to dry it before use.
I have been putting sand in my chicken runs for the last 10 years have never had any problems use a litter box cleaner for cleaning
What kind of sand do you use?
Hi Jessica
I have 10 chickens. I have been using sand in coop since spring. Have a bug problem now and may need to change or wash sand. How does debris from sand get washed away and sand remain?? coop is 10 x 12( way to big) Sand is delivered wet, now that we are first week of November not sure it would dry. In northern Indiana, temps now about 60… not too sunny ….would you recommend washing buggy sand?
maybe if i spread sand thin on tarps??? Don’t want to switch to shaving now…….
Thank you!
Janet, what kind of bugs are you dealing with? It may be easier to treat the sand than it is to wash it. Diatomaceous Earth will work on most bugs, but if that’s not strong enough they have Garden & Poultry Dust. I don’t love the garden and poultry stuff because it’s not 100% natural (it’s a chemically enhanced natural product), but it is effective.
I just purchased new bedding, but may try this as an alternative here in northern Wisconsin. Luckily, I have a gravel pit about 1/4 mile down the road I have free access to, which has a very large sand deposit.
what do you mean by
In the coop you can get away with 3-4″ so long as it’s not placed right on the ground
where am i meant to place it then in the air lol
LOL, I can understand why that might be confusing. Some coops are placed directly right on the ground (often with a dirt floor). I was referring to coops that are raised off the ground. For example, my coop has 6″ blocks under it and has a wooden floor.
Jessica, thanks for this super helpful blog. Forgive my ignorance, but is the floor of the coop itself wooden – in which case is it treated and does the sand sit directly on top – or do the blocks sit underneath it? We are looking to create a coop-and-run and trying to work out if a concrete base with sand and perhaps with gravel. What I can’t understnd is where the drainage goes when at the bottom of the sand/gravel/wooden floor – do outlets need to be created? Thanks. 🙂
I would love to use sand, but in my local area it would cost $500 (I checked) to put 3″ of sand in our 10’x16′ run ?
I am a new chicken owner of 10 hens and a bantam rooster. I chose to try sand after reading your posts and others. I love it!!! Low odors in coop and in the run. No fly problem since the sand dries the poo fast and clean ups are easy and quick. I did put down gravel first to help drainage in the run. Thanks for all your information and sharing.
You are so welcome! Glad to hear it’s working for you.
I have a green house 10×10. I have been thinking about turning it into a chicken coop. I only want three or four hens. My question is it has a floor made of lava rock would that be okay. This will be my first attempt at this and very excited to get started. Thanks for any advice
I don’t know enough about the consistency of lava rock to say one way or another. Does it drain well? Is it dusty?
I put sand in our coop about a month ago (after reading this article and others). I love it! I also added a droppings board, so very little poo gets onto the floor since my chickies spend all day free-ranging. I haven’t had any problems so far and am enjoying a less smelly coop and the money savings of not having to buy bedding!
What do you do with the sand, compost or garbage? Do you have to clean all the sand out once or twice a year or just add more sand to it? Is landscape/paver sand acceptable? We have a company that sells sand but when I asked for construction or river sand they weren’t sure what I needed (and neither do I, lol). Also, do you add DE to the sand? Should it be mixed in or sprinkled on top? How do you know how much to use? Thanks in advance! All advice is Welcome!!
I also tried to find construction sand and no one knew what I was talking about. ?
If you call a local sand & gravel pit they should know exactly what you need. They supply all sorts of construction sites and would be able to fill your truck or deliver to your site.