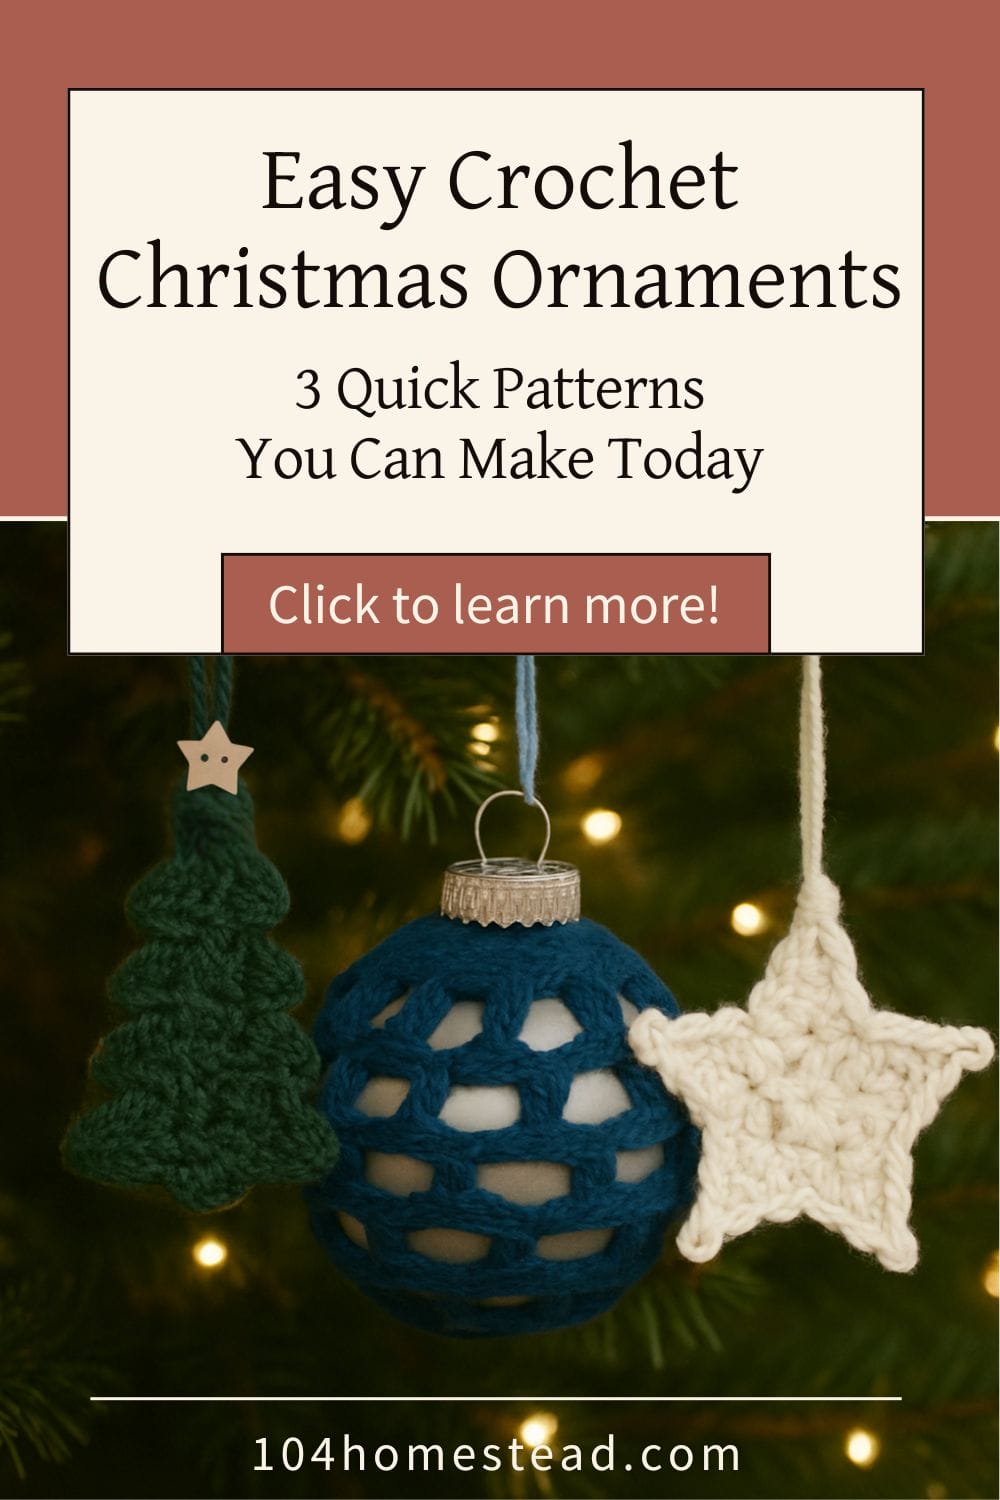
3 Simple Crochet Christmas Ornaments for Handmade Holidays
Make three easy crochet Christmas ornaments using scrap yarn. These quick patterns work for any tree and there’s a free printable PDF to follow along.
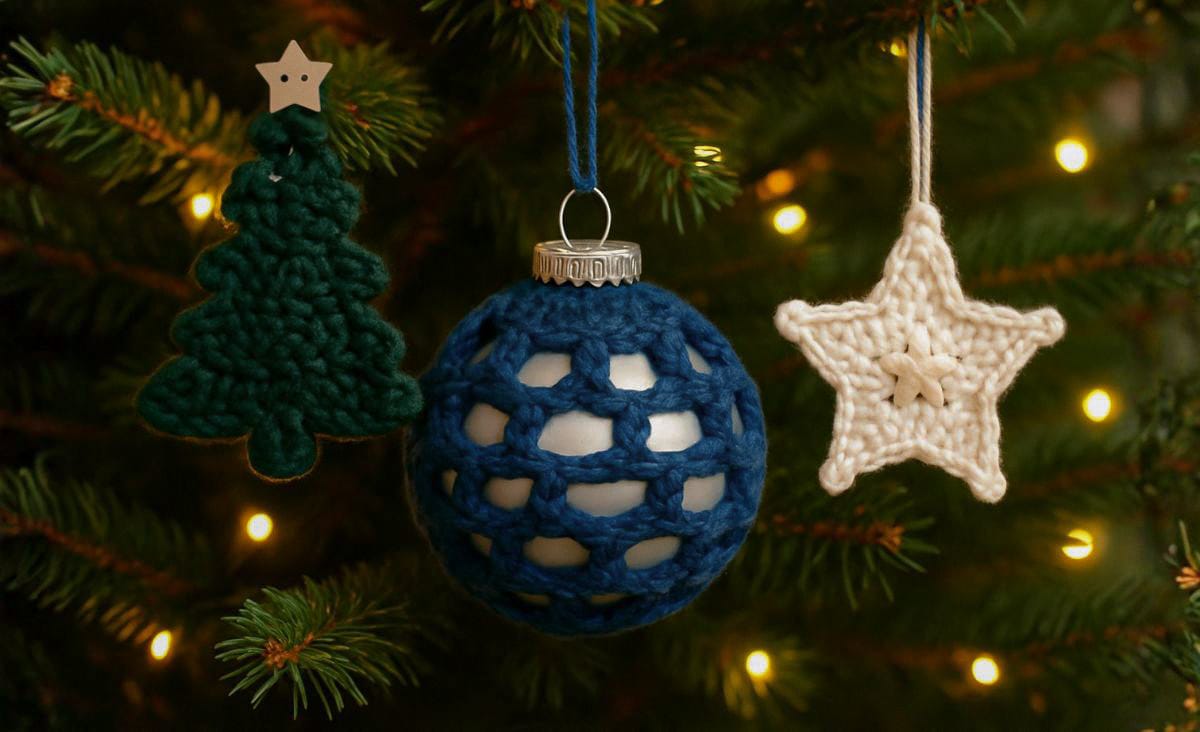
Christmas has always been my season. Give me a quiet corner, something warm to drink, and a simple project, and I’m perfectly content. A few winters ago, I ended up with a box of scratched silver ornaments that were heading for the trash. I figured I could give them a second chance with some leftover yarn, so I put together a quick crochet cover. I made one, and suddenly I was ten ornaments in. That turned into a whole weekend of crocheting ornaments.
If you want an easy Christmas project to keep your hands busy, these three ornaments are a good place to start. They use worsted-weight yarn, work up fast, and work with whatever style your tree has going on. You’ll see a couple other ideas sprinkled in, in case you want more ways to decorate on the cheap this year.
Materials You’ll Need
You won’t need much for these patterns. Most of the time I’m pulling scraps from the bottom of my basket.
• Medium weight (#4) worsted yarn (any colors you like)
• H/5.0 mm hook (for the ornament cover)
• G/4.25 mm hook (for the tree and star)
• Scissors
• Yarn needle
• Standard-size Christmas ball ornament (for the cover)
• Small star button + jute twine (for the looped tree)
If you’re watching the holiday budget, you’ll probably like 10 Easy DIY Christmas Decorations on a Budget too.
Download These 3 Ornament Patterns (Free Printable PDF)
If you’d rather print patterns than keep unlocking your phone, I put them all together in one PDF so you can print it and go.
Now let’s get crocheting.
Pattern 1: Crochet Ornament Cover
This is the pattern that saved that whole box of scratched ornaments.
Materials
Medium weight (#4) worsted yarn
H/5.0 mm crochet hook
Standard-size Christmas ball ornament
Scissors
Yarn needle
Abbreviations (U.S. Terms)
ch – chain
sl st – slip stitch
dc – double crochet
sc – single crochet
Instructions
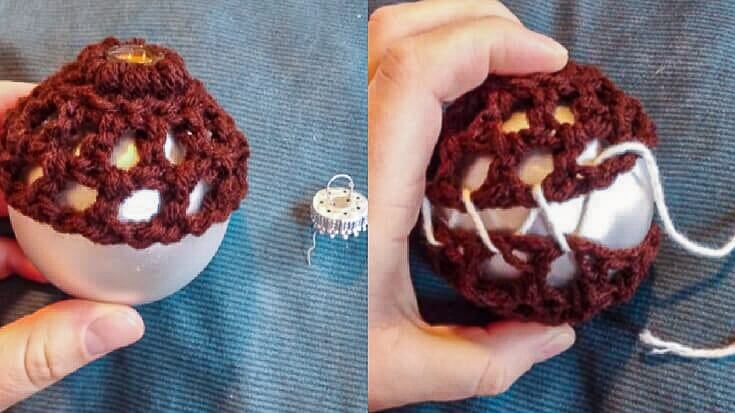
Make two identical circles. You’ll stitch them together around the ornament at the end.
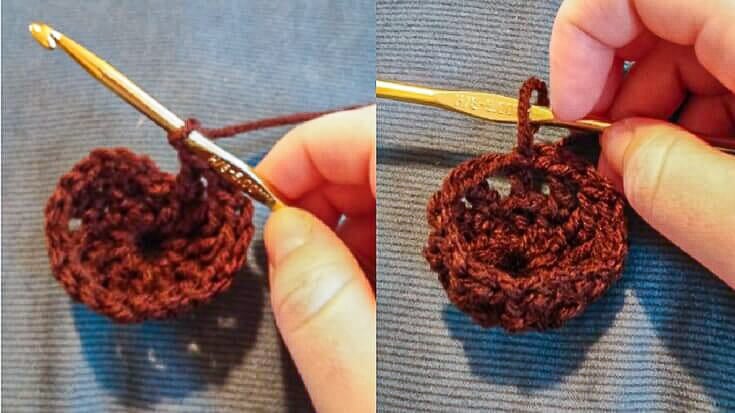
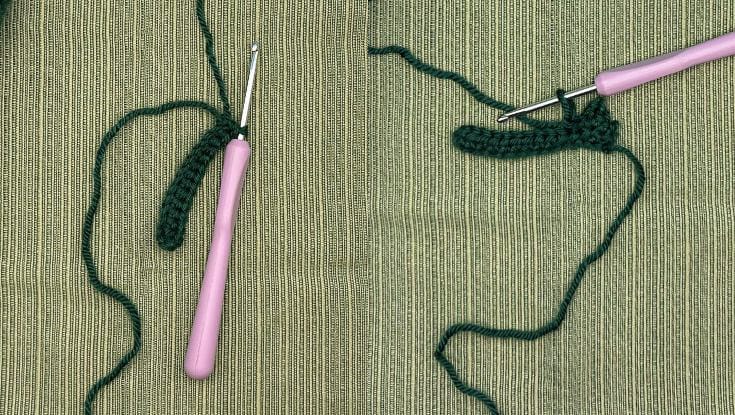
Foundation: Ch 5. Sl st into the first ch to form a ring.
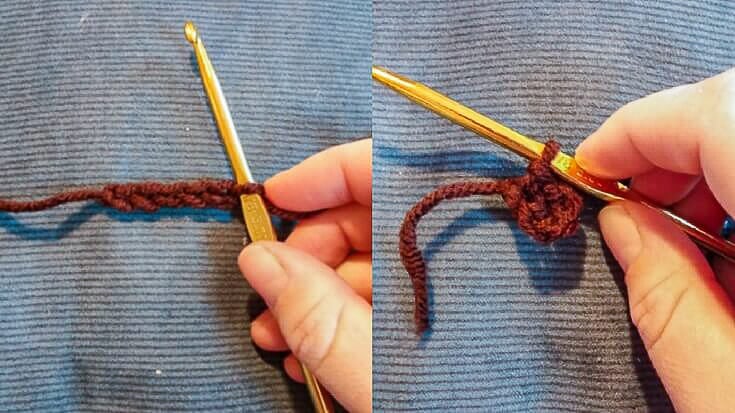
Round 1: Ch 2 (counts as first dc). Work 9 dc into the ring. (10 sts total including ch-2). Sl st to the top of the ch-2.
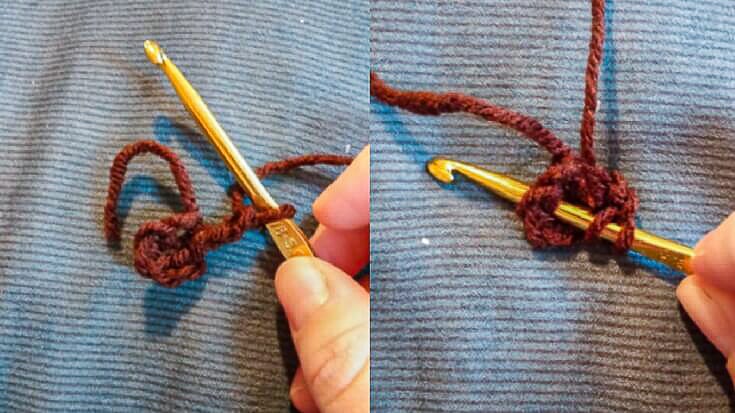
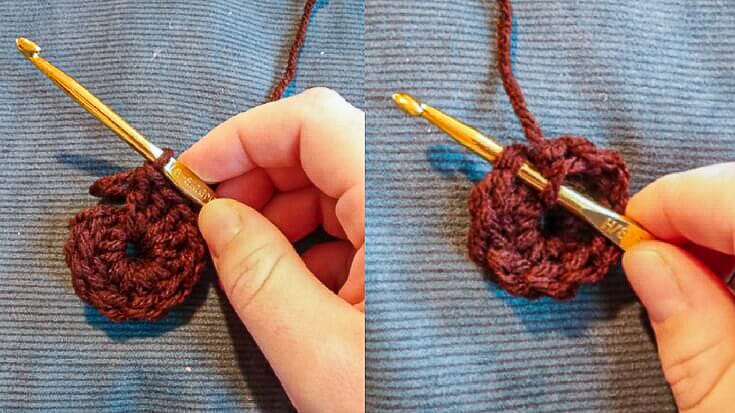
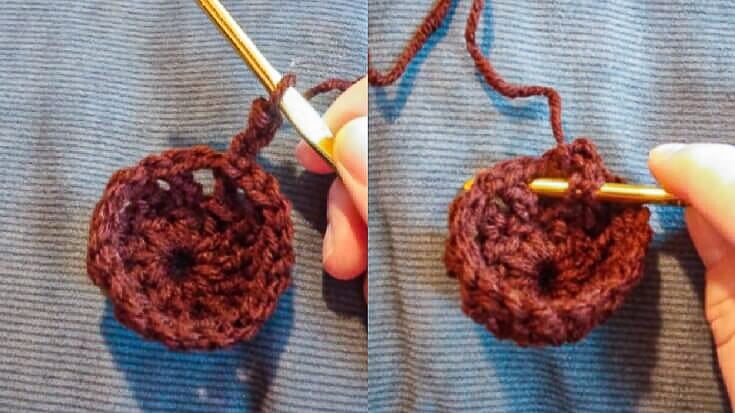
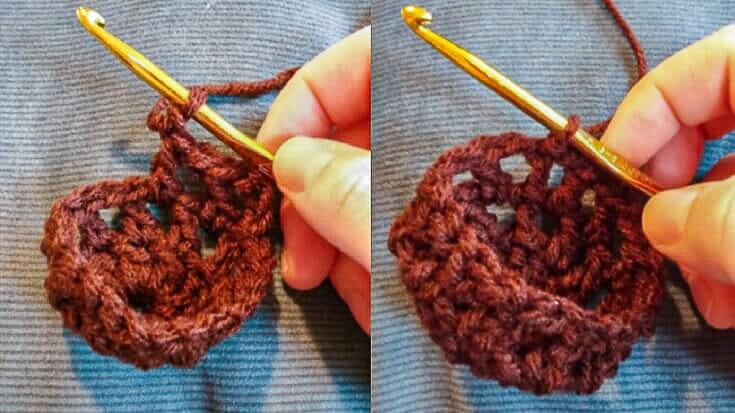
Round 2: Ch 3 (counts as dc + ch-1). Dc in next st, ch 1. Repeat (dc, ch 1) around. (10 dc, 10 ch-1 spaces). Sl st to the 2nd chain of the starting ch-3.
Round 3: Ch 3. Dc in each ch-1 space, ch 1 between dcs. Continue around. Sl st to the 2nd chain of starting ch-3. Fasten off.
Assembly
Remove the ornament cap. Stretch one crochet circle around the opening. Place the second circle on the opposite side and whipstitch the edges together. Tie your ends securely and tuck them out of sight.
If you’re team ‘real tree’ like me, don’t miss How to Keep a Real Christmas Tree Fresh. I go over exactly what works (and what’s just holiday folklore).
Pattern 2: Looped Christmas Tree Ornament
This one always turns out really cute, especially in a couple different shades of green.
Materials
Medium weight (#4) yarn
G/4.25 mm hook
Small star button (optional)
14″ jute twine
Yarn needle and scissors
Abbreviations (U.S. Terms)
ch – chain
sl st – slip stitch
sc – single crochet
hdc – half double crochet
st(s) – stitch(es)
sk – skip
Instructions
Foundation: Ch 15.
Row 1: Hdc in 2nd ch from hook and in each ch across. (14 sts)
Row 2 (Right Side):
Ch 1 (does not count as a stitch). Turn.
Sc in first 2 sts.
Ch 4, sl st in same st, sc in next 2 sts.
Ch 6, sl st in same st, sc in next 2 sts.
Ch 8, sl st in same st, sc in next 2 sts.
Ch 10, sl st in same st, sc in next 2 sts.
Ch 12, sl st in same st, sc in next 2 sts.
Ch 14, sl st in same st.
Sc in next st.
Place 3 sc in last st and rotate to work along the left side.
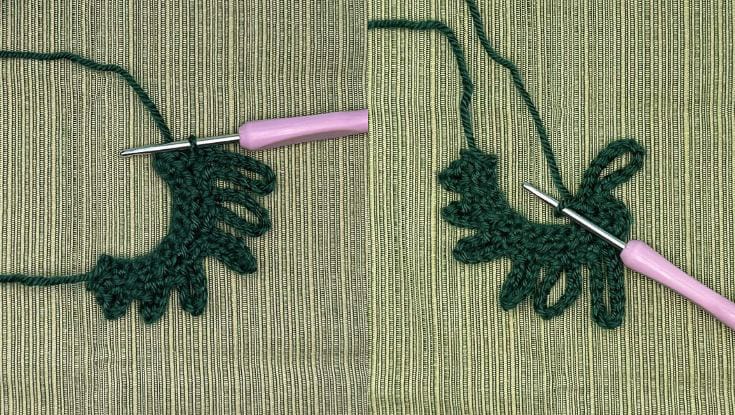
Row 3 (Left Side):
Sc in next 2 chains.
Ch 14, sl st in same st, sc in next 2 sts.
Ch 12, sl st in same st, sc in next 2 sts.
Ch 10, sl st in same st, sc in next 2 sts.
Ch 8, sl st in same st, sc in next 2 sts.
Ch 6, sl st in same st, sc in next 2 sts.
Ch 4, sl st in same ch.
Sc in last ch.
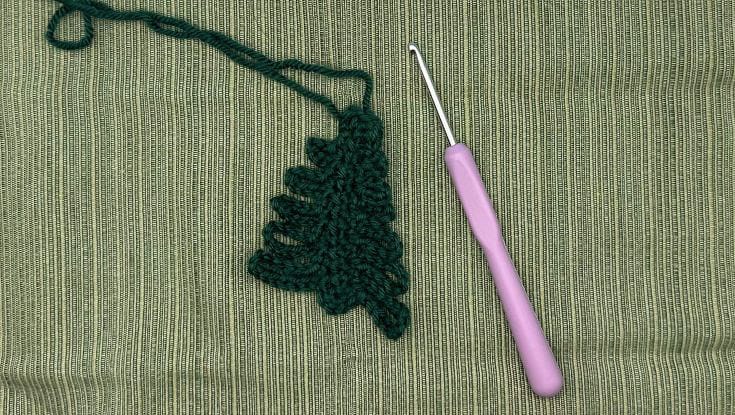
Sl st into starting ch-1. Fasten off and weave in ends.
Finishing
Thread the jute through the star button and the top of the tree. Tie a knot above the tree and another at the top to create the hanger.
If projects like this get you thinking about reusing older holiday items, you’ll probably like 13 Creative Ways to Upcycle Holiday Cards.
Pattern 3: Simple Five-Point Star
This little star looks good no matter what color yarn you grab. If you make several, you can turn them into a garland for the mantle.
Materials
Medium weight (#4) yarn
G/4.25 mm hook
Scissors & yarn needle
Abbreviations (U.S. Terms)
st – stitch
sl st – slip stitch
ch – chain
sc – single crochet
hdc – half double crochet
dc – double crochet
tr – treble crochet
ch4-picot – ch 4, insert hook into base st, yo, pull through all loops
Instructions
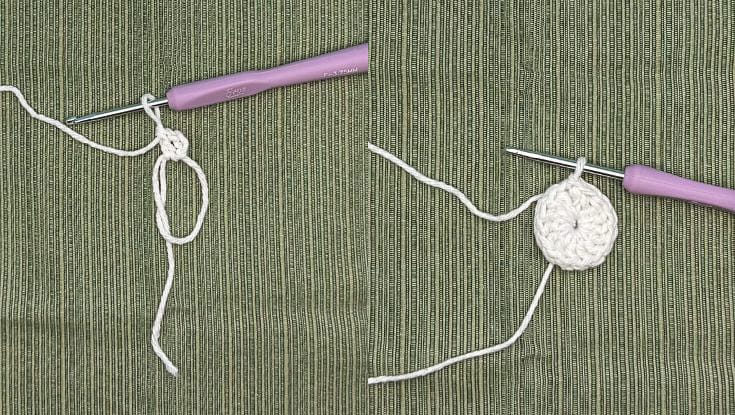
Start with a magic ring or ch 5 and join with a sl st to form a ring.
Round 1: Ch 3 (counts as dc). Work 14 dc into the ring. (15 dc total). Sl st to top of ch-3.
Round 2: Ch1. *[Sc, hdc] into same st. [Dc, tr, ch4-picot, tr, dc] into next st. [Hdc, 1sc) into next st.* Repeat from * to * until you’ve completed five points. Sl st to first sc and fasten off.
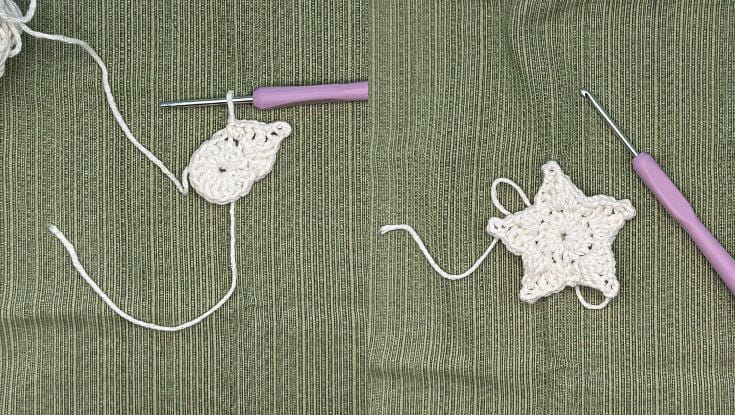
Add a hanger and you’re done.
Finishing Tips & Little Adjustments
The nice thing about these ornaments is they’re hard to mess up, but here are a few quick fixes if something doesn’t look quite right.
- If your ornament cover feels too tight, use a larger hook or add a round before stitching the circles together.
- If your star curls, just give it a quick steam and shape it with your fingers.
- If your tree twists, loosen your tension a bit or gently pull each loop into place.
And if you’re anything like me and working through a pile of older ornaments or decorations, you might appreciate the roundups in 10 Easy DIY Christmas Decorations on a Budget.
Questions You Might Have About These Crochet Ornaments
If you hit a ‘wait, what?’ moment or just want a bit of reassurance, these should answer what most people wonder about.
Pin this to keep the patterns handy for your next crocheting session.
Crocheting ornaments has become one of my favorite December habits. They’re quick, they use up whatever yarn I’ve got lying around, and they beat anything you can buy at the store. Whether they end up on your tree or someone else’s, I hope you enjoy making them as much as I do.
If you make one, all three, or your own variation, tell me about it in the comments. I always love seeing what people make and the colors they choose.
Just fell upon you and your blog this morning in pinterest. Love every article you have posted and look forward to what comes ahead.