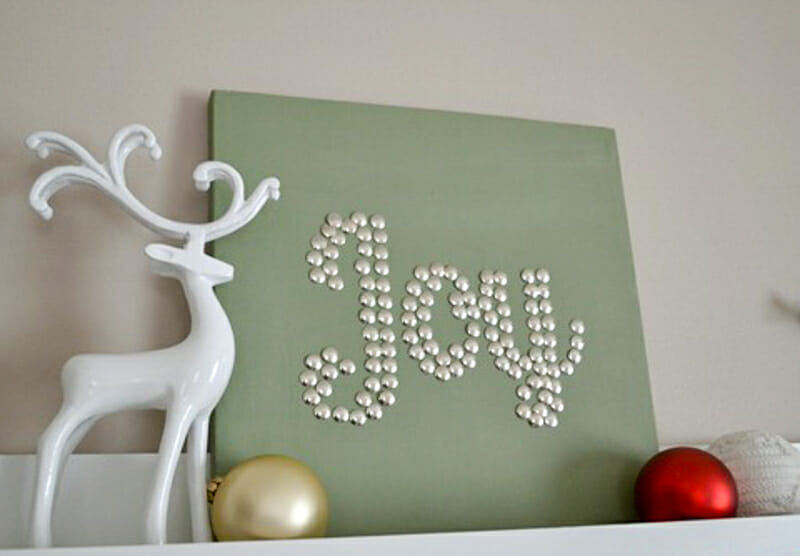
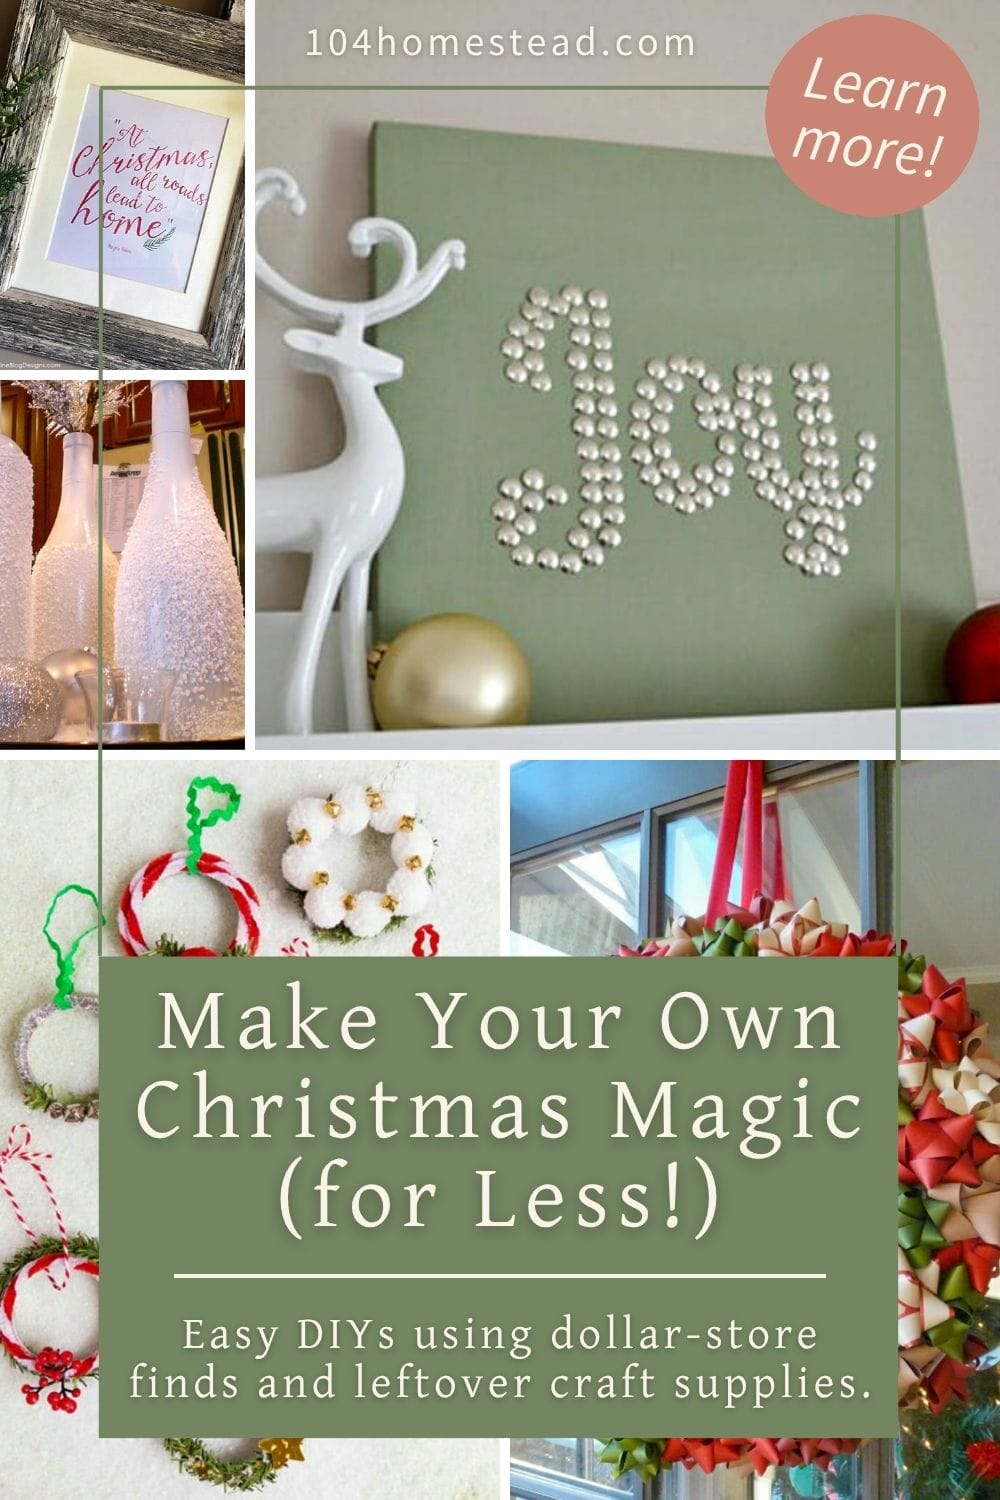
DIY Christmas Decorations on a Budget Using What You Have
These 10 DIY Christmas decorations are cheap, easy, and charming enough to reuse year after year. Perfect for a handmade, budget-friendly holiday.
It’s amazing how quickly December drains your wallet. Between gifts, food, and wrapping paper, decorations often feel like the one thing you could skip, until you see those price tags and think, “I could totally make that myself.” And honestly, you’re right.
I’ve spent a lot of Christmas seasons turning scraps and dollar-store finds into cheerful holiday decor. Some of it’s still holding up, which is saying something. These ten DIY Christmas decorations are simple, budget-friendly, and nice enough to keep year after year. Whether you want to decorate the mantel, the porch, or the tree, these ideas will help you do it without spending a fortune.
If you love projects like this, check out Christmas Decorating on a Budget: Santa-Approved Holiday Crafts for even more frugal inspiration.
Easy (and Affordable) DIY Christmas Decorations
I’ve tried a lot of holiday crafts over the years. Some turned out gorgeous, others… not so much. These are the ones I actually still use around my house year after year. They’re simple, beginner-friendly, and great for using up odds and ends you’ve probably got lying around.
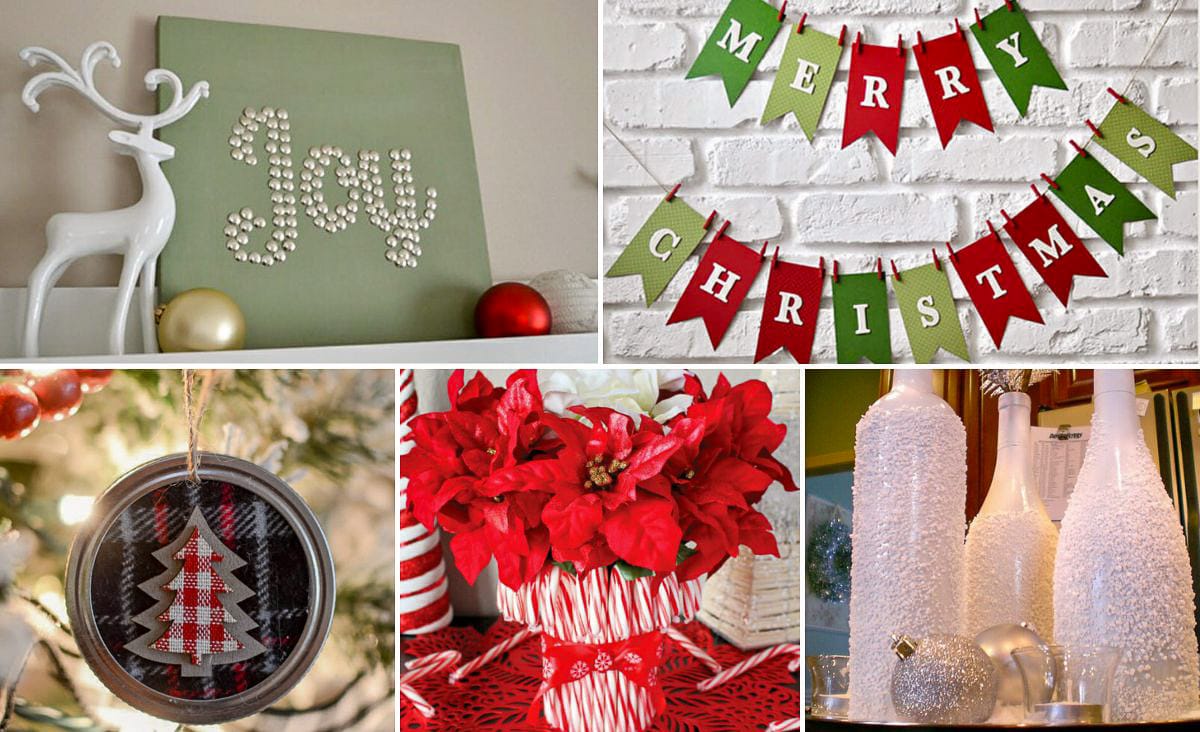
Thumbtack “Joy” Canvas
If you’ve got a spare canvas lying around (or find one on sale), this one’s about as simple as it gets. All you need is a handful of thumbtacks and a little paint. Trace your letters or design with a pencil, then fill them in with thumbtacks for a metallic pop. It’s one of those quick, why-didn’t-I-do-this-sooner projects.
I’ve done this one with gold on white and silver on red. Both turned out stunning. Just make sure to use thin coats of paint so the canvas texture still shows through.
Instructions and Photo via At Home With H
Estimated Cost $3–6
- Canvas: $1–3 (on sale or dollar store)
- Box of thumbtacks: $1
- Paint (small bottle or leftover): $1–2
Buying multi-packs of canvas or tacks drops the price per piece even further.
Snowy Wine Bottle Centerpiece
Empty wine bottles, Epsom salt, and spray adhesive are all it takes to make a frosty little centerpiece that sparkles like snow. I’ve used this trick for years. Epsom salt gives that expensive frosted look, even though it costs next to nothing.
If you want to step it up, add small candles or LED fairy lights to create a cozy glow on the table or windowsill.
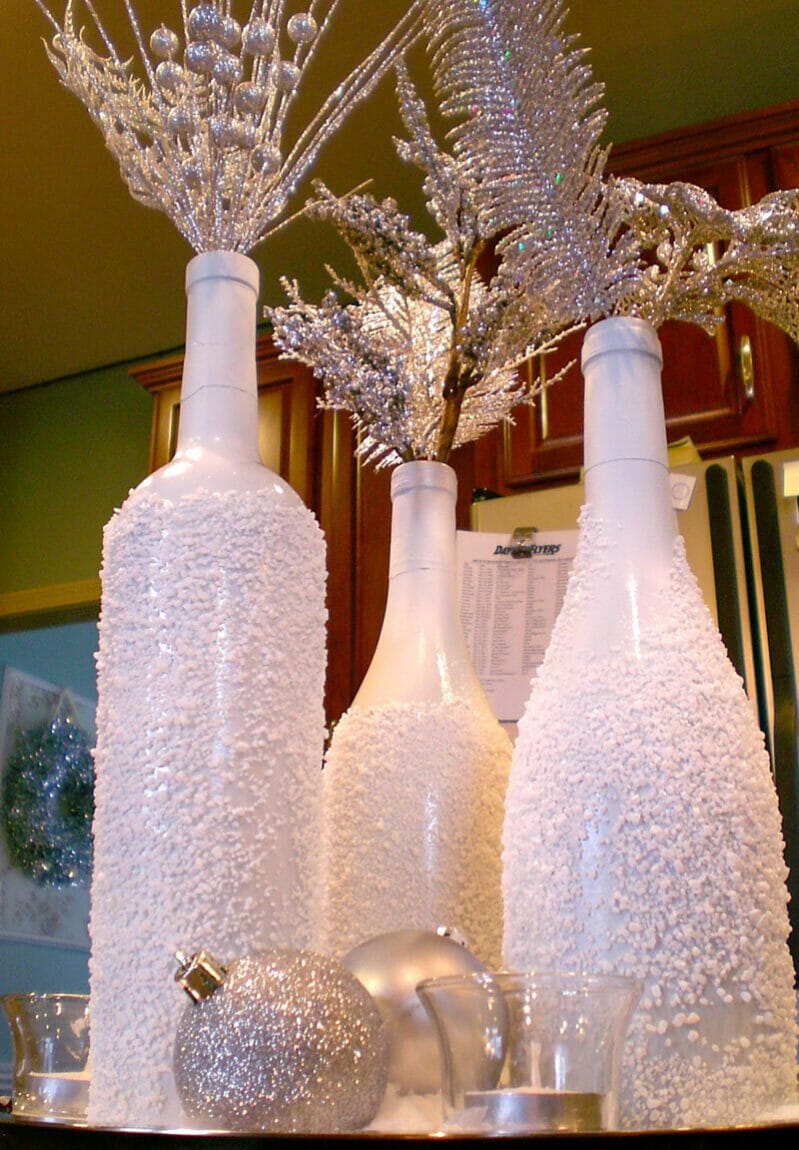
Instructions and Photo via Cleverly Inspired
Estimated Cost $2–4 per bottle
- Empty wine bottles: free (reuse)
- Spray adhesive: $2–3 (enough for several)
- Epsom salt: $1
Optional: Add $1–2 if including LED candles or fairy lights.
If you’re decorating outdoors, check out my Budget-Friendly Outdoor Homestead Christmas Decor post for ideas that can handle the weather.
Mason Jar Lid Ornaments
Got extra mason jar lids hanging around? They make surprisingly cute ornaments. These come together fast with a little cardstock, ribbon, and whatever bits of craft stash you’ve got. The best part? You can make them fit any style—rustic, farmhouse, or even a little sparkly if that’s your thing. My kids love making these too, especially when they can pick the paper or glitter colors.
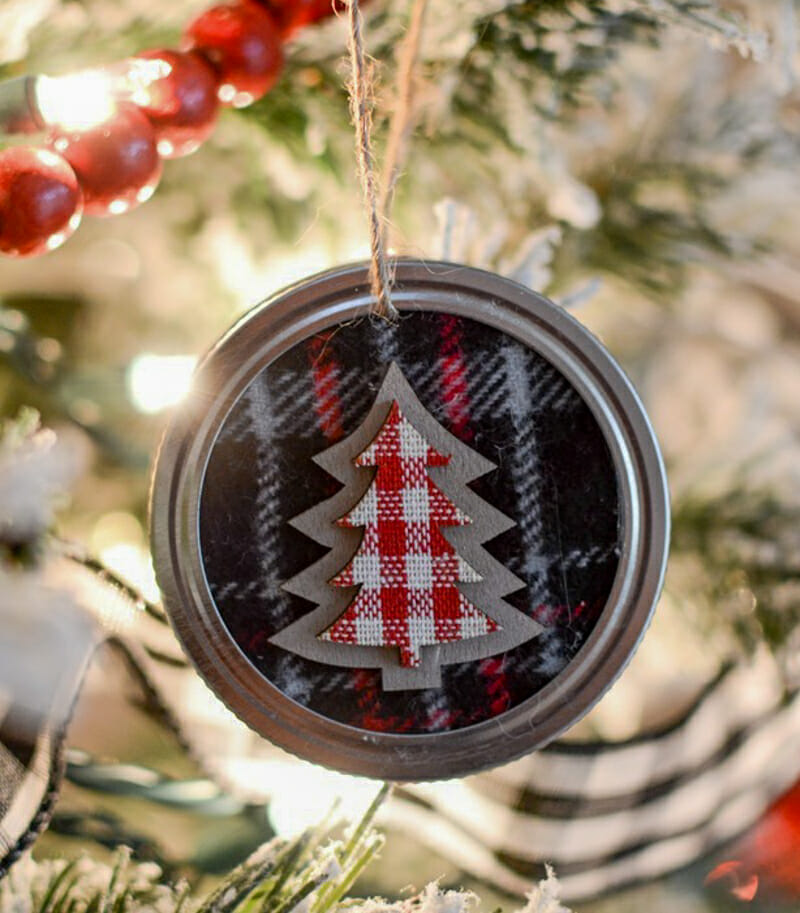
Instructions and Photo via The Frugal Homemaker
Estimated Cost $5 for a batch of 6–8 ornaments
- Hot glue or tape: likely on hand
- Jar lids (already on hand or $3 for a 12-pack)
- Scrapbook paper or cardstock: $1
- Ribbon/twine: $1
Another sweet variation is a mini wreath ornament using greenery, pom poms, or berries.
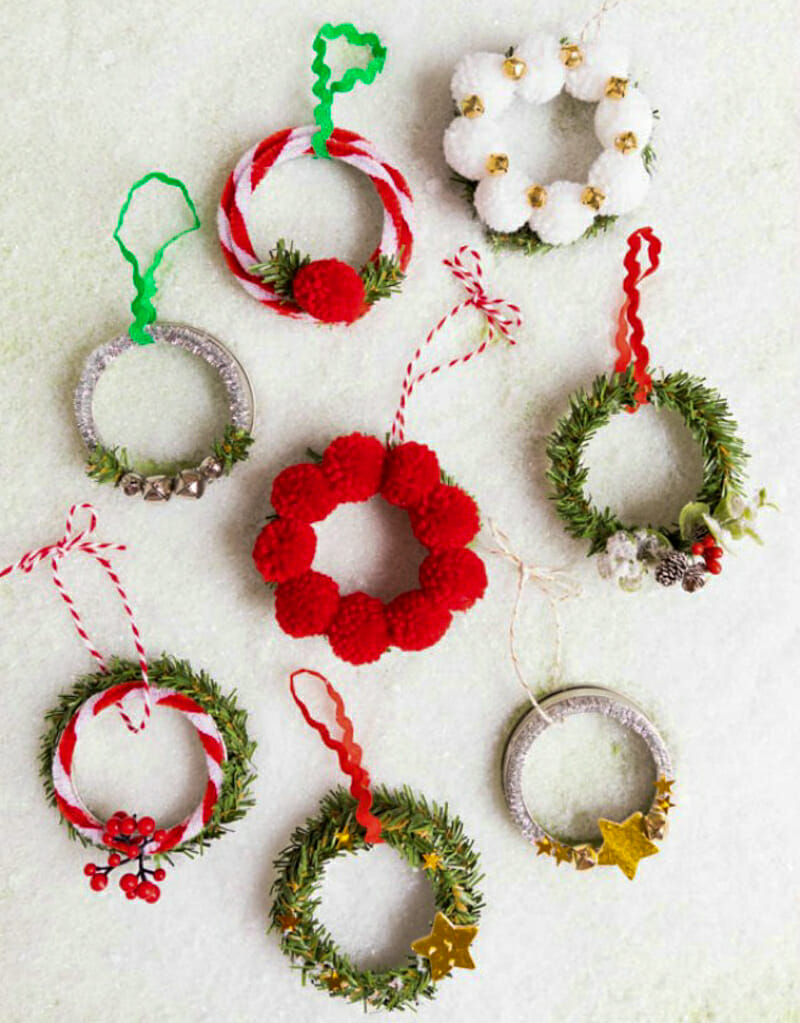
Instructions and Photo via Design Improvised
Mini wreath ornaments may add $1–2 for greenery or pom poms.
If you crochet, don’t miss my Easy DIY Crochet Christmas Ornaments. They pair beautifully with these rustic lid crafts.
Candy Cane Vase
Candy canes aren’t just for eating. Hot glue them around a small vase, tie it off with ribbon, and you’ve got a cheerful little vase that instantly feels like Christmas wherever you put it. I like to use mine to hold fresh greenery or paperwhites, but it also makes a thoughtful hostess gift. Wrap the base in wax paper before gluing to make cleanup easier later.

Instructions and Photo via Living Well, Spending Less
Estimated Cost $3–5
- Candy canes: $1
- Small vase or jar: $1–2
- Ribbon: $1
Optional: Add $2–3 for fresh flowers or greenery.
Bow Wreath
If you’re short on time and supplies, this one makes a big impact for how little effort it takes. Just grab a foam wreath form and a bag (or two) of bows from the dollar store. Hot glue them around the form until it’s covered. I made one in traditional red and green, but I’ve seen beautiful versions in silver and blue too. Keep it under cover, though. Rain and bows don’t mix well.
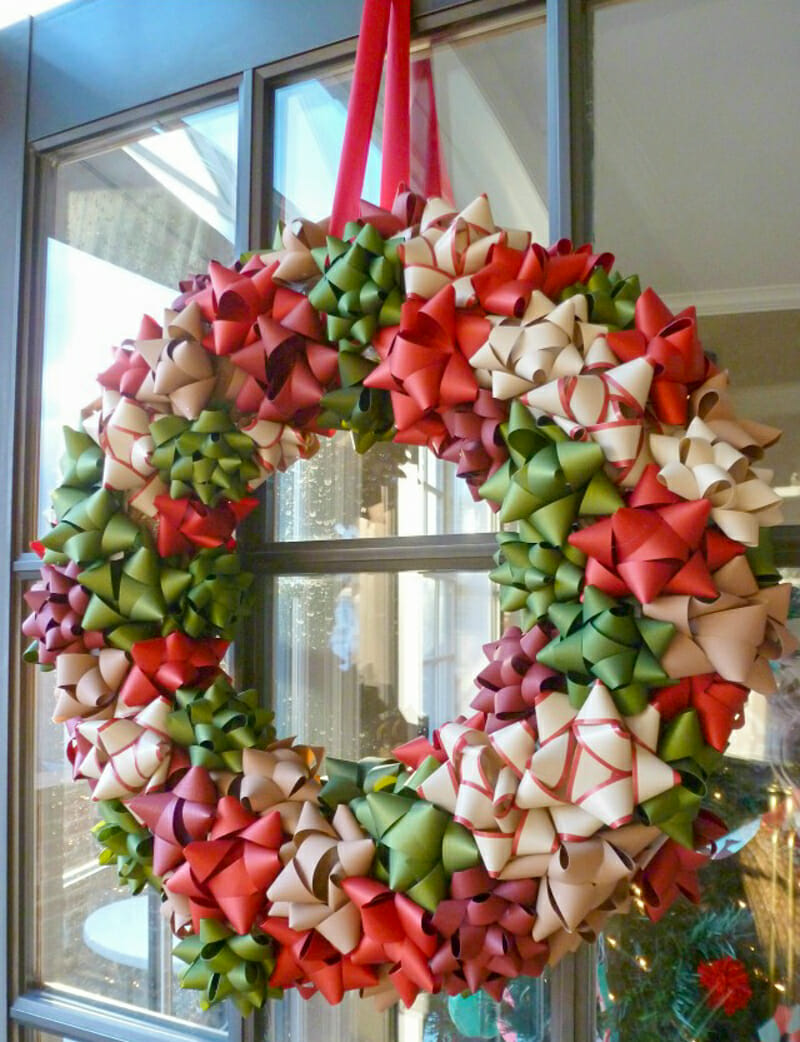
Instructions and Photo via Design Improvised
Estimated Cost $10–15
- Foam wreath form: $4–6
- Bag of bows: $1–2 each (you’ll need 4–5)
- Hot glue: on hand
Buying bows in bulk lowers cost. Mixing metallics gives it a surprisingly classy look.
Ornament Garland
Ribbon, ornaments, and a bit of patience are all you need to make a stunning garland. The trick is to mix ornament sizes and colors for that full, layered look you see in those picture-perfect holiday homes. It’s ideal for a mantel or staircase railing, and yes, you can use dollar-store ornaments. I did this one year with thrifted finds and still get compliments.
The trick is patience. Threading ornaments always takes longer than I think it will, but it’s worth it. Throw on a good Christmas movie and enjoy the process.
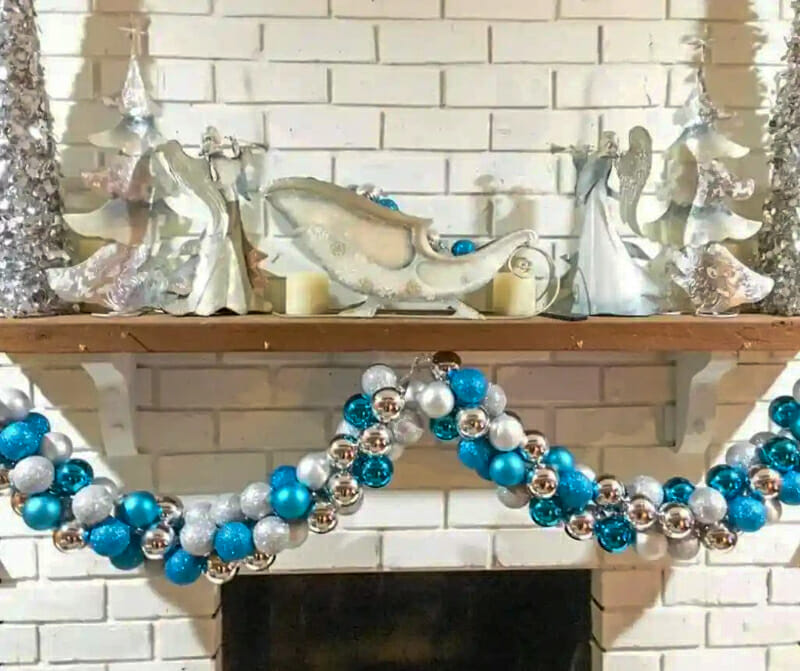
Instructions and Photo via Jasper & Willow
Estimated Cost $8–12
- Ribbon or rope: $2–3
- Assorted ornaments: $6–9 (or thrifted)
Reuse old ornaments or pick up mismatched sets from clearance bins.
If you’re baking while you decorate, make sure to try my 31 Yummy Christmas Cookies for Your Holiday Pleasure.
Framed Christmas Quote
This one’s so simple you’ll wonder why you haven’t done it before. Print your favorite holiday saying, frame it, and display it on your mantel or entryway table. You can swap out the print anytime you want a fresh look.
Thrift stores are the best place to find frames for projects like this, and you can easily refresh them with a coat of spray paint to match your theme.
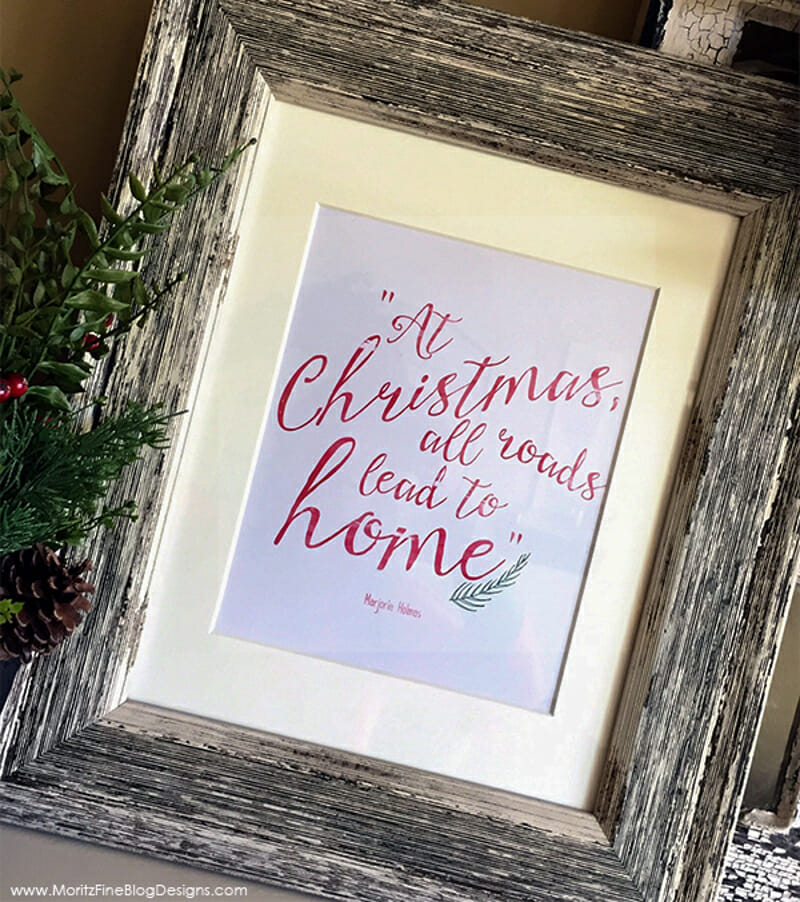
Printable and Photo via Moritz Fine Designs
Estimated Cost $2–4
- Thrifted frame: $1–2
- Printable design: free
- Paper and ink: $1
Add $1 for spray paint if refreshing the frame color.
Fabric Wall Art
If you have leftover holiday fabric, don’t toss it. Turn it into art. Stretch fabric over foam board, secure it with hot glue, and hang it up. This is a simple way to tie your holiday colors together without spending a dime on new decorations. I’ve even made a few mini versions and hung them in a grid for a more modern look.
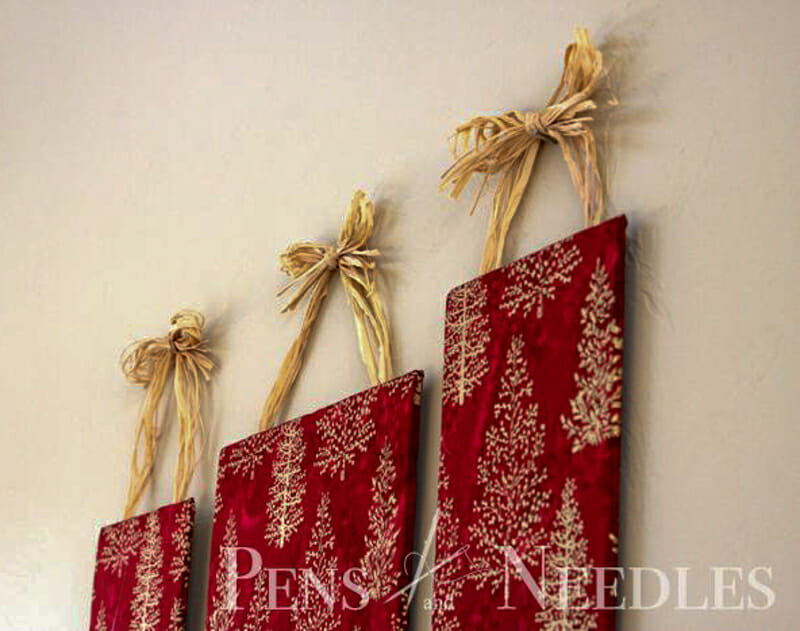
Instructions and Photo via Pens & Needles
Estimated Cost $4–6
- Foam board: $2–3
- Fabric remnant: $2–3 (often less from the sale bin)
- Hot glue: on hand
If you’ve got extra fabric, make a few more while you’re at it. They look great grouped together.
DIY Merry Christmas Garland
If you love paper crafts, you’ll love this one. Cut festive letters out of scrapbooking paper, attach them to clothespins, and clip them onto twine. It’s cheap, cheerful, and easy to match to whatever colors you’re decorating with this year.
I usually hang mine across the fireplace or window frame, but it also makes a great photo backdrop for holiday gatherings.
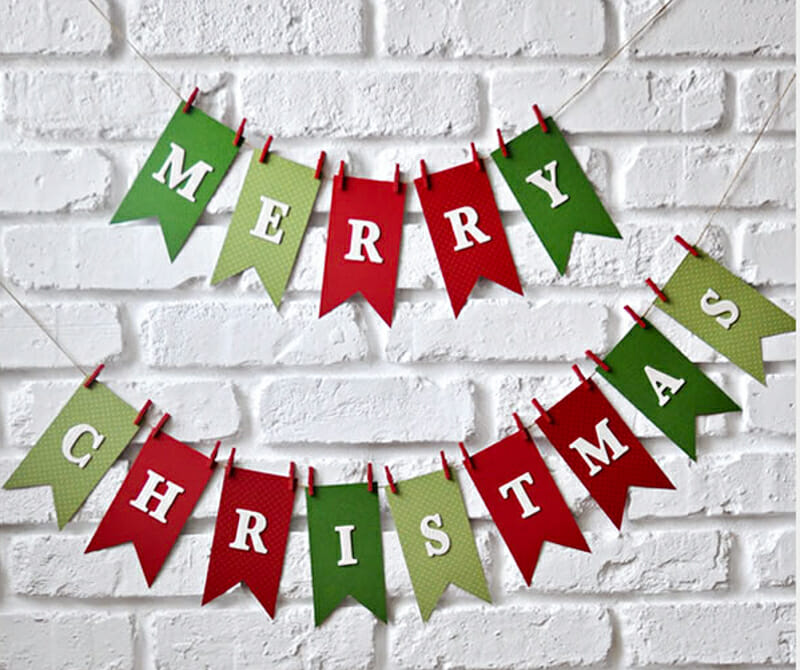
Instructions and Photo via Vicky Barone
Estimated Cost $4–6
- Scrapbooking paper: $2
- Clothespins: $1
- Twine: $1
- Letters or stencils (optional): $1–2
Add glitter or accents for a $1 or two more.
Cinnamon Ornaments
These are pure nostalgia. Made with cinnamon, applesauce, and glue, they smell incredible and last for years if you pack them away carefully. Let the kids cut out their favorite shapes, bake them at a low temperature, and hang them with twine. I sprinkle a little glitter on mine before drying for an extra festive touch.
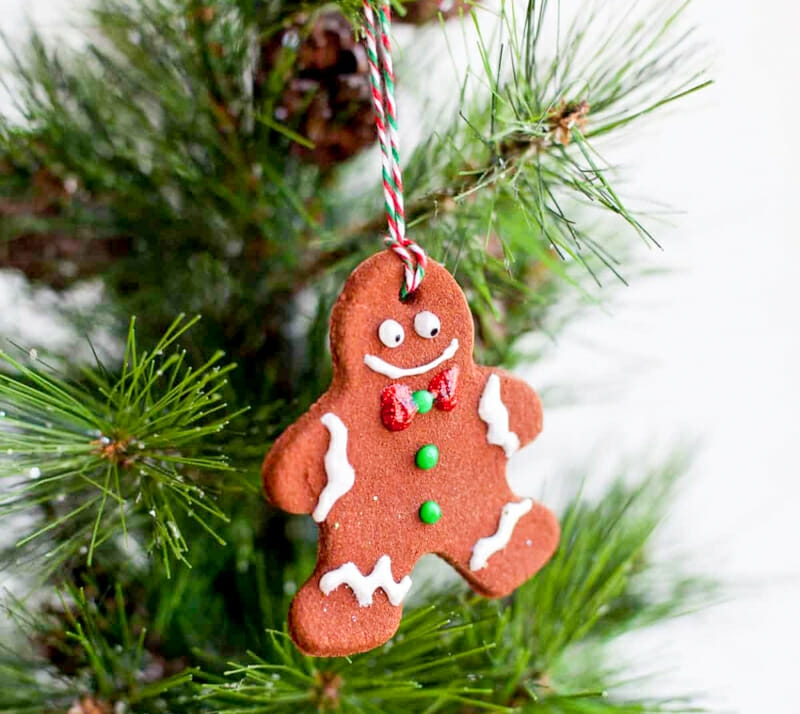
Instructions and Photo via Wholefully
Estimated Cost $3–5 per batch
- Cinnamon: $2 (bulk or dollar store)
- Applesauce: $1
- White glue: $1 (on hand for most crafters)
Makes about 15–20 ornaments. Add $1 for glitter or twine.
If you use a real tree, my post on How to Keep a Real Christmas Tree Fresh (Without Any Weird “Secret Recipes”) will help keep it looking its best all season.
Let’s Tackle a Few Common Christmas Craft Questions
Here are a few questions that come up a lot once people try these at home.
Love these ideas? Save this post so you can find it when you’re ready to start crafting.
Wreaths, garlands, and table decor made with your own two hands and a few dollars. That’s the kind of decorating that actually means something. It’s not about spending. It’s about creating memories… and yes, probably cleaning glitter off the floor for weeks (been there).
Which of these DIYs are you trying first? Leave a comment below or save this post on Pinterest for your next craft day.