How to Harvest Green Beans & How to Preserve Them
Get the most out of your green beans with these tips on harvesting green beans and how to store green beans for optimal flavor and freshness.
Estimated reading time: 8 minutes
Do you ever crave green beans’ fresh, crisp taste long after the harvest season? Well, you’re not alone. Green beans are a staple in many households, loved for their versatility and nutritional benefits. Plus, they’re incredibly easy to grow! But timing is everything when it comes to getting the most flavor and tenderness out of these vibrant vegetables.
In this post, I’ll show you how to determine the perfect moment to harvest your green beans and share some tips for preserving them so that you can enjoy their deliciousness all year round. From signs of readiness to proper storage techniques, get ready to become a green bean preservation pro.
Signs Your Green Beans are Ready to Be Picked
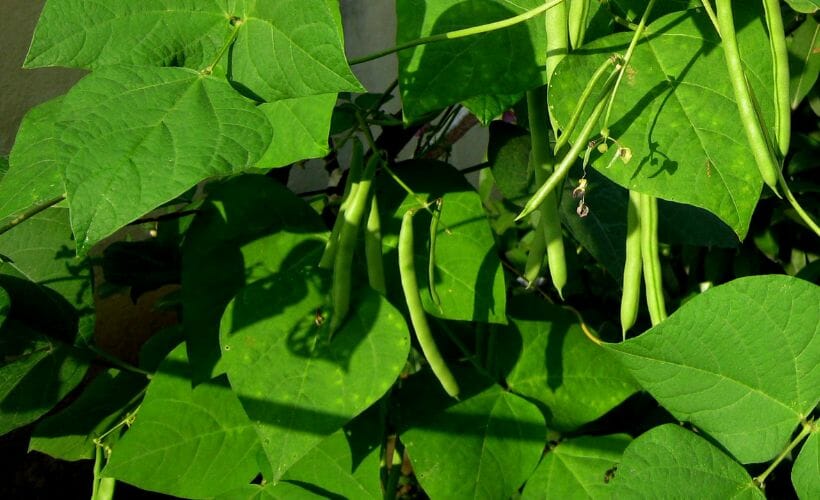
To ensure you’re harvesting your green beans at their peak flavor and tenderness, it’s important to know the signs that indicate they’re ready to be picked. While visual cues can be helpful, the beans’ touch and feel can also be excellent indicators.
Keep an eye on the size of the beans. Green beans are typically ready to be harvested when they have reached a length of around four to six inches. They will still have a firm texture and vibrant color at this stage, making them ideal for consumption in various dishes.
Another reliable sign that your green beans are ready to be plucked is their width. A mature green bean will have a diameter of about a quarter-inch or less. Thicker beans are likely to have tough, fibrous pods and may not offer the same level of tenderness and flavor.
Check the Seed Pods
One way to determine the readiness of your green beans is by checking for visible seeds inside the pods. Beans that have fully developed seeds will be plump and bulging. However, if the seeds are still small and underdeveloped, it’s best to wait a little longer before harvesting. Patience is key to ensuring optimal taste and texture.
In addition to visual indicators, touch can be a great tool for assessing the readiness of your green beans. Gently squeeze the pods to feel for a crisp snap. If the beans bend easily without resistance, they may not be fully matured. On the other hand, if they are tough and rigid, they may have passed their prime. Aim for that perfect balance of firmness and flexibility.
Remember that green beans can mature at different rates, even within the same plant. It’s a good practice to check each pod individually. By selectively harvesting the beans that are at their peak, you’ll ensure a consistent and enjoyable eating experience.
The Right Way to Harvest Green Beans
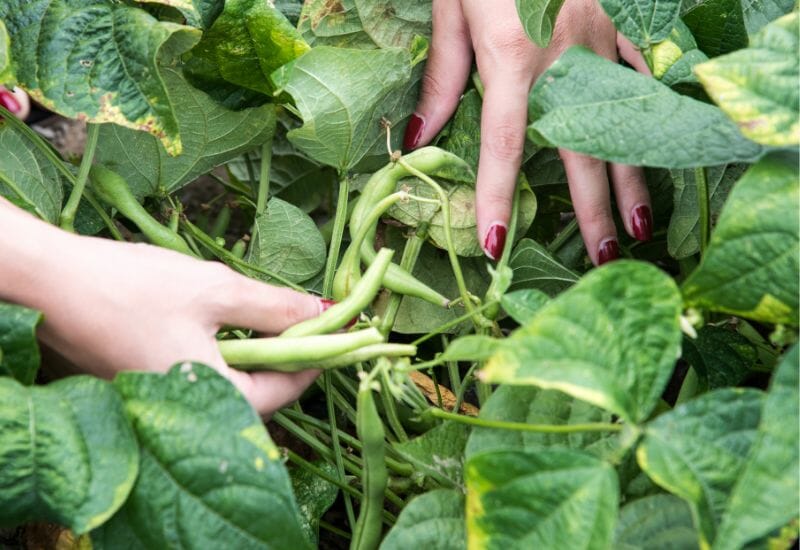
When harvesting green beans, handling them with care is crucial to avoid harming the plant or damaging the pods. Use scissors or garden shears to snip the mature beans from the plant gently. Be sure to cut the stem close to the pod, not disturbing the surrounding foliage or other developing pods. This helps preserve the plant’s growth and future harvest and prevents unnecessary stress and damage.
It’s important to note that green beans can be quite fragile, especially when they have reached their peak ripeness. Avoid excessive handling and squeezing, which can cause bruising or even break the delicate pods.
Now that you are aware of the proper techniques for harvesting green beans, we’ll explore how to prepare them for preservation.
Preparing Green Beans for Preservation
Preparing green beans for preservation is essential in ensuring that their flavor and quality are maximized throughout the process.
One crucial aspect of preserving green beans is removing any stems or ends. These parts can be tough and fibrous, and they don’t contribute to the overall texture or taste of the preserved beans. You’ll be left with the tender and flavorful portions of the beans by snipping off the ends with a sharp knife or scissors.
Another important consideration is the size of the green beans. While some preservation methods, like freezing, can accommodate beans of various sizes, others, such as canning, require uniformity. It’s recommended to sort your green beans and separate them into batches of similar size. This will ensure that they cook evenly during preservation and maintain a consistent texture.
Washing the green beans thoroughly is also crucial in preparing them for preservation. By rinsing them in cool water, you’ll remove any dirt or debris that may be clinging to the pods. This step can help remove any potential pests or bacteria that could compromise the quality of your preserved beans.
Lastly, consider blanching the green beans before preservation. Blanching involves briefly boiling the beans in a large pot of water and plunging them into a bowl of ice water to halt the cooking process. This step not only helps retain the beans’ vibrant green color but also helps eradicate any enzymes that can affect the flavor and texture over time. Blanching is particularly important for canning and freezing methods.
By following these simple steps of removing stems and ends, sorting for size, thoroughly washing, and blanching, you’ll ensure that your green beans are well-prepared for any preservation method you choose.
How to Store Green Beans for Winter
Now that your green beans have been expertly prepared, it’s time to explore the various methods for preserving them. Whether you have an abundance of green beans from your garden or you’ve found a great deal at the local farmers market, knowing how to preserve them allows you to enjoy their freshness and flavor throughout the year.
Canning Green Beans
One popular method for preserving green beans is canning. Canning involves sealing green beans in airtight jars, which helps to protect them from spoilage and bacteria. By carefully following the canning process, which typically includes blanching the green beans and processing them in a pressure canner or a water bath, you can create jars of green beans that will be shelf-stable for months or even years. Canned green beans can be conveniently stored in your pantry, ready for use in soups, stews, casseroles, or as a side dish.
Simply Canning will show you how to safely can your green beans.
Freezing Green Beans
Another option for preserving green beans is freezing. Freezing helps to retain their color, texture, and flavor. To freeze green beans, blanch them quickly in boiling water, then transfer them to an ice bath to cool rapidly. Pat them dry with a paper towel (or eco-friendly alternative), and pack them into freezer bags or containers, removing as much air as possible. Properly frozen green beans can be stored in the freezer for up to a year, allowing you to enjoy their freshness long after the harvest season.
Pickled Green Beans
You can also pickle green beans if you prefer a less traditional method. Pickling involves packing green beans in a brine made of vinegar, water, and spices, allowing them to develop a tangy and flavorful taste. Pickled green beans add a zesty kick to salads and sandwiches or can be enjoyed as a snack on their own. The pickling process requires sterilizing jars, preparing the brine, and processing them in a water bath canner to ensure their safety and longevity.
Stettled has a great pickled green bean recipe.
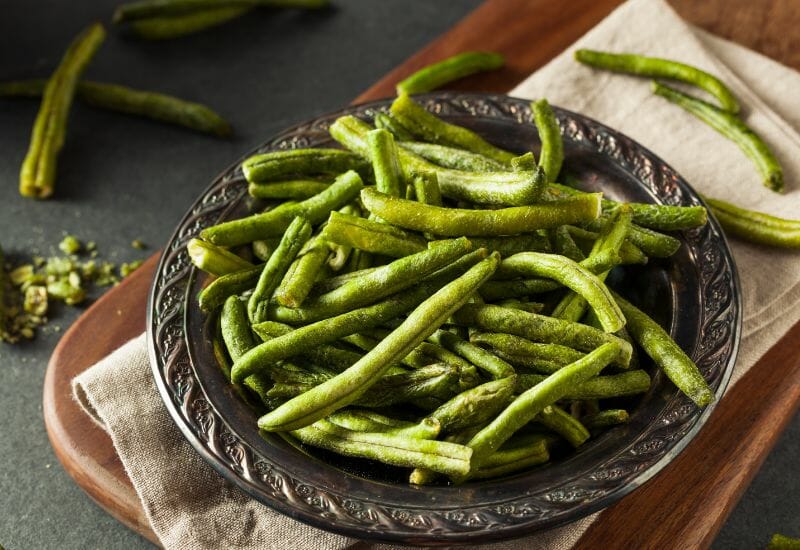
Dehydrating Green Beans
Dehydrating is yet another option for preserving green beans. Removing the moisture from the beans makes them lightweight and compact. To dehydrate green beans, blanch them briefly, then arrange them on dehydrator trays. Follow the manufacturer’s instructions for drying time and temperature, and store the dehydrated beans in airtight containers once they are completely dry.
Dehydrated green beans can be rehydrated and used in soups, stir-fries, or ground into a powder for seasoning.
How to Store Fresh Green Beans
If you plan to consume your green beans within the next few days, leave them on the stems, rinse them, and store them in the refrigerator. It’s best to avoid any storage containers or plastic bags to preserve their crispness. When in doubt, you should store them in the coldest part of the refrigerator, away from sources of moisture and heat. The crisper drawer is usually a safe bet. And, for optimal freshness, make sure to consume them within three to five days of storage.
My Favorite Dishes for Fresh Green Beans
Are you looking for the perfect recipe for your garden’s fresh green beans? I’ve got you covered. Here are a few of my family’s favorites.
The first recipe is for a green bean and tomato salad—a unique combination of two summer favorites. It’s simple to make and is especially delicious when served on a bed of leafy greens.
For a quick and easy dinner idea that lends itself beautifully to leftovers, check out my 2-for-1 Slow Cooker Beef Roast with Bonus Bean Soup. No need to fire up a hot stove or oven.
Another great recipe is for a creamy green bean casserole that’s sure to be a crowd-pleaser at your next backyard gathering.
For a truly unique twist, try sautéing them in olive oil and adding a splash of balsamic vinegar to bring out the natural sweetness of the green beans.
And finally, steamed green beans with butter and garlic are a delicious way to enjoy the freshness of the green beans. The combination of garlic and butter adds an amazing flavor that pairs perfectly with the green beans.
From harvesting to preservation, there’s no better way to enjoy the fresh flavor of the season than to take advantage of flavorful green beans. So grab your veggie basket and get to harvesting! And don’t forget to save your seeds so you can grow more green beans next year.