How to Incubate Quail Eggs & Brood Quail Chicks Like a Pro
The internet would have you believe that incubating and brooding quail is difficult. It’s not. Let’s learn how to incubate quail eggs.
Are you ready to dive into incubating quail eggs? Imagine the satisfaction of successfully hatching your quail chicks and watching them grow into healthy birds right before your eyes. Whether you’re a seasoned breeder or new to the incubating world, I will guide you through the process, providing essential tips and troubleshooting to ensure a smooth incubation journey.
This post was written specifically for those learning how to incubate Coturnix quail eggs because that is what I have, but the information applies to all quail, including Bobwhites. The only difference is that Bobwhite quail take 23-24 days to hatch, so you will want to lockdown on day 22 instead of day 16.
To learn about raising Bobwhites, check out this post from The Happy Chicken Coop.
Step-by-Step Guide to Incubating Quail Eggs
Incubating and hatching quail eggs isn’t hard to do at all! Follow these steps to start quail farming today!
Step 1: Prepare the Incubator
You can purchase an incubator (I like the Sailnovo and Magicfly incubators) or make your own. Ensure your incubator is clean and free from any debris or contaminants. Thorough cleaning with warm soapy water is recommended. Once clean, set the temperature to a stable 99.5°F and the humidity to around 40-50%.
Step 2: Collect & Store the Eggs
Gently collect the quail eggs and avoid sudden movements or jostling that could damage them. Make sure to gather eggs that are of good quality and fresh. It’s advisable to store the eggs in a cool, dry place no longer than a week before incubation to maximize their chances of hatching. If you purchase eggs from an online hatchery, allow them to rest for 24 hours to allow the air cells to settle.
Step 3: Positioning the Eggs
Place the eggs with their pointed ends facing down in the incubator in a quail-sized egg-turner. The air cell facing upwards ensures proper airflow and allows the embryo to orient itself correctly. Although quail eggs can be hatched without a turner, it’s much more demanding and requires daily maintenance. It’s important not to overcrowd the incubator, which can hamper proper airflow and affect successful hatching.
Step 4: Monitor Temperature & Humidity
Regularly check and maintain the incubator’s temperature and humidity levels throughout the incubation period. Fluctuations can negatively impact embryo development and hatchability. Consider investing in a reliable thermometer and hygrometer to monitor these conditions accurately.
Step 5: Turn the Eggs
To mimic natural incubation, gently rotate the eggs at least three times a day. This must be done manually if you don’t have an automatic turner. Turning the eggs prevents the embryo from sticking to the shell wall and promotes uniform development. If you’re turning the eggs manually, mark them on one side with an “X” and on the opposite side with an “O” to keep track of their rotation.
Step 6: Candle the Eggs (optional)
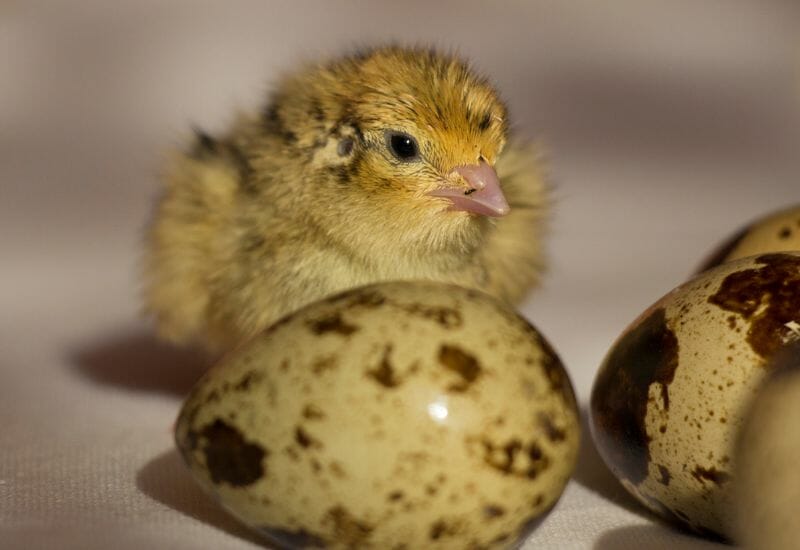
Around day 7, examine the developing embryos using a bright flashlight or an egg candler. This process, known as candling, helps identify any non-viable or infertile eggs, allowing you to remove them and focus on the healthy ones. Can’t see anything past the dark egg markings? Don’t worry! Because of the short incubation time, you don’t need to worry about infertile or “quit” eggs exploding as you do with duck or chicken eggs.
Step 7: Prepare for Hatching (aka Lockdown)
As the incubation period nears its end, typically at days 16-18, increase the humidity level to around 65-75%. Humidity aids in softening the eggshell and facilitating the hatching process. Avoid opening the incubator unnecessarily during this period, as it can disrupt the humidity levels.
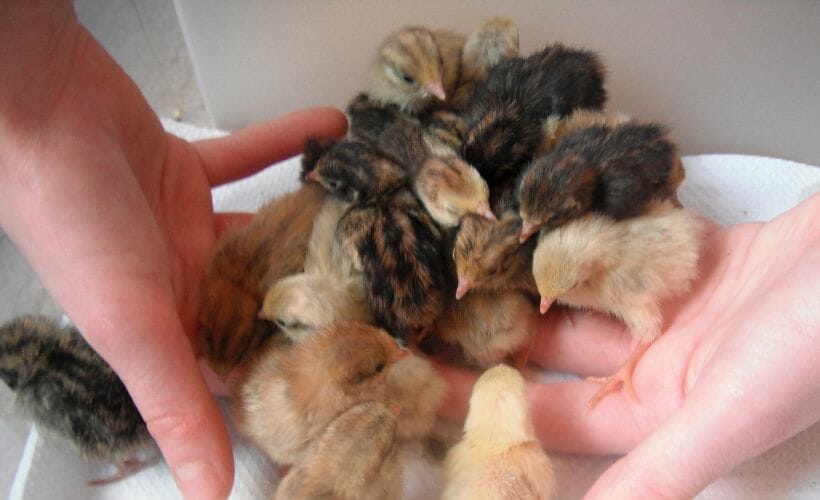
Step 8: Welcome the Quail Chicks
Once the quail chicks begin to pip, resist the urge to intervene. Let nature take its course. They may take up to 24 hours to fully hatch, so be patient and allow them to complete this remarkable process independently. Chicks can stay in the incubator for up to 12 hours before needing to be removed for food and water, so it is recommended only to remove dry, fluffy chicks twice a day until the hatch is complete.
Essential Tips for Successful Quail Hatch
To ensure good hatching rates, here are some essential tips to keep in mind:
- Maintain Optimal Temperature & Humidity: Maintaining the correct temperature and humidity levels is crucial throughout the incubation period. Fluctuations in these factors can impede the hatching process. Use a reliable thermometer and hygrometer to ensure the temperature remains at 99.5°F and the humidity stays around 40-50%.
- Resist the Temptation to Assist: As you witness the quail chicks actively pecking through the shell, it may be tempting to lend a helping hand. However, interfering during this critical stage can do more harm than good. The chicks have their natural instinct and strength to break free. Allowing them the necessary time to complete this remarkable process is essential.
- Provide a Quiet & Peaceful Environment: Creating a serene atmosphere during hatching can significantly contribute to the chicks’ successful emergence. Minimize disturbances, loud noises, and sudden movements around the incubator. Maintaining a calm environment ensures the chicks can concentrate on hatching without unnecessary stress.
- Keep a Watchful Eye: While it’s important not to intervene, it doesn’t mean you can’t watch the process. Ensure that your incubator provides a clear view of the hatching eggs. Monitoring the progress can help you identify any potential issues or delays that may require attention later.
Now that you know how to incubate quail eggs, let’s cover how to care for the babies.
How to Brood Quail Chicks
It’s essential to have a well-prepared brooder before the hatching process begins. The brooder will provide a safe and comfortable environment for your chicks as they start their journey to adulthood.
Setting Up the Brooder
Select a suitable brooder box or enclosure that is spacious enough to accommodate the anticipated number of chicks. The size of the brooder will depend on the number of eggs you plan to hatch, ensuring there is enough room for the chicks to move around freely. You want to allow for ½ square feet per chick.
Line the bottom of the brooder with a layer of absorbent bedding material. Bedding could include pine shavings, sand, paper towels, or shredded newspaper. The bedding should be soft and provide insulation to maintain the chicks’ body temperature. Do not use sheets of newspaper or other slippery options as it may cause the chicks to develop a condition called Spraddle Leg.
Ensure the brooder is equipped with a reliable heat source. A heat lamp is commonly used to maintain the ideal temperature for the chicks. However, heat plates specifically for brooding are quickly gaining popularity thanks to their safety features and ease of use. Set up the lamp or heat plate at one end, creating a temperature gradient. Keeping the heat source at one end of the brooder allows the chicks to move closer to or farther away from the heat source as per their comfort. It’s essential to monitor the temperature closely and adjust as needed, aiming for a consistent temperature of around 95°F for the first week. The heat can be reduced by 10°F each week until the brooder has reached room temperature.
To promote a healthy and hygienic environment, clean the brooder regularly. Remove any soiled bedding and replace it with fresh material. Frequent cleaning will help prevent the buildup of droppings and reduce the risk of disease and infection among the chicks.
Consider the chicks’ safety by placing a wire mesh or screen cover over the top of the brooder. A lid or cover will prevent unwanted visitors or potential predators from entering the brooder and causing harm to the chicks. Pets will attack or attempt to play with chicks. Small children can also be a considerable risk for these little birds.
Choose the Correct Feeders & Waterers
When it comes to feeders, there are a few options to consider. One popular choice is the standard chick feeder, a shallow tray with low sides that allows easy access for the chicks. This type of feeder is often made of plastic or metal and can hold a significant amount of feed, reducing the frequency of refilling. Choosing a size appropriate for the number of chicks you have is important, ensuring that each bird has enough space to eat comfortably.
Another option to consider is the tube feeder made from PVC piping, designed to minimize waste. This style of feeder has small holes that only allow the chicks to stick their beaks in and access the feed, preventing them from scratching or spilling it. Tube feeders are often hung from the side of the brooder, keeping the feed clean and reducing the chances of contamination.
Quail babies should be fed a game bird starter crumble or a quail-specific feed that contains the necessary protein levels. I find the crumbles are too big for the chick’s beaks in the first two weeks, so I grind it into nearly a powder using an old coffee grinder.
In addition to feeders, waterers are equally crucial for the well-being of your quail chicks. A chick waterer with a small trough or nipple drinker is a suitable choice. This type of waterer ensures that the chicks have a constant supply of fresh water that is easily accessible while also minimizing the risk of drowning.
It’s important to regularly check and clean the feeders and waterers to ensure they are free from debris, mold, or any potential contaminants. Cleaning feeders and waterers will help control harmful bacteria and prevent health issues for your chicks.
How long should quail stay in the brooder?
Quail chicks should remain in the brooder for about three to four weeks. During this time, they are still fragile and vulnerable, requiring a controlled environment to ensure their well-being. It provides them warmth, protection, and easy access to food and water.
It’s important to remember that the specific duration may vary depending on various factors, including the health and development of the chicks, the ambient temperature outdoors, and the size of the space. Observing the behavior and physical maturity of the quail chicks can help you determine whether they are ready to transition out of the brooder.
Monitoring the behavior and overall health of the quail chicks during their transition period is essential. If you notice any signs of stress or discomfort, it may be necessary to return them to the brooder or provide additional support to ensure their well-being.
Troubleshooting Common Brooding Challenges
Maintaining the ideal temperature is crucial for the well-being of your quail chicks. If you notice that they are huddled together or constantly seeking heat sources, it may indicate that the brooder temperature is too low. Conversely, if they are avoiding certain areas or panting excessively, it could mean that the brooder is too hot. Adjusting the heat source or repositioning it within the brooder can help regulate the temperature and create a comfortable environment for the chicks.
Another common challenge during brooding is ensuring proper ventilation. If the brooder becomes overly damp or smells unpleasant, it may suggest a lack of adequate airflow. Poor ventilation can lead to respiratory issues and affect the chicks’ overall health. To address this, you can increase the number of ventilation holes or open up the top of the brooder slightly to improve air circulation.
Social dynamics among the quail chicks can also pose challenges during brooding. While they should ideally have enough space to move around, you may still witness bullying or overly aggressive behavior. If you observe any signs of aggression or excessive pecking, separating the chicks or creating partitions might be necessary to establish a more peaceful environment.
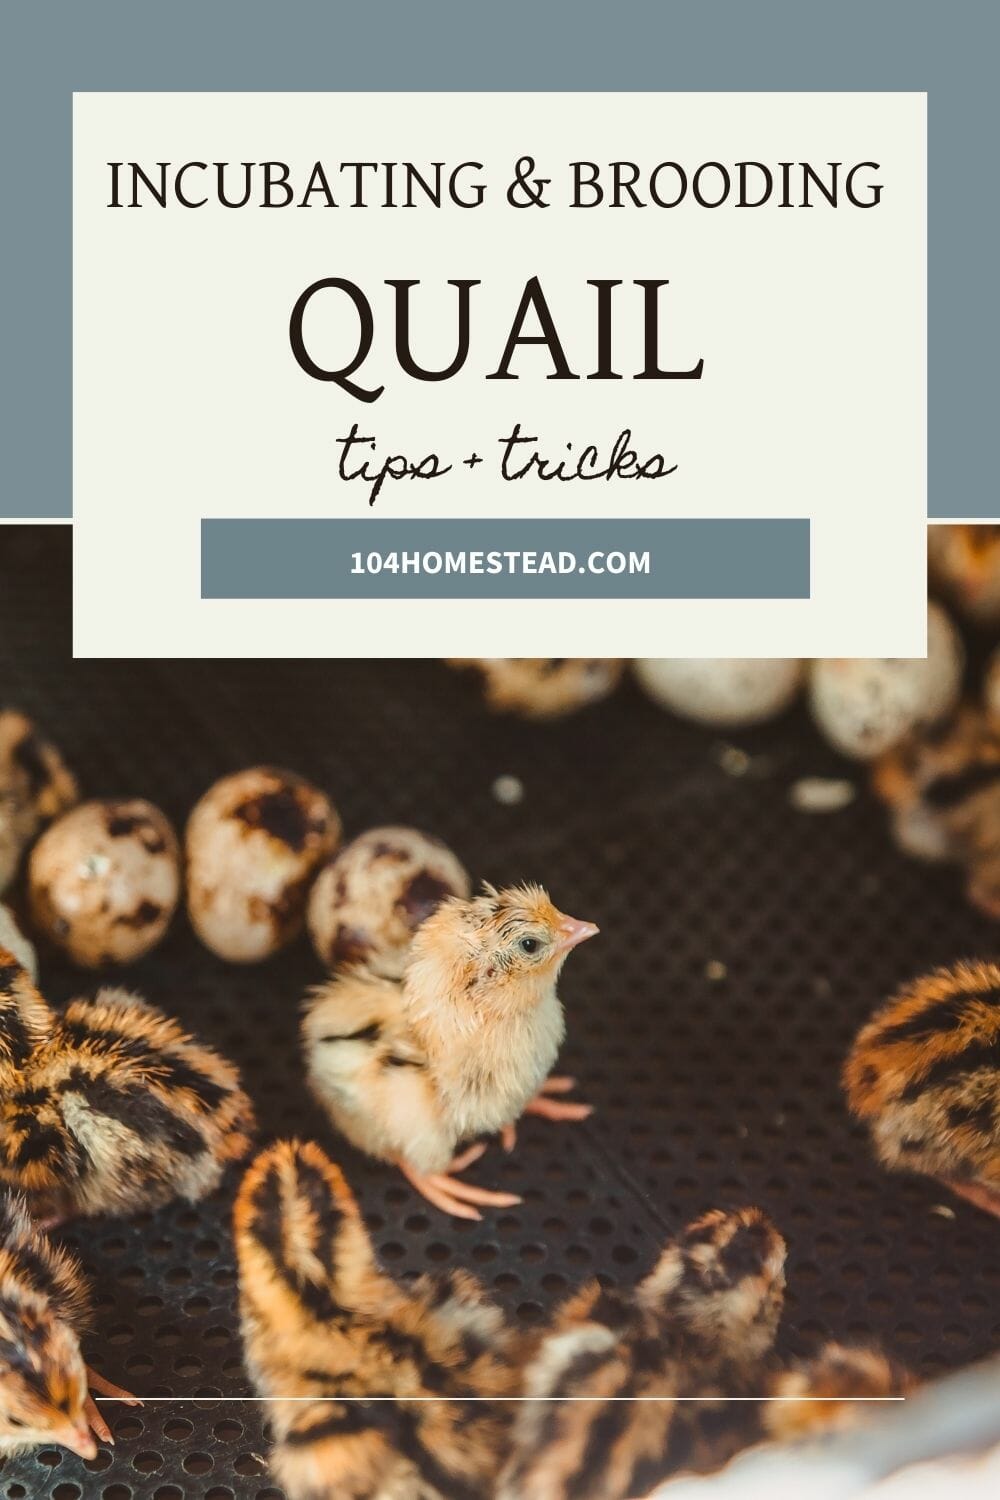
If you’ve found value in this blog post and enjoyed reading it, why not share it with your Pinterest community? Pin the image below and spread the love!
Incubating and brooding quail chicks is an incredibly rewarding experience. From selecting the eggs to caring for the chicks, quails are ideal for homesteaders. So, what are you waiting for? Get cracking and experience the joy of hatching your own quail chicks today!
Looking for even more tips on raising Coturnix quail? Check out my dedicated site, Forget-Me-Not Quail Farm, for feeding guides, housing tips, and everything you need to keep your covey thriving. And for a quick-start guide to avoiding common quail-keeping mistakes, grab a copy of my book 5 Mistakes New Quail Owners Make. It’s packed with practical advice to help you raise happy, healthy quail!
We moved in with a large Turkey Coop on the property. Chickens did not work out with my hunting dogs, but Quail have been much quieter. So far this is working.
We just pulled our quail eggs out of the egg turner this is day 15 feeling a little nervous and scared because this is our first hatch we did do the water test and some of them were not viable we put them in just to check and see and it turned out to be right! Reading all of your information has been extremely helpful. I just pray that once they hatch, I get them in their brooder quickly enough to keep them warm and get them fed and watered correctly so that they don’t go hungry or don’t get enough water!!!!
Thank you for a good detailed post. There is sure a lot of information on the net about quail breeding, or partridge as they are also called here. I bookmarked this since it was informative and apears to work good for you.
I have absolutely no experience in quail breeding but I do some ancient practice in common hen and turkey breeding. I’m old and retired but in decent health and really need a new hobby that my back will accept without major problems. I’m currently in the process of building a simple incubator and might be able to score some white colored eggs. Wish me luck and thanks again. God bless.
Thank you for all the information. I’m watching one quail egg hatch now. Watching through the incubator of corse. It’s so exciting. I’m new at this so any information is great. I enjoyed yours best. I’m pretty sure I should leave them in the incubator for at least 24 hrs, right? My red heat lamp for brooder is 125 degrees. I’ll put that on one side of brooder. Is it to hot though? Thank you, Robin Hill
Thanks for the article, we just got our first batch of coturnix quail hatching today. Quail eggs will be a great addition to our farm/homestead. They sure do pump out the eggs from what I’ve read.
Good morning from Belize (and apparently 5 years after you wrote this, so I don’t actually expect a response, but we’ll see!) I breed curassowa and other endangered gamebirds for release back into the wild. I recently acquired some quail which of course are now laying- already using a hova bator and hand turning, my actual question is do you/can you introduce chicks that are now ready for outdoor life into an enclosure with adult birds? I don’t with curassows as adults are aggressive and just too big, and of course I never do ioth laying hens, but if it works for quail, I won’t need to construct yet another enclosure! David
I can’t speak for all quail but I can say for Japanese Coturnix like I have, adding birds that are 5-6wks old has worked fine for me as long as they are not males added to a male’s enclosure. I only let males live with other males they grew up with and without females. When you add females, they begin to get territorial and can be aggressive toward each other.
I have all my males housed together with the girls, a little fighting at first but nothing to worry about. The fighting stops after a little while, they all work out who’s trouble and who’s not.
Hey, I am a teen and am thinking about hatching eggs and selling chicks to make some money. What would you recommend I do to start? I have raised quail before and am somewhat familiar with them but have never hatched them myself. Please help, thanks!
Just get a good incubator and fertile eggs and it’s that easy good luck I Ben raising them for 2 years now they are very fun birds and easy to hatch and sell good luck to ya Jim Graff Portland maine
my daughter has been incubating 30 quail eggs, but we are now on a week or so over the hatch date. She realized about a week in that she didn’t have the temp high enough, but only by a few degrees. She insists they are still growing, but I am not so sure – can you answer that question? None of them have hatched. We are using an incubator that turns the eggs but the humidity has been harder to control, going anywhere from 37% to 45%. Thank you in advance – any help is appreciated!
Candle them. Set on flashlight and look inside for a bird
whats does this even mean..
I fell into quail by a fluke of luck. Last year, a member of our poultry group announced he had some ready and I opted for 4 chicks. Not knowing anything about them, I failed that clutch miserably. This year my quail keeping is much different and I am keeping 20 at this time and am starting to incubate eggs. My first hatch resulted in 8 out of 21 eggs. I’d like to improve this number and hatch as many as possible. Like you, I have a small piece of property and am working towards my homesteading goals a little at a time. Thank you for sharing your expertise. I appreciate the data you’ve included in this article!
I have noticed you don’t monetize your website, don’t waste
your traffic, you can earn extra bucks every month.
You can use the best adsense alternative for any type of website (they
approve all websites), for more info simply search in gooogle: boorfe’s tips monetize your website
Hello. I see that you don’t update your site too often. I know that writing content
is boring and time consuming. But did you know that there is a tool that allows you to create
new articles using existing content (from article directories or other blogs from your niche)?
And it does it very well. The new articles are high quality
and pass the copyscape test. You should try
miftolo’s tools