How to Incubate Quail Eggs & Brood Quail Chicks Like a Pro
The internet would have you believe that incubating and brooding quail is difficult. It’s not. Let’s learn how to incubate quail eggs.
Are you ready to dive into incubating quail eggs? Imagine the satisfaction of successfully hatching your quail chicks and watching them grow into healthy birds right before your eyes. Whether you’re a seasoned breeder or new to the incubating world, I will guide you through the process, providing essential tips and troubleshooting to ensure a smooth incubation journey.
This post was written specifically for those learning how to incubate Coturnix quail eggs because that is what I have, but the information applies to all quail, including Bobwhites. The only difference is that Bobwhite quail take 23-24 days to hatch, so you will want to lockdown on day 22 instead of day 16.
To learn about raising Bobwhites, check out this post from The Happy Chicken Coop.
Step-by-Step Guide to Incubating Quail Eggs
Incubating and hatching quail eggs isn’t hard to do at all! Follow these steps to start quail farming today!
Step 1: Prepare the Incubator
You can purchase an incubator (I like the Sailnovo and Magicfly incubators) or make your own. Ensure your incubator is clean and free from any debris or contaminants. Thorough cleaning with warm soapy water is recommended. Once clean, set the temperature to a stable 99.5°F and the humidity to around 40-50%.
Step 2: Collect & Store the Eggs
Gently collect the quail eggs and avoid sudden movements or jostling that could damage them. Make sure to gather eggs that are of good quality and fresh. It’s advisable to store the eggs in a cool, dry place no longer than a week before incubation to maximize their chances of hatching. If you purchase eggs from an online hatchery, allow them to rest for 24 hours to allow the air cells to settle.
Step 3: Positioning the Eggs
Place the eggs with their pointed ends facing down in the incubator in a quail-sized egg-turner. The air cell facing upwards ensures proper airflow and allows the embryo to orient itself correctly. Although quail eggs can be hatched without a turner, it’s much more demanding and requires daily maintenance. It’s important not to overcrowd the incubator, which can hamper proper airflow and affect successful hatching.
Step 4: Monitor Temperature & Humidity
Regularly check and maintain the incubator’s temperature and humidity levels throughout the incubation period. Fluctuations can negatively impact embryo development and hatchability. Consider investing in a reliable thermometer and hygrometer to monitor these conditions accurately.
Step 5: Turn the Eggs
To mimic natural incubation, gently rotate the eggs at least three times a day. This must be done manually if you don’t have an automatic turner. Turning the eggs prevents the embryo from sticking to the shell wall and promotes uniform development. If you’re turning the eggs manually, mark them on one side with an “X” and on the opposite side with an “O” to keep track of their rotation.
Step 6: Candle the Eggs (optional)
Around day 7, examine the developing embryos using a bright flashlight or an egg candler. This process, known as candling, helps identify any non-viable or infertile eggs, allowing you to remove them and focus on the healthy ones. Can’t see anything past the dark egg markings? Don’t worry! Because of the short incubation time, you don’t need to worry about infertile or “quit” eggs exploding as you do with duck or chicken eggs.
Step 7: Prepare for Hatching (aka Lockdown)
As the incubation period nears its end, typically at days 16-18, increase the humidity level to around 65-75%. Humidity aids in softening the eggshell and facilitating the hatching process. Avoid opening the incubator unnecessarily during this period, as it can disrupt the humidity levels.
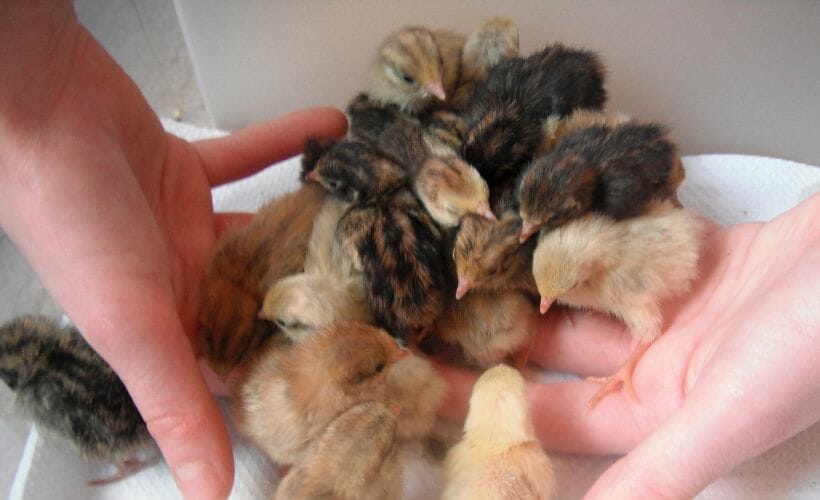
Step 8: Welcome the Quail Chicks
Once the quail chicks begin to pip, resist the urge to intervene. Let nature take its course. They may take up to 24 hours to fully hatch, so be patient and allow them to complete this remarkable process independently. Chicks can stay in the incubator for up to 12 hours before needing to be removed for food and water, so it is recommended only to remove dry, fluffy chicks twice a day until the hatch is complete.
Essential Tips for Successful Quail Hatch
To ensure good hatching rates, here are some essential tips to keep in mind:
- Maintain Optimal Temperature & Humidity: Maintaining the correct temperature and humidity levels is crucial throughout the incubation period. Fluctuations in these factors can impede the hatching process. Use a reliable thermometer and hygrometer to ensure the temperature remains at 99.5°F and the humidity stays around 40-50%.
- Resist the Temptation to Assist: As you witness the quail chicks actively pecking through the shell, it may be tempting to lend a helping hand. However, interfering during this critical stage can do more harm than good. The chicks have their natural instinct and strength to break free. Allowing them the necessary time to complete this remarkable process is essential.
- Provide a Quiet & Peaceful Environment: Creating a serene atmosphere during hatching can significantly contribute to the chicks’ successful emergence. Minimize disturbances, loud noises, and sudden movements around the incubator. Maintaining a calm environment ensures the chicks can concentrate on hatching without unnecessary stress.
- Keep a Watchful Eye: While it’s important not to intervene, it doesn’t mean you can’t watch the process. Ensure that your incubator provides a clear view of the hatching eggs. Monitoring the progress can help you identify any potential issues or delays that may require attention later.
Now that you know how to incubate quail eggs, let’s cover how to care for the babies.
How to Brood Quail Chicks
It’s essential to have a well-prepared brooder before the hatching process begins. The brooder will provide a safe and comfortable environment for your chicks as they start their journey to adulthood.
Setting Up the Brooder
Select a suitable brooder box or enclosure that is spacious enough to accommodate the anticipated number of chicks. The size of the brooder will depend on the number of eggs you plan to hatch, ensuring there is enough room for the chicks to move around freely. You want to allow for ½ square feet per chick.
Line the bottom of the brooder with a layer of absorbent bedding material. Bedding could include pine shavings, sand, paper towels, or shredded newspaper. The bedding should be soft and provide insulation to maintain the chicks’ body temperature. Do not use sheets of newspaper or other slippery options as it may cause the chicks to develop a condition called Spraddle Leg.
Ensure the brooder is equipped with a reliable heat source. A heat lamp is commonly used to maintain the ideal temperature for the chicks. However, heat plates specifically for brooding are quickly gaining popularity thanks to their safety features and ease of use. Set up the lamp or heat plate at one end, creating a temperature gradient. Keeping the heat source at one end of the brooder allows the chicks to move closer to or farther away from the heat source as per their comfort. It’s essential to monitor the temperature closely and adjust as needed, aiming for a consistent temperature of around 95°F for the first week. The heat can be reduced by 10°F each week until the brooder has reached room temperature.
To promote a healthy and hygienic environment, clean the brooder regularly. Remove any soiled bedding and replace it with fresh material. Frequent cleaning will help prevent the buildup of droppings and reduce the risk of disease and infection among the chicks.
Consider the chicks’ safety by placing a wire mesh or screen cover over the top of the brooder. A lid or cover will prevent unwanted visitors or potential predators from entering the brooder and causing harm to the chicks. Pets will attack or attempt to play with chicks. Small children can also be a considerable risk for these little birds.
Choose the Correct Feeders & Waterers
When it comes to feeders, there are a few options to consider. One popular choice is the standard chick feeder, a shallow tray with low sides that allows easy access for the chicks. This type of feeder is often made of plastic or metal and can hold a significant amount of feed, reducing the frequency of refilling. Choosing a size appropriate for the number of chicks you have is important, ensuring that each bird has enough space to eat comfortably.
Another option to consider is the tube feeder made from PVC piping, designed to minimize waste. This style of feeder has small holes that only allow the chicks to stick their beaks in and access the feed, preventing them from scratching or spilling it. Tube feeders are often hung from the side of the brooder, keeping the feed clean and reducing the chances of contamination.
Quail babies should be fed a game bird starter crumble or a quail-specific feed that contains the necessary protein levels. I find the crumbles are too big for the chick’s beaks in the first two weeks, so I grind it into nearly a powder using an old coffee grinder.
In addition to feeders, waterers are equally crucial for the well-being of your quail chicks. A chick waterer with a small trough or nipple drinker is a suitable choice. This type of waterer ensures that the chicks have a constant supply of fresh water that is easily accessible while also minimizing the risk of drowning.
It’s important to regularly check and clean the feeders and waterers to ensure they are free from debris, mold, or any potential contaminants. Cleaning feeders and waterers will help control harmful bacteria and prevent health issues for your chicks.
How long should quail stay in the brooder?
Quail chicks should remain in the brooder for about three to four weeks. During this time, they are still fragile and vulnerable, requiring a controlled environment to ensure their well-being. It provides them warmth, protection, and easy access to food and water.
It’s important to remember that the specific duration may vary depending on various factors, including the health and development of the chicks, the ambient temperature outdoors, and the size of the space. Observing the behavior and physical maturity of the quail chicks can help you determine whether they are ready to transition out of the brooder.
Monitoring the behavior and overall health of the quail chicks during their transition period is essential. If you notice any signs of stress or discomfort, it may be necessary to return them to the brooder or provide additional support to ensure their well-being.
Troubleshooting Common Brooding Challenges
Maintaining the ideal temperature is crucial for the well-being of your quail chicks. If you notice that they are huddled together or constantly seeking heat sources, it may indicate that the brooder temperature is too low. Conversely, if they are avoiding certain areas or panting excessively, it could mean that the brooder is too hot. Adjusting the heat source or repositioning it within the brooder can help regulate the temperature and create a comfortable environment for the chicks.
Another common challenge during brooding is ensuring proper ventilation. If the brooder becomes overly damp or smells unpleasant, it may suggest a lack of adequate airflow. Poor ventilation can lead to respiratory issues and affect the chicks’ overall health. To address this, you can increase the number of ventilation holes or open up the top of the brooder slightly to improve air circulation.
Social dynamics among the quail chicks can also pose challenges during brooding. While they should ideally have enough space to move around, you may still witness bullying or overly aggressive behavior. If you observe any signs of aggression or excessive pecking, separating the chicks or creating partitions might be necessary to establish a more peaceful environment.
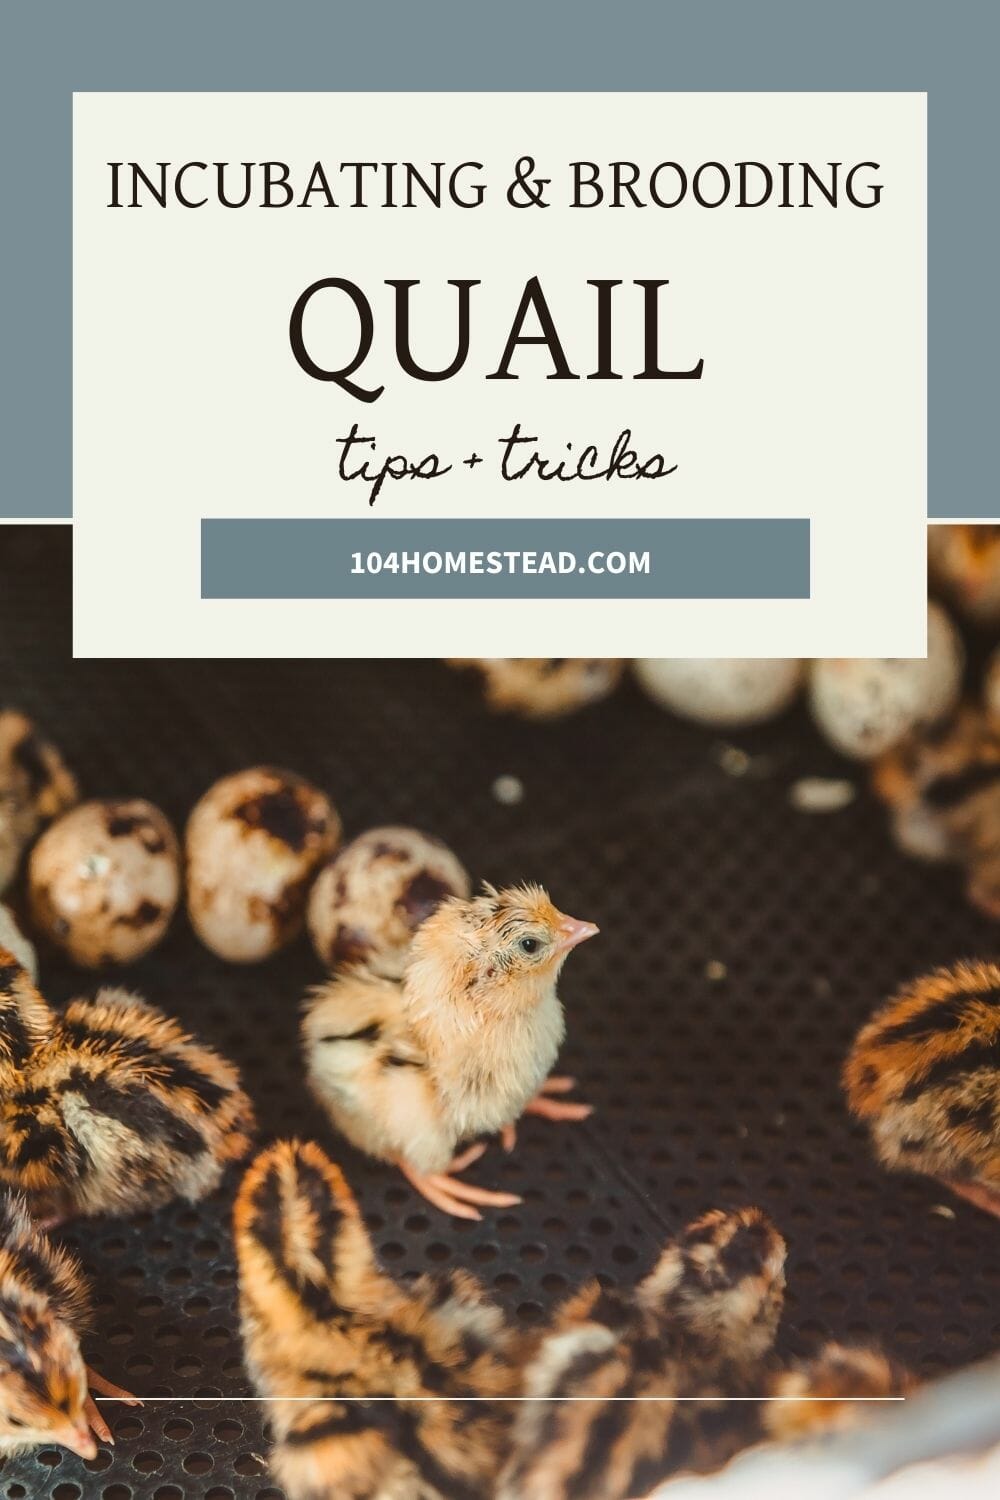
If you’ve found value in this blog post and enjoyed reading it, why not share it with your Pinterest community? Pin the image below and spread the love!
Incubating and brooding quail chicks is an incredibly rewarding experience. From selecting the eggs to caring for the chicks, quails are ideal for homesteaders. So, what are you waiting for? Get cracking and experience the joy of hatching your own quail chicks today!
Looking for even more tips on raising Coturnix quail? Check out my dedicated site, Forget-Me-Not Quail Farm, for feeding guides, housing tips, and everything you need to keep your covey thriving. And for a quick-start guide to avoiding common quail-keeping mistakes, grab a copy of my book 5 Mistakes New Quail Owners Make. It’s packed with practical advice to help you raise happy, healthy quail!
Hi,
We’ve successfully hatched 10 quails, the only problem we’re having now is we’ve moved them to a brooder from the incubator once they were all fluffy. The temperature is around 35c there’s shallow water and food yet they seem to be getting weak. We’ve dipped their beaks in the water so they don’t dehydrate and they’ve been eating. What could be the problem?
Mine don’t eat at first, they have a reserve of yolk in their system from the egg. I’ll bet they eat in a day!
You can get a mash starter feed from Front vein feeds that is great to start your chicks on
How do you take care of them in the Winter?
you bring them inside.
Hi I have botj common quail and the white bobwhites in at the same time.
I read online that its good to keep the humidity up to 60% for the jumbo breeds. So its been between 55-60% from day one. They are now on day 15. Do you think they will be fine? Wont drawn? The temp is set at 98.5 f. Thanks for your help!
Do i need to raise the humidity?
I also read that bobwhites and california quail hatch on day 22-23. Is that true?
Thank you!
Irrespective of breed type, they need lower humidity during incubation so the air sac grows larger and they have air to breath between internal pip and external pip (when they breath outside air). Higher humidity prevents the air sac from growing larger. Check out Coturnix Corner on YouTube or Slightly Rednecked. These two people have a lot of experience and I’m sure will answer any questions you have. I learnt about lower vs higher humidity from Coturnix Corner.
Also, while it’s too late for the OP, everyone should know that 98* is too low – bump that up to 100*.
Hi Jessica,
Recently I bought Hova Bator 1602N, I started incubating my question is on the top of the incubator RED vents do I need to remove or keep it.
Please let me know.
Thanks in advance.
You add or remove them based on the humidity in your incubator. If you notice it’s too dry, add them. If the humidity is too high, remove them. Keep an eye on the temperatures while you do this.
Do you turn the temperature up
Hi there nice to meet you I am a beginner for raising quial I have read all your suggestion for incubating quial eggs thank you very much.
I want to incubate quail eggs but i’m not sure what kind of incubator I should get they can range from under $20 to $200 and i’ve never hatched eggs before nor has anyone that I know so could you please tell what kind of incubator you have and where I can get one from that would be very helpful
Hi! I ordered an incubator off of amazon. It looked like this http://amzn.to/2s8Rrug
Enjoy!
I tried the cheap styrofoam ones from tractor supply, my chickens hatched but my pheasants died. I splurged and got a Brinsea 28. Every egg I’ve put in so far has hatched. It turns them controls humidity. It’s great! My quail are in now. Can’t wait to see them.
I bought a cheap Styrofoam one from Tractor Supply. It was missing parts. So I went back and got a replacement. It was missing different parts. So, I simply ordered one from Lumia, and although it cost more, everything was there, and I feel much better knowing this isn’t Styrofoam, either. I am now incubating my second batch of eggs. On my first batch, I got about a 60 % hatch rate, but the eggs that didn’t hatch weren’t fertile, or at least had no embryos – I checked at the end. Everything with an embryo hatched, although one died within an hour.
Can you help me my quail eggs are in an automatic turner do i just pull the plug from the turner on day 15 and leave eggs pointed down in trays or lay them on there side on bottom and remove yellow turner my 1st time
You have to keep going with the heat and bring humidity up. Definitely take the turner out and lay them on the bottom. Don’t have to be standing up.
Okay so I am about to start hatching my very first Quail that are flying in from across Canada. I have thought about making my own incubator since its worked for my friend apparently. But I need help on one piece of information…
My friend says to leave the eggs alone for the incubating period yet 90% of people say that you MUST turn the eggs everyday. She said that her eggs would go bad everytime she opened the incubator. I’m so conflicted with this info. Will my Quail eggs die if I open the incubator to turn the eggs???
I always turn mine, but I have an automatic turner, so that might be why it’s successful. I wonder if having the lid off to turn all those tiny eggs by hand is why your friend doesn’t have much luck.
As far as I know all bird eggs need to be moved during incubation until the last couple of days when embryo is positioning itself for popping. Your quail eggs will not go bad because you open and turn them. Start small and work up your experience. Don’t kill yourself and throw it all away if you fail. This is not rocket science and the information here is good, it’s based on experience and not calculated facts. Experience is the key to everything, anyone can read a book and think they know all about it. I’m a retired mechanic tought by those who knew from experience long before internet. Qails are sturdy little buggers and I’m sure you can be an excellent quail breeder rather quickly. Success comes from effort. Good luck and god bless.
Do eggs need to rest in the incubator before turning it the unit on to its 100degree temperature
Some say you should, but I’ve never had that problem. If they were shipped, I’d err on the side of caution and let them rest for 24 hours.
Thanks for the reply and help!
Hey Jessica I have the same incubator as you, and I have 2 different readings on 2 dye thermometers at 101 on the one side of the bator and than 99 on the opposite side, while the middle hygrometer is reading 97.9 directly in the centre under the fan… Its been running for over 24 hours.. How do I calibrate so that it distributes evenly ?
If you have a fan in place, you’ve done all you can. Mother Nature isn’t perfect and neither are incubators, unfortunately. That isn’t a huge extreme. If you’re turning by hand, try rotating the eggs around the incubator. If you are worried that it really will cause a problem (though I don’t think it will), you can cut cord grooves in all four corners (you know how there’s one in the back right already). That way you can rotate the base daily and the lid will still shut.
Okay, so you think those temp difference should be fine? I’m using my automatic egg turner, I figured Id rotate the eggs from left to right through the middle every 3 days or so when I added water. I just worried the middle may be to cold
I think you should be okay.
Hey, from all my reading and from what it even says with the hovabator, the quail eggs take roughly 21 days to hatch. My question is, what day should i remove the quail from the egg turner ? and also, if I’m picking my eggs up, is it recommended to turn my incubator off before they go in leave them in the egg turner for 6-8 hours before turning it back on for them to acclimate to the higher temp?
I’ve never had them take that long (even 19 days is rare). I’d still take them out of the turner on day 15. They chances of them sticking before hatch is very unlikely.
When you remove them from the turner are you basically just removing the turner from the incubator and placing the eggs back in?
I had 22 eggs in the incubator 1 hatched on day 17 on day 18..this is day 19 and still no more chicks..I know there were chicks in all of them..these eggs were left at cool room temperature for about 3 weeks befor going to incubator..do you think He rest will hatch?feeling anxious
While it’s no uncommon for eggs to hatch as late as day 19 (usually because the temperature is set too low and it delayed hatching), my concern is the age of the eggs. We try to collect eggs for no more than 5 days before getting them in the incubator. Three weeks will seriously reduce hatchability.
Is there any specific incubator you recommend for Coturnix quail?
I have the Hova Bator with fan and I’ve had great results from everything from duck eggs to quail eggs. I highly recommend using an egg turner with quail. They unusually come with racks for chickens and ducks, but you can get quail rails separately.
Ok! I have a Little Giant still air incubator but I can buy the fan, egg turner, and quail rail attachments no problem 🙂
Also, I can’t seem to find this info anywhere. Maybe I’m searching wrong. Is there a way to store eggs so I can incubate them all at the same time? Say, 1 week of eggs going in at the same time, so I’m not trying to separate 2-3 eggs for lockdown each day?
With duck and chicken eggs you rotate them daily and store them at room temperature. I don’t worry so much with my quail eggs. I just keep them in an egg carton and give them a little tilt from time to time until I’m ready to put them in the incubator. No matter how far apart they were laid, day 1 of incubating will still be 24 hours after putting them in the incubator. Just keep in mind that hatch-ability declines after 5 days.
Thanks for this information. We’ve got a single pair of quail and were wondering about hatch-ability!
I have d 2 quail hatch this am.still 12 left to hatch .is it OK to put od in the incubator and leave the 2 chicks in there and for how long. will the humidity hurt the 2 chicks?
The humidity won’t hurt the chicks, it will just prevent them from fully drying which isn’t a big deal if they are put right into a warm brooder when removed. I leave chicks up to 24 hours, especially if only a couple have hatched. It’s best to move a minimum of 4-5 so they can huddle in the brooder if they need to.
I have just started with i first hard 10 3 weeks birds . I know have 400 day old chicks they have started purging just after the 2nd night , what is the cause?
Just starting out with Coturnix, have only 5, not even sure of the male/female ratio. They lay 3 eggs everyday and I would like to incubate and brood. What would you recommend for equipment? Thanks.
Hey Jessica! Attempting my first hatch in a still air incubator with hand turning. I am on day 19 with a couple wiggly eggs but no chicks yet. I was going to chuck the lot as I thought maybe they were bad but when I picked up the one I swore was wiggling yesterday there was a small hole through which I could see the chick’s side moving as it breathed. I put it back and thought the one beside it was wiggling too. I had trouble with the incubator the first couple days, so maybe that delayed the hatch? And is it normal for that one egg to have a hole in the shell with the chick still inside? At what point/day do I just consider the whole thing a failure? Thanks!
Don’t begin to worry yet. Still air incubators can cause cold spots which are made worse by opening the incubator. Hands off for the next 24 hours and see what happens.
I now have 2 chicks so far. Still a little worried that in about 6 hours we will begin day 21 and I haven’t turned the eggs since day 14 but since a couple have hatched so maybe not a big deal? The first one to “zipper” the shell got stuck like that for more than 12 hours and when I finally investigated it was on it’s back in the shell – which had dried around it. I cracked it open just a little and put it belly side down and the next time I checked it had finally busted out. Poor little thing seems really exhausted though. Since they don’t all hatch at the same time how long/many days should I wait to see if the others hatch? Oh, and browsed your site for hours yesterday – thanks for all the information!
I’d give them until day 21. Do you know how to float test eggs to see if they’re alive? Fill a glass with warm water (not hot) and gently place an egg in the water (making sure the egg hasn’t pipped). If it sinks it’s not viable. If it floats watch it for a moment to see if it wiggles. If it floats but doesn’t move it’s probably not viable.
We just hatched our first 5 on day 18. Still have 45 left to hatch. So you leave them in the incubator for 24 to 48 hours. Do you put food and water in the incubator for them? I have searched the internet and I can’t find anything.
No food and water in the incubator, just in the brooder. They absorb the yolk just before hatching and that provides nourishment that will last for up to 3 days.
the yolk last them 24 hours not 3 days :/ , you can put water in the incubator from when the 1st one hatches ( i know breeders that have been doing it for years) please before giving any adice out, you do your research….
– Texas A&M University, Department of Poultry Science
Of course they live up to 3 days off the yolk. How else would they survive shipment?
You just contradicted yourself. First you say only 24 ours and not 3 days and then you say “of course they live off the yolk for 3 days. I am glad that the information from Texas A&M is the bible for research and facts. I thing you are the one that needs to get the facts straight. No wonder there is so much confusion with this hobby. There is an abundance of incorrect information given out by people who do not have their facts straight and then with You Tube videos it is a nightmare watching what they do to the poor innocent chicks.
Is there any difference in incubating A&M jumbo’s and regular cortunix?
No, they are the same except for bloodlines and selective breeding.
Hi there, hoping you might have some advice on hatching quail – we have hatched a little batch of 14, and 9 have hatched so far – they are running around inside the incubator but looking very damp still, though two hatched last night (at least 18 hours ago) – there is condensation on the inside plastic window of the mini incubator, should we maybe wipe it dry, clean out the damp paper, and put them back in to fluff up? It is a still air incubator and I don’t understand how they are supposed to get fluffy in high humidity?! Any advice would be greatly appreciated, thanks for your no fuss advice above 🙂
Congratulations on your hatch! It sounds like your humidity may have climbed a bit, which is normal when there are a bunch of wet chicks running around. Happens to me almost every time. Do you have a humidity gauge in there with them? What I suggest is removing a few plugs from the incubator (if it has them) or tilting the just a bit to release a bit of the humidity. Just make sure you are checking the thermometer and changing it as necessary. Often when you vent to release humidity, the temperature will lower. Let me know how it goes and don’t hesitate to ask more questions.
Thank you for getting back to me so quickly! I had 14 hatch and after 24 hours I moved them to the brooder and two more habe hatched since then. Unfortunately one is upside down in the rail with this wings and head through the hole at the bottom. Do you have any advice on getting him out?
I was out of town and got to day 16 with my egg turner still in the incubator, walked in the door ran in to check. One was hatched and fluffy. The second one was like Cynthia’s stuck in the vents of the bottom of the egg turner. I carefully removed the bird by pushing him through. All he needed to do was tuck his wing in to make it. Luckily they are both healthy and I’m waiting for the other 46 to hatch. I think the first two hatched late on the 15th day.
I’m so glad it turned out well. Even with seemingly nothing that could cause issues, I always have one that gets stuck somewhere (usually it gets stuffed under the thermometer and needs rescuing). Good luck with the remainder of your hatch.
Thanks for the article! I have a question today is day 16 and I have 48 eggs in my incubator and two hatched today. Do I remove those birds after 18 to 24 hours and wait for more to hatch? (hopefully more will hatch)
I would wait 48 hours from when the first hatched and then pull out any that are fluffy. Congratulations on your chicks!
I’ve been thinking about adding quail for a couple of years now. I think reading your stuff may be the turning point.
Thanks
They really are great little birds. I feel like I’m becoming a quail pusher lol.
Raising the Corturnix was a fun experience. I’m currently raising Bobwhites and that has been so different., loving it and finding out with each breed they are so different. Great tips, I don’t incubate going to let the girls do it for me. Love it when nature takes control.
Hope you have a great July 4th
Carole
Thanks Carole! Happy fourth to you as well (is it just me or did it sneak up on us?)
I have raised many Quail… big secret they can’t eat starter feed. Put it into a coffee mill and grind it down to the consistency of powder and put on a plastic lid in the box they will figure it out… water put marbles in to the water so they can’t walk or fall in… they grow so fast after a week they are ready for the started and regular waters
Is that why people keep quail – because they lay eggs so fast? Is it for eating? I’ve never researched quail so I’m completely ignorant – help!
They are often kept for meat and eggs. The reason why quail are gaining popularity is because of the quick turn around for both of these. Also, with a more majestic and less obnoxious crow, people are able to keep breeding stock without annoying the neighbors.