Repairing Damaged Soil: Tips & Strategies for a Lush Garden

Bring life back to damaged soil with sustainable and cost-effective tactics. Repairing damaged soil will get you results in no time.

Rhubarb growing in poor soil.

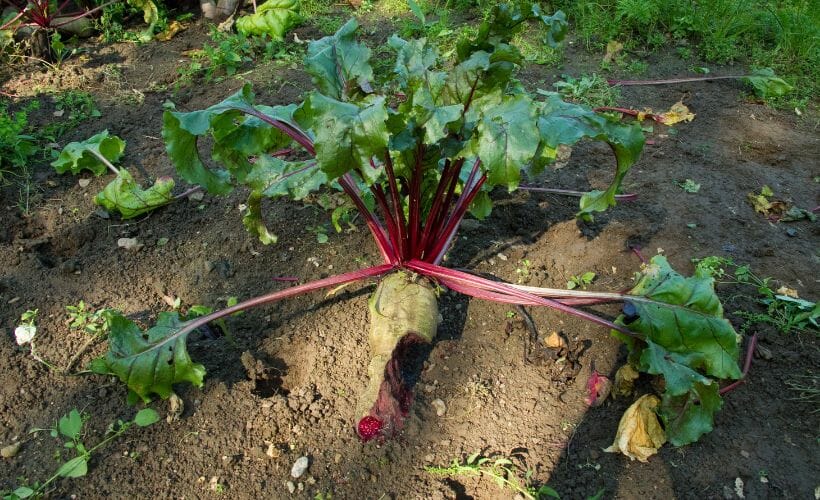
When the summer heat hits hard and your soil starts to bake and dry out, it can feel like you are at a loss for how to take care of it. The plants might struggle to put down roots, and it can almost feel like you’re trying to grow food in an oven. If your soil is made of hard clods or is sandy dust that easily blows away, that only makes it more difficult to cultivate.

You aren’t the only one in this position. Poor agricultural and construction practices like using herbicides, pesticides, and other contaminants have damaged millions of acres of North American soil.

The good news is that this damage is reversible. Soil fertility is the foundation of strong plant and crop growth, and repairing it is possible and cost-effective. The process of bioremediation starts with an understanding of what makes soil healthy. The perfect recipe for healthy soil is composed of an ideal balance of organic matter, minerals, oxygen, water retention, and other life-sustaining elements.

The thing to remember is that your soil is not beyond repair. With the right plan, you can transform it from a hard, cracked desert to a lush, fruitful landscape. The steps may not be simple, but it’s worth the effort. After all, healthy soil is the foundation of a sustainable and successful garden.

Transition From Dirt to Soil with Compost

The first step in repairing damaged soil is to begin adding nutrients and structure back to the ground. This will take you from “dirt” to real “soil”. Organic compost and aged manure are the best and easiest soil amendments to improve soil health.

You can mix up an awesome batch of compost in a month or so, or you can buy it pre-made. Aged manure is easily found at the nearest horse, cow, or rabbit farm near you. Most farms (especially the horse-boarding type) are super happy to have you take the manure off their hands!

Of course, if you have your own animals, you can make use of their manure instead of sourcing it elsewhere. When you add compost or manure, you must add a lot of it to make up for the damaged soil. So get as much as you can possibly get your hands on!

Using a Lasagna Method to Amend the Soil

The best way to add your compost and manure is to apply a “lasagna” style of layering. This is sometimes better for the soil than double digging in the amendments and it helps reduce soil compaction.

Start with a layer of newspaper or cardboard, wet it down, and add a thin layer of compost or manure. Then, add a 6–8-inch thick layer of straw or chopped dry leaves, and top with a final thick layer of compost or manure. Making sure that erosion doesn’t wash away all the lovely nutrients you added is the next step in repairing damaged soil.

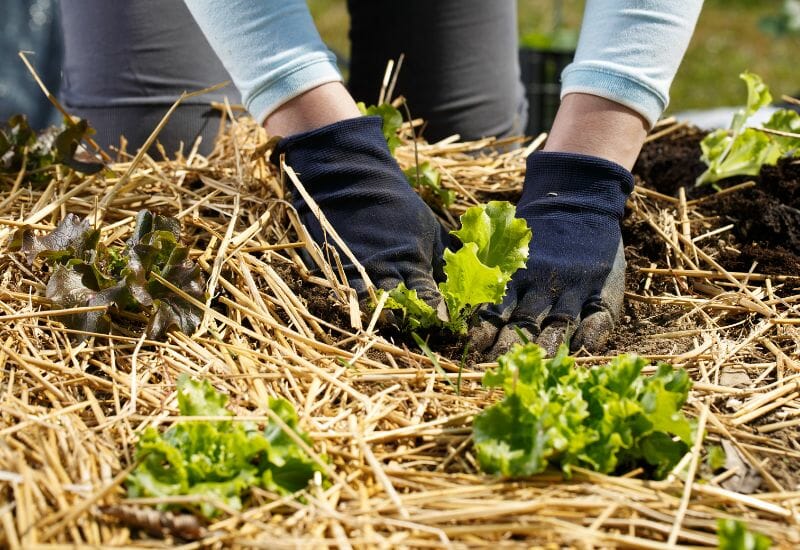
Keep Soil in Good Condition with Mulch

In nature, bare soil is never allowed to exist for very long. If a patch of earth becomes scratched up by an animal or washed bare by a flash flood, weeds quickly grow up and take over the bare soil. We can emulate this principle in our gardens by heavily mulching any bare soil in between our plants. By mulch, I don’t necessarily mean wood chip mulch, although it can be used in a Back to Eden garden.

The Best Kinds of Garden Mulch

  • Straw
  • Chopped leaves
  • Seaweed
  • Lawn Clippings
  • Wood Chips

They all work beautifully. I suggest using the one that is most easily accessible in your area of the world. Leaf mold is a great way to mulch your garden during the growing season and after. Leaf mold made from the leaves that already need to be cleaned up in your yard is an easy, green, and free option.

After you have planted your plants or your seeds have sprouted to a decent size, cover any bare ground in between the plants with your mulching material. This will keep weeds from growing as aggressively, help retain moisture, and help prevent your good soil from washing away.

Lettuce being planted in straw mulch.

During the “off-season” of gardening, make sure your soil is heavily mulched, or grow a “cover crop” to act as a fertilizer as well as hold your soil in place. To do this, simply sow your cover crop of choice, let it grow all winter, and then turn it under with a hoe in the early spring.

  • Winter Rye
  • Hairy Vetch
  • Clover
  • Cow Peas
  • Buckwheat

Selecting the right cover crop for your soil can make a huge difference in the success and growth of your garden.

When selecting a cover crop, it’s essential to understand the different qualities of varieties that you might choose and to think about how they will interact with the specific temperature and climate requirements of your garden. Every cover crop variety has different properties that make them beneficial, such as providing extra nutrition to the soil or suppressing weed growth. They also have varying temperature and climate requirements that can have a significant impact on the success of your garden.

Winter wheat is an ideal cover crop for moderate climates, as it can survive temperatures as low as 15 degrees Fahrenheit. The soil-enriching qualities of cool-weather clovers can only handle temperatures as high as 50 degrees Fahrenheit, so they must be planted in the early spring for the best results.

It’s wise to do some research to determine which cover crop best suits the needs of your soil. Consider the climate and temperature of your area, and ask around for what types of cover crops work best for similar gardens in the region.

Fix the Soil’s PH

At first glance, soil pH may not seem like a very important aspect of gardening. It’s actually a critical factor for ensuring success.

Using a rapid test to check soil integrity.

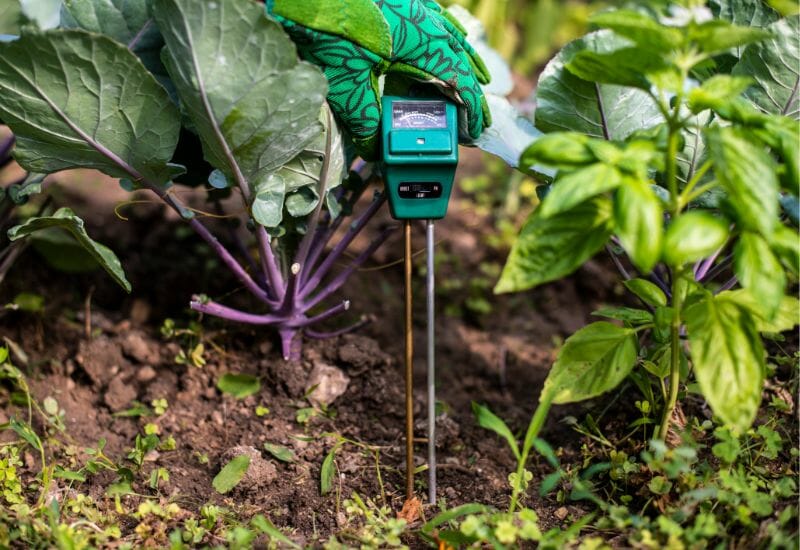
But what exactly is soil pH? It’s a measure of acidity or alkalinity, and it helps determine which nutrients, minerals, and microorganisms are available to your plants. With a simple soil test, you can quickly determine whether your soil is acidic, neutral, or alkaline. There are a few key indicators that can help you determine if your soil is on the acidic side. For instance, gardeners may notice that certain plants, such as azaleas, blueberries, and rhododendrons, exhibit growth problems within a few weeks of planting in soil with a pH below 6. If you’re using chopped leaves in your garden, then those acidic characteristics will be naturally present in the soil.

The good news is that if your soil’s pH level indicates that it’s a bit on the acidic side, you can easily and inexpensively remedy the problem with the application of organic garden lime. This natural soil amendment helps to lower soil acidity and raise pH levels. Lime is a valuable tool for maintaining a balanced soil environment and encouraging strong, disease-resistant plants.

Test Your Soil’s Key Indicators

Though testing soil pH may seem daunting, it’s an important and painless step that every gardener should take in order to ensure a successful and bountiful garden. With the help of a simple soil test and a few key indicators, you can quickly determine whether your soil is acidic, alkaline, or neutral. With a simple application of organic garden lime, balance it out and see your garden grow.

Frequently Asked Questions

Damaged soil often exhibits several signs, including poor plant growth, compacted soil texture, lack of earthworm activity, water pooling on the surface, and an imbalance in soil pH levels. Plants may look yellowed, stunted, or display signs of nutrient deficiencies despite adequate care.

While most soils can be rehabilitated with time and effort, extremely contaminated soils (e.g., heavy metals, toxic chemicals) may pose health risks and could be more challenging to remediate. In such cases, professional assessment and possibly replacing the top layer of soil might be necessary. However, these situations are relatively rare in home gardens.

The time required to repair damaged soil can vary significantly depending on the soil’s initial condition, the specific issues being addressed, and the methods used. Generally, noticeable improvements can be seen within one growing season, but achieving optimal soil health may take several years of consistent care and organic practices.

If you’ve found value in this blog post and enjoyed reading it, why not share it with your Pinterest community? Pin the image below and spread the love!

A pinterest-friendly graphic on how to repair damaged soil.

After applying these simple techniques, you will find your soil much more fruitful and easy to work on. As you continue to apply these principles each season, the soil will keep increasing in nutrients. Eventually, you will have completely repaired your damaged soil!

Have you faced challenges with soil health in your garden? Share your experiences and any unique tips you’ve discovered for rejuvenating your garden’s soil.

Leave a Reply

Your email address will not be published. Required fields are marked *

This site uses Akismet to reduce spam. Learn how your comment data is processed.

19 Comments

  1. How would you repair soil that has been under a large concrete driveway that has been removed? I do not know the age of the concrete or what chemicals have been leaching into the soil. I would like to grow vegetables and fruit.

  2. So I just mved to an Alpine area. The native trees to this area are multiple species of pine and Quacking Aspen. There doesn’t seem to be much variety in trees that are in the Nat Forest/Cal Conservation land around my house. According to long term residents (20+ yrs) my lot has been mostly meadow. However up until I bought it, it rental with parking on a majority of the yard. I’ve identified Lupine, Pineapple weed, a few yarrow plants, maybe something called false dandelion, possibly manzineta and random areas of grass that at some point a former resident tried to plant. All of which are growing in dirt rather than soil. I don’t want to rip what few natives I have how do I go abt encouraging meadow formation and improving/repairing the soil

  3. Ron Baumann says:

    I live in a trailer park. Last year I made a couple of 4×8 raised beds. I ordered some top soil, which I was told came from near a pond. Last year, the crops were great, but the soil had some amount of clay. Last fall I covered the beds with combination of home made compost, burned horse manure and a thick layer of chopped leaves. This spring when I planted my tomatoes I just dug the holes without disturbing the soil. It was a little damp from a wet spring but the holes were full of earthworms (promising) and I mulched them with cardboard, compost, dried leaves and grass clippings from my yard (no chemicals are used). Well, the plants didn’t grow or produce like I thought they would. And this fall, I’m left with rock hard cracked soil with a lot of roots that make it hard to even push a forked spade two inches in the ground. I’m sure some of the roots are from the plants but some may be from Creeping Charlie which runs rampid in my yard and around the beds. I’ve tried to keep them under control around the beds with mulch but I’m not sure if their roots make it up inside the beds. I’m at a loss, any ideas what to do? Thanks

  4. I am a gardening newbie and decided to try a vegetable garden this year. Unfortunately I do not think I prepared my soil appropriately because after a few hard rains my soil is crusted and cracking in places. I already have baby plants planted and so far they seem to be ok but what should I add to them to help repair the cracking? Or should I add straw in the rows?

    Thanks!

  5. My garden soil has a lot of clay in it and pinetrees nearby. But the killer has been a mold or fungus in the soil. The roots decay and the plants die. Any ideas ?

  6. Betty Rains says:

    My problem is: I cleaned my concrete porch with ‘Dawn ‘ liquid, (get rid of it, like a dummy) and where it ra off, onto the lawn, it must have totally destroyed something in the soil. as tje grass died and won’t revive, for about four iinches all along the edge, and left a trail of dead grass where it ran down a slope Do I have to dig down several inches and remove the damaged soil, before I replace it with good dirt? There needs to be an arlarm put out about ‘Dawn’ and it’s weed killing abilities, Makes me wonder what it did for the poor sea life that it was used on to remove oil. (AND to the surrounding areas!.)

    1. Mary Bryant says:

      It wasn’t the dawn, it was the chemical the dawn lifted out of the concrete

      1. Anonymous says:

        It was the Dawn. It contains many chemicals which burn plants and are toxic to aquatic life.

  7. Anonymous says:

    My problem is: I cleaned my concrete porch with ‘Dawn ‘ liquid, (get rid of it, like a dummy) and where it ra off, onto the lawn, it must have totally destroyed something in the soil. as tje grass died and won’t revive, for about four iinches all along the edge, and left a trail of dead grass where it ran down a slope Do I have to dig down several inches and remove the damaged soil, before I replace it with good dirt? There needs to be an arlarm put out about ‘Dawn’ and it’s weed killing abilities, Makes me wonder what it did for the poor sea life that it was used on to remove oil. (AND to the surrounding areas!.)

  8. my soil is covered in wood chips and dry grass and i dont know how to fix it . please help . ):

  9. im starting with compact dirt. anybody try covering the spaghetti method mentioned above with small pebbles? The idea being it would sit and develop for 1 year+ and we have a dog. I would imagine leaving the soil and manure uncovered would result in the dog tracking in some undesirables? thanks,

    1. Jessica Lane says:

      I’m not sure pebbles would be a good choice. We do Back to Eden where everything is covered with a thick layer of wood chips. That would keep the pup out and still help build nutrients. You can find more about the technique here.

  10. Don’t know why this website downs woodchips! Natural woodchips are a neutral compost that feeds the ground and benefits everything. Been using them for years and totally amazed with every aspect of them. How much longer my plants last and how much healthier they are. It’s a one and done deal. Deep rich, soft soil. Love it!

    1. Jessica Lane says:

      I’m not sure why you think we are against wood chips. I am a huge fan of Back to Eden Gardening. Most of my beds and containers are BTE. Check them out here.

  11. Julie @ Our Simply Abundant Life says:

    Thanks for this article! We have been trying to improve our very sandy soil. Our property was a former gravel pit and the soil is severely lacking in nutrients. Something that is confusing to us is that when we do the soil tests, the results always say the ph is very alkaline. However, we are surrounded by oaks and pines. We have always assumed our soil would be acidic, but the tests are confusing. We’re wondering if the lack of nutrients would have an affect on the ph? We’ve had some success with raised beds and composting for a small garden area, but unfortunately the fruit trees and blueberry bushes are really struggling.

    1. Jessica Lane says:

      You guessed right. Nutrient depletion can cause changes in PH. Also, trees don’t always affect the soil PH as much as people believe. When your soil is repaired and it is able to absorb things like fallen leaves and needles, then the soil may grow more acidic.

    2. Martial Law says:

      Blueberry plants love acidic soil

  12. Good points for gardening. Since we’re lucky enough to live on a family farm we have a small hill near the barn with manure, hay, straw etc. Some of it twenty years old. We have a roto-tiller that hooks to the three point hitch on the tractor and we work it in with that. I’m gonna make the guys work on the yard with it this year, too. New flower beds to combine with veggies! That red clay is slowly beginning to look like real soil! Unfortunately, it’s not enough to treat the fields.

  13. Angi @ SchneiderPeeps says:

    Hi Jess and Angi, this is a great article! We have both sandy and clay soil on our property. Our orchard is in a sandy area and our garden is in a clay area. We didn’t plan it that way, it’s just how it worked out. We’ve been working compost into the soil, adding mulch and using cover crops and it is amazing how both the sandy and the clay soil have improved.