Naturally Colored Sugar Cookies (Easy, Freezer-Friendly, and Perfect for Decorating)
Make these naturally colored sugar cookies with simple ingredients and plant-based dyes. Easy to roll, freezer-friendly, and perfect for decorating.

There’s something about a sheet pan full of sugar cookies that just feels like the holidays. In my kitchen, sugar cookies are the recipe I reach for when I want something dependable, simple, and pretty enough to share, but simple enough that I don’t lose my mind making them. And honestly, I’ve made these cookies so many times over the years they feel more like muscle memory than baking.
The real fun, though, is in the decorating. I’ve pretty much switched over to natural colors at this point and using India Tree’s Nature’s Colors gives me those bright, happy shades without the synthetic dyes. If you’ve ever tried coloring cookies with beet juice, you already know why I switched.
I’ll walk you through my go-to sugar cookie dough, how I mix naturally colored icing, the quirks that come with natural coloring, and the small lessons you only learn after rolling out tray after tray. You’ll also find freezer tips, troubleshooting advice, and answers to the questions people ask most once they try natural colors for the first time.
Why I Keep Coming Back to This Recipe
Sugar cookies can go wrong in a dozen different ways. Too much spreading. Too tough. Not enough flavor. I’ve been there for all of it. These cookies are soft but sturdy, flavorful, and easy enough that you can make a double batch without breaking a sweat.
The dough chills beautifully and rolls out without cracking. The edges hold their shape in the oven. And because the flavor stays neutral, your colored icing really stands out. If you’ve ever wondered why some batches work and others don’t, you might enjoy the tips I gathered in my guide on how to bake better cookies from scratch.

Ingredients You’ll Need
For the Cookies:
- All-purpose flour
- Salted butter, softened
- Sugar
- Large eggs, room temperature
- Vanilla extract
- Baking powder
- Salt
For the Icing:
- Confectioners sugar
- Milk or light cream
- India Tree’s Nature’s Colors natural food coloring
The icing is intentionally simple. This is my ‘I need icing now’ recipe. It softens slightly when applied, then sets enough to stack.
Step-by-Step Instructions for the Cookies
Start by creaming the softened butter and sugar until the mixture looks pale and fluffy. It only takes a minute or two, but it makes a noticeable difference. Mix in the eggs and vanilla. The batter may look a little uneven at first, but it smooths out once the dry ingredients go in. In a separate bowl, whisk together the flour, baking powder, and salt, then add it to the mixer on low just until the dough comes together. Once you no longer see dry flour, stop mixing so the cookies stay tender.
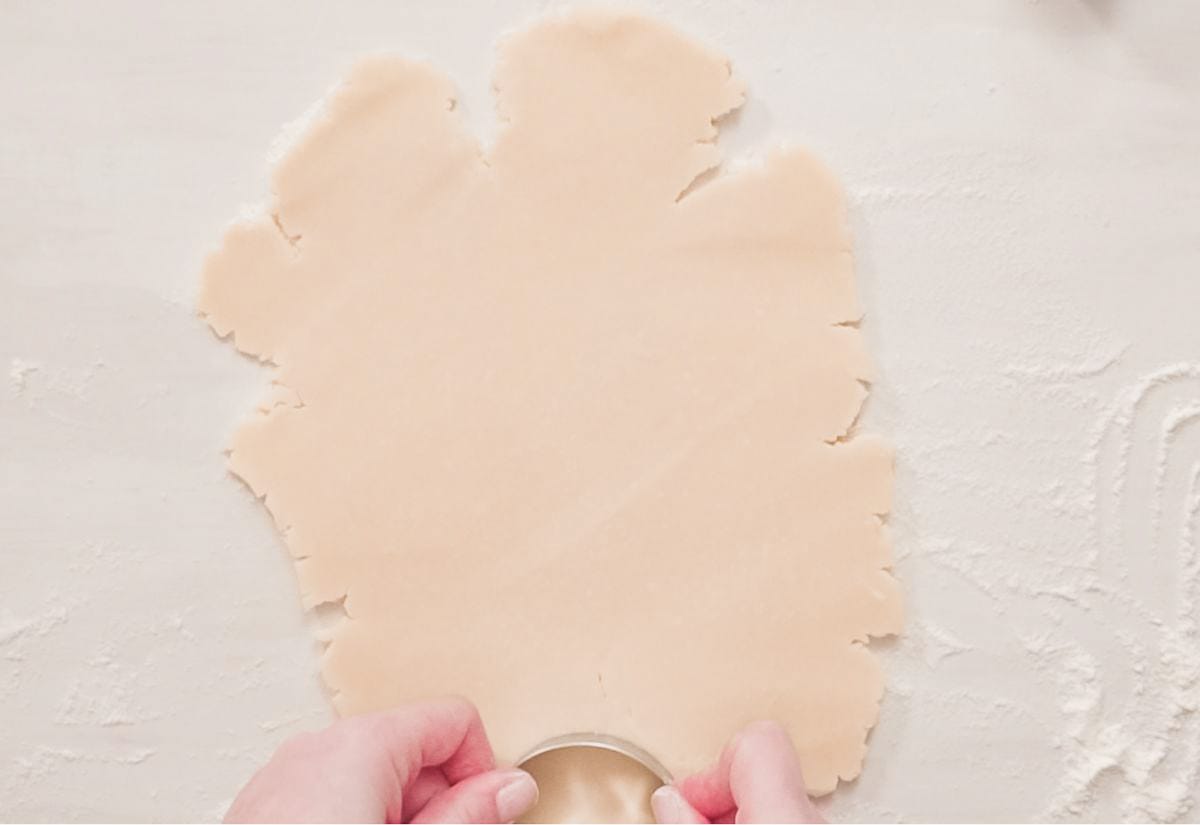
Divide the dough into two pieces, flatten them into discs, and wrap tightly. Chilling for at least an hour firms the butter and makes rolling easier. When you’re ready to bake, warm one disc on the counter for about five minutes. You want it cold enough to hold its shape, soft enough to roll without cracking. Roll the dough on a lightly floured surface to about ½ inch thick and cut out your shapes, placing them an inch apart on a parchment-lined baking sheet. Gather the scraps, re-roll once, and cut again.
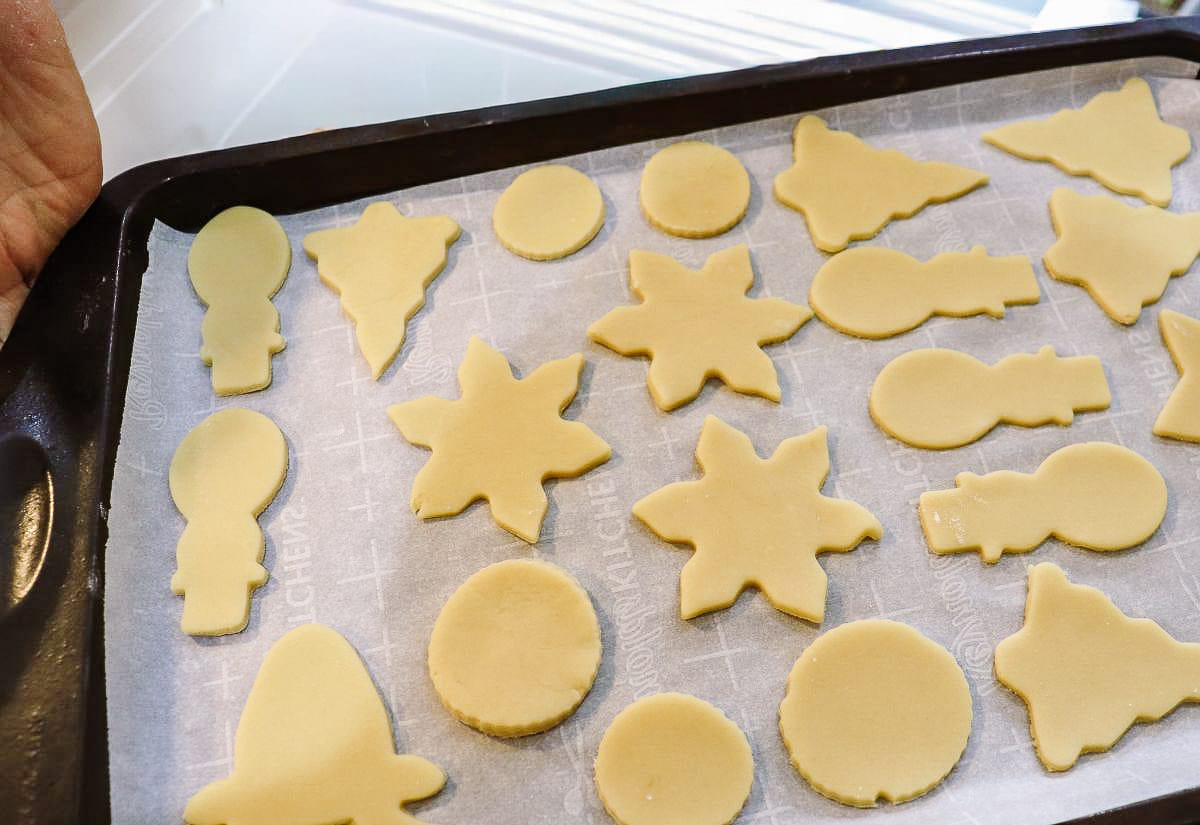
Bake at 350°F for 9 to 10 minutes, just until the edges look set. The centers should still be soft; they’ll finish cooking on the warm baking sheet. Give them a five-minute rest before transferring to a rack. Repeat with the second disc or save it for a later baking day.
How to Mix Naturally Colored Icing
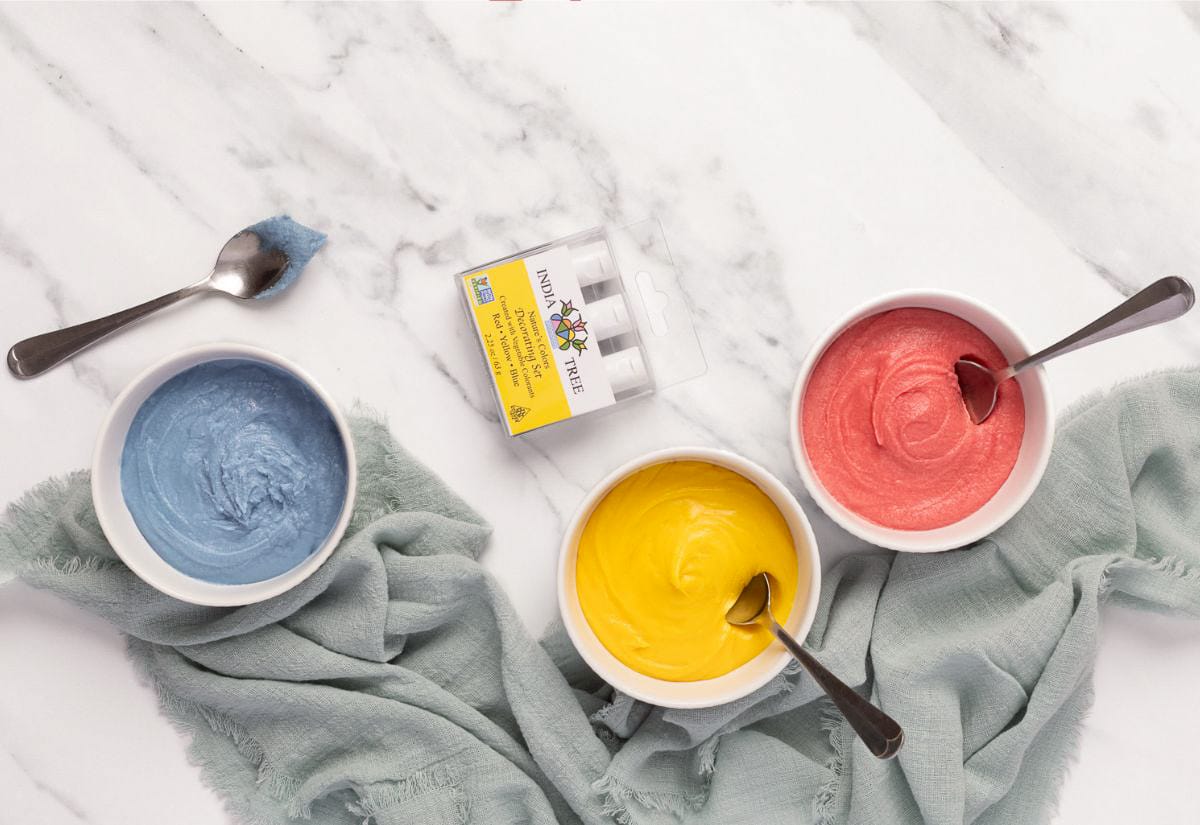
To make the icing, whisk the confectioners sugar and milk together until smooth, starting with the smaller amount of milk so you can adjust as needed. A slightly thick icing gives you more control and won’t flood the edges of your cookies. If it’s too stiff, add milk a few drops at a time. IIf it gets too runny, sprinkle in more sugar until it thickens back up.
Divide the icing into small bowls for coloring. Natural dyes behave differently from synthetic ones, so add India Tree’s Nature’s Colors a drop at a time and let the color sit for a minute before adjusting (natural pigments deepen as they rest). Work from a white icing base to keep your colors bright, and adjust thickness based on how you plan to decorate. If you want clean outlines, keep it thick. If you want that soft glossy look, thin it just a touch.
If you want that pretty marbled look, place two shades side by side and swirl them gently with a toothpick. If you like experimenting, I’ve shared how I make natural green dye too.
Tips for Getting Vibrant Natural Colors
Natural dyes get a bad rap for being muted, but you can get some really nice color if you:
- Add color slowly and let it rest before adjusting.
- Use white icing as your base.
- Keep in mind that natural blues and purples often deepen after 5–10 minutes.
- Test one cookie before committing to a whole batch.
When I’m working with blues, I mix two little bowls (one lighter, one darker) and swirl them on the cookie with a toothpick until they look wintery and soft.
Troubleshooting Natural Food Coloring
Here are a few things I’ve run into after working with natural colors for years:
The color looks too soft? Let it sit for a few minutes. The color deepens as it sits.
The icing won’t thicken? Add more powdered sugar, a tablespoon at a time.
The icing looks dull once it dries? This often happens when the icing is too thin. Thicken it slightly next time.
My colors faded in the oven? Save the color for the icing. Natural dyes fade fast in the oven.
If you want more guidance on cookie texture, shaping, or avoiding spread, I shared everything I wish I’d known sooner in my list of simple tricks for better cookies.
Make-Ahead, Storing, and Freezing Tips
one of the things that keeps me sane during December. I usually mix up a double or triple batch in early December, wrap each disc tightly, and stack them in the freezer. They thaw beautifully and roll like fresh dough.
- Freeze unbaked dough for up to six months.
- Freeze baked cookies (undecorated) for up to three months.
- Decorated cookies stay good on the counter for a few days.
If you’re constantly volunteering (or being volunteered) to bring cookies, these naturally colored cookies pair beautifully with the elegant, seasonal treats in my roundup of Christmas cookies that always impress a crowd.

More Cookie Inspiration
If you love playing with color, my holiday pinwheel cookies use these same India Tree natural dyes, and they swirl into the prettiest patterns. They take a little more work, but worth it when you really want to turn heads at a cookie swap.
Your Questions About Natural Cookie Coloring
Still have questions? Here are some of the things people often wonder once they start decorating with natural food coloring.
Pin this to save the recipe for your next cookie-decorating day.

If you’ve been wanting to ditch the synthetic dyes (or just try something new) these naturally colored sugar cookies are a friendly place to start. The dough is forgiving, the icing is simple, and mixing colors is honestly the fun part.
If you make a batch, I’d love to hear how your colors turned out. Leave a comment and tell me what colors you ended up using.

Soft Cut-Out Sugar Cookies
This post may contain paid links. If you make a purchase using the links in this recipe, I may earn a commission.
Equipment
- Cookie Cutters
- Rolling Pin
- Parchment Paper
- Plastic Wrap for chilling dough
Ingredients
For Cookies
- 2½ cups All-Purpose Flour
- 2 large Eggs room temperature
- 1 cup Sugar
- 1 cup Butter salted, softened
- 2 teaspoons Vanilla Extract
- ¾ teaspoon Baking Powder
- ½ teaspoon Salt
For Icing
- 1 cup Confectioners Sugar
- 2 tablespoons Milk or light cream
- Nature’s Colors Food Coloring by India Tree
Instructions
Cookie Instructions
- Cream the softened butter and sugar together in the bowl of a standing mixer until light and fluffy.1 cup Butter, 1 cup Sugar
- Add vanilla and eggs and beat until combined.2 teaspoons Vanilla Extract, 2 large Eggs
- Whisk together the flour, baking powder, and salt in a separate bowl, then add it to the mixer on low speed. Mix just until the dough comes together (avoid overmixing).2½ cups All-Purpose Flour, ¾ teaspoon Baking Powder, ½ teaspoon Salt
- Divide the dough into two equal portions. Shape each into a flat disc and wrap tightly in plastic wrap.
- Chill for at least 1 hour or overnight.
- Preheat the oven to 350°F. Line two large cookie sheets with parchment paper.
- Let one dough disc sit at room temperature for about 5 minutes so it softens slightly.
- Roll the dough on a lightly floured surface to ½-inch thickness. Cut out shapes and place them 1 inch apart on the baking sheets.
- Re-roll scraps once and continue cutting until all dough is used.
- Bake for 9–10 minutes, or until the edges look set but not browned.
- Cool on the baking sheet for 5 minutes, then move to a wire rack to cool completely. Repeat with the second disc.
Icing Instructions
- Add the confectioners sugar to a medium bowl.1 cup Confectioners Sugar
- Add milk and whisk until smooth, adding small splashes of milk only if needed to reach your desired thickness.2 tablespoons Milk
- Divide the icing into small bowls and tint each portion with your chosen shades using India Tree’s Nature’s Colors.Nature’s Colors Food Coloring by India Tree
Notes
- Butter temperature matters. Too cold and it won’t cream. Too warm and the cookies may spread.
- Don’t skip the chill time. The dough needs time to firm up so the cookies hold their shape.
- Thickness affects texture. Rolling to ½ inch gives you soft, sturdy cookies that decorate well.
- Natural dyes develop over time. Let your tinted icing rest for a minute or two before adjusting the color.
- Freeze the dough. Wrapped tightly, the discs freeze beautifully for up to 6 months (perfect for holiday prep).
I am awed that you were able to create such a beautiful rainbow of colors from the basic 3 primary colored food colorants, Jess! The free form icing makes the cookies look like an artist’s palate! Often, simple is the BEST.
I like these – simple and beautiful.
How fun! I love these. You did a really great job with the colors, these would be really fun at Easter.