The Theory Behind Back to Eden Gardening
The concept behind Back to Eden gardening is to cover the soil, mimicking nature, so the soil is not exposed to harsh elements.
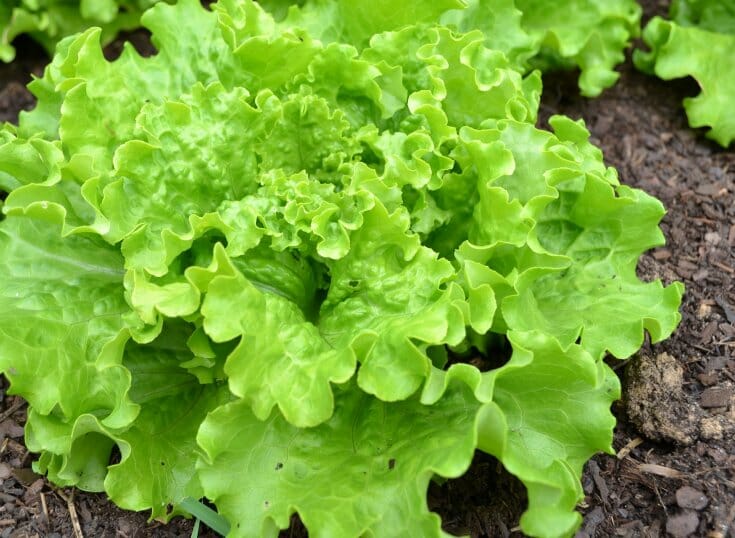
In this post, I’m unraveling the fascinating theory behind this approach that promises bountiful harvests with minimal fuss. Whether you’re a seasoned gardener or just getting your hands dirty, understanding the principles of Back to Eden gardening could be the game-changer your garden needs. So, grab your gardening gloves, and let’s explore the secrets of cultivating a thriving, low-maintenance Eden in your backyard!
So many exciting things happened on The 104 Homestead during the 2014 season. We increased our duck flock to keep up with egg demand, and we added quail to our homestead, but most exciting is that we changed the way we garden.
Wait… there’s more than one way to garden? Why yes, my friends, there are many ways to garden.
Common Gardening Methods
- The Traditional Method: A single plot garden where plants are tended (weeded, watered, amended) on a regular basis.
- No-Dig Method: Narrow rows of plants that are composted from the top and not turned. A common term for this style is lasagna gardening.
- Raised Bed Method: Framed mini-gardens where the soil is specially made or purchased.
- Square Footage/Intensive Planting Method: Planting in a grid to maximize the use of space in the garden.
Of course, each of these methods can utilize even more gardening methods, such as permaculture concepts like swales and hugelkultur, as well as companion planting, deep mulching, etc.
The gardening method I’m going to introduce you to today is Back to Eden gardening. It incorporates several of the common planting methods but with a twist. This is going to be an honest review of the method as it applies to where I live. I’m going to share our experience throughout the 2014 growing season and beyond. The good, the bad, and the just plain ugly.
What is Back to Eden Gardening?
I’m not big on sitting and watching documentaries (especially those with a strong religious tone), but this one is worth watching. The creator, Paul Gautschi, explains the idea in depth far better than I could.
So I throw out some wood chips, and I’m good?
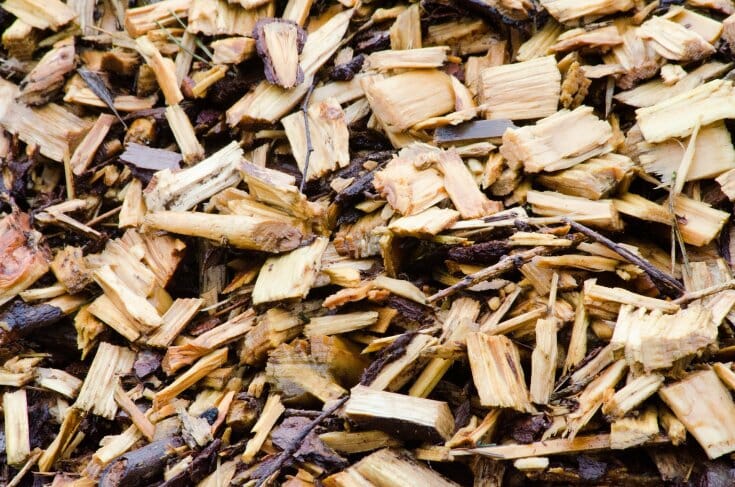
Well, not exactly. That seems to be the takeaway that many people get from the film. Unfortunately, it’s not quite that easy. First, although Paul prefers wood chips, he mentions that you should use whatever natural materials you have in your area. It’s all about keeping moisture in the soil and the harsh elements of blazing sun and winds out. Some great covering options, if wood chips aren’t available, include grass clippings, leaves, animal manures, straw, and even rocks. For my case study, I’m using wood chips because I was able to get some from my tree guy, Eli of Hutch’s Property & Tree.
What about nitrogen?
Now, it’s not just about covering the soil. Again, that’s what people seem to take from the film and nothing more. There are two things you need to know that address the nitrogen aspects of Back to Eden gardening.
First, you need to layer with the covering, not mix the covering. If you mix wood chips into your soil, it certainly will lock up the nitrogen in the soil. It drastically reduced the quality of my compost.
2021 UPDATE: I use sand inside my coop for a multitude of reasons, and I put wood chips from my arborist in the chicken run to help with drainage and to later use in my garden.
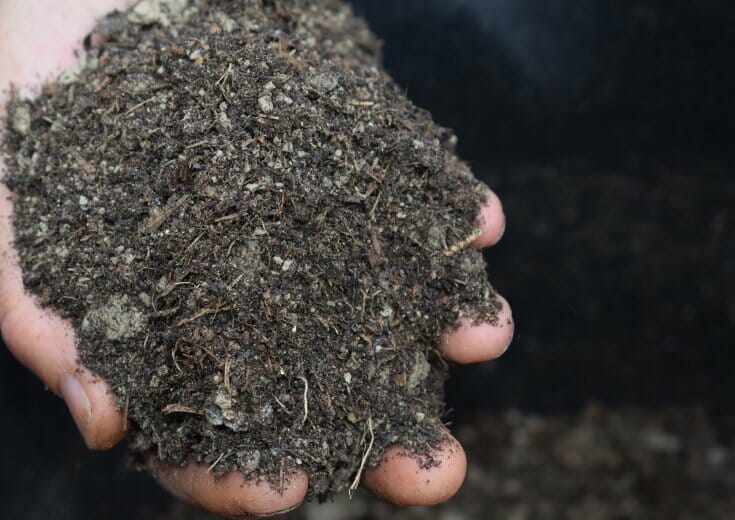
Second, you need to spread compost in your garden regularly. Cue the chickens! Paul mentions in the film how chickens are a great companion to the Back to Eden gardening method. They have wonderful high-nitrogen manure, and they love to break down the compost. I am lucky enough to have a whole flock of hard workers, ready and willing to put their time into my gardens. Much like Paul does, all yard and kitchen waste goes right in with the chickens. They do all the hard work for me (I’m a firm believer in working smarter, not harder).
2021 UPDATE: Like above, this all happens in the chicken run now. I used to have a bin for yard waste and kitchen scraps that the chickens could access, but now we just toss it in the yard, and they eat what they want and scratch up what they don’t, allowing it to break down quickly.
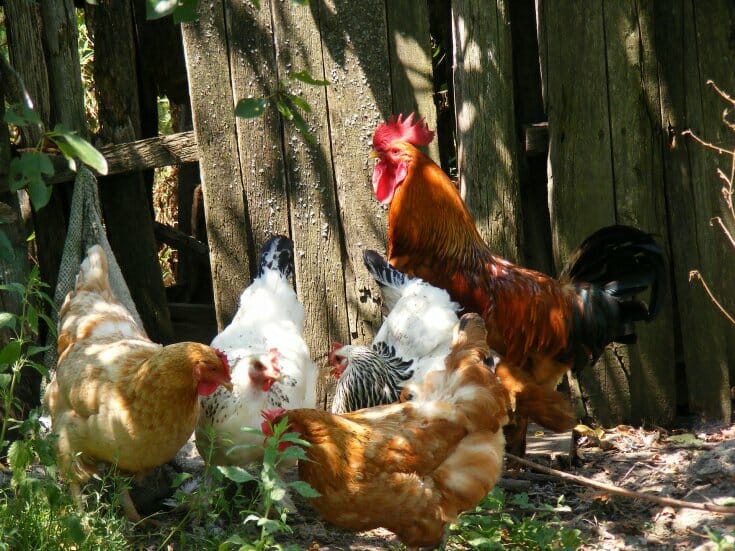
Throughout the growing season, I can access the wonderful compost my chickens have provided me and spread it in the gardens as I see fit. With Back to Eden, you can’t overcompost. The covering acts as a filter of sorts, creating marvelous compost tea every time it rains.
So when can I start Back to Eden gardening?
Last fall. Oops!
Did you, like myself, get bit with the Back to Eden bug over the winter or spring? Not all hope is lost. Starting a Back to Eden garden in the spring has its challenges, but it can be done. The reason why most people start in the fall is so that your coverage layer has a chance to break down before planting season. Our goal with spring starting is that we want to accelerate that breakdown so that our covering doesn’t lock up the nutrients in the soil. The best way to do this is to add high-nitrogen elements such as chicken manure and even urine and keep the garden moist (not drenched, or you’ll be opening a whole new can of worms – or slugs).
Another consideration when starting a Back to Eden garden in the spring is how you plant. Regardless of when you begin your garden, you always need to be sure you are planting in the soil and not in the wood chips. This is even more important in a spring-started garden. When planting, push the wood chips or other covering back away from the planting area until the plant is well-established. Once the plant is established, you can push the covering back in place.
Our Back to Eden Garden Experience

Getting Started
This month in our experimental garden, we are putting the “you can use any type of wood chips except Eucalyptus” theory to the test. I’ll be honest: it was not my intent to check the validity of this statement. My friendly neighborhood tree guy, Eli, gave me a call saying he had a truckload of chips, and I was so eager to get that first layer down that I sort of tuned out the word Walnut.
Eli mentioned something about the trees containing juglone, a growth inhibitor, but I kept thinking to myself, “But Paul said…” After receiving the chips, I did my homework and thought, “Oh crap.” I am still standing by my belief of what Paul said, but bet your bum I’m working extra hard to encourage those juglone toxins to dissipate quickly. I also made sure not to spread the walnut chips anywhere near the future planting sites of potatoes, peppers, and tomatoes since those seemed to be the most susceptible to juglone toxicity. Time will tell, and I promise to share the good, bad, and just plain ugly…
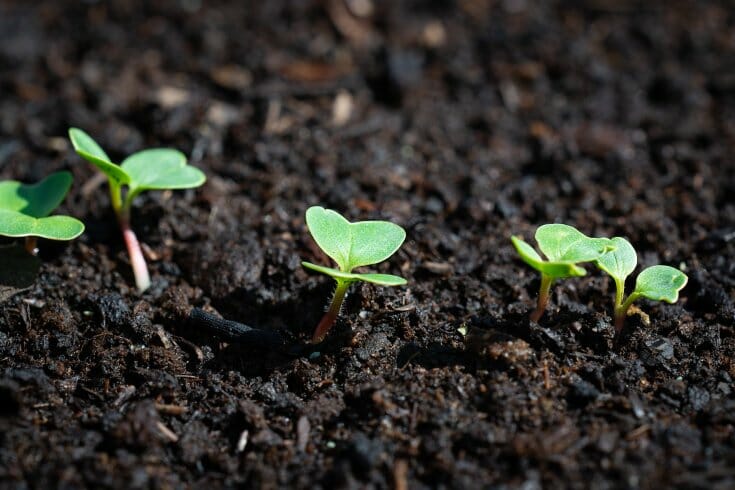
The Good
Where once there was almost pure sand, after only one year, we have rich, beautiful soil. My son has joked about starting a worm business for people headed fishing down the road. Such a little entrepreneur.
We barely water anymore. Once the seedlings took hold, nature pretty much took it from there.
The first year resulted in some leaf discoloration, but it didn’t affect the quality or quantity of the vegetable production. Every year after that first year, it just kept getting better and better.
Juglone did not end up being an issue whatsoever. We’ve used chips from a large variety of tree species (probably every kind that grows in Maine at this point), and we haven’t had a problem with any of them.
The Bad
Germinating carrots was a bit of a pain in the butt. Any time it would rain, the wood chips would wash down and crush the little seedlings, no matter how far I pulled them back away from the planting site. I did find a cool workaround that helps with germinating carrots in general.
Cucumbers sometimes bury themselves in the wood chips, making it hard to find them. This was only really an issue when they were little and I was harvesting whole baby pickles.
Again, the first year, we had some yellowing leaves. It didn’t hurt anything, but it did lead to me panicking unnecessarily.
The Ugly
There was none! Five years of Back to Eden Gardening, and it was the most beautiful garden I’d ever had.
Frequently Asked Back to Eden Questions
If you’ve found value in this blog post and enjoyed reading it, why not share it with your Pinterest community? Pin the image below and spread the love!
As we wrap up our exploration into the theory of Back to Eden gardening, it’s clear that this approach is more than just a gardening technique—it’s a philosophy that harmonizes with the earth’s natural rhythm. From creating nutrient-rich soil through deep mulching to the symbiotic dance between man and nature, the Back to Eden method offers a holistic perspective on cultivating a garden that’s not just sustainable but abundantly fruitful. So, as you venture into your own Eden-inspired garden, remember that the key lies in working alongside nature, letting it thrive, and reaping the rewards of a garden that’s both resilient and rich with life.
What’s your take on the Back to Eden gardening theory? Have you tried implementing these principles in your garden, and if so, what were your results? Whether you’re a seasoned Back to Eden enthusiast or just getting started, I’d love to hear your thoughts, experiences, and any tips you have for cultivating your own thriving Edenic paradise! Drop your comments below, and let’s grow this conversation together.

From what I understand, each year you add more mulch to the top. But when you plant, you need to pull back the mulch to get to the soil. Doesn’t the soil get too deep then? Or is the idea that the bottom of the mulch has broken down and so then the next year when you add more mulch then when you dig down to “soil” it is actually broken down mulch from the previous year?
Thanks for the mention of interviews with Paul on YouTube, I will check that out. I think his theory makes a lot of sense, just wish we could have seen his garden when he first started. Obviously my pile of mulch doesn’t look like his soil – and now I’m overrun with slugs! Now trying to make leaf mould in a separate pile, so I can get the water retention benefits without the mulch complications. BTW, for those of us trying this in the Southwest, keep in mind Paul gets a ton more rainfall in his “I never water it” system!
I have noticed rose growers are big believers in mulch as fertilizer and soil improvement. Maybe I can find some tips in their articles. 🙂
Paul’s chips have already decomposed in to a 2 foot deep ‘planting medium’.
To reproduce that you would want to first get that in the form of well-aged composted manure and also enrich with nutrients.
He does not put chip directly on the garden any more; he fetches it from the chicken run.
The other aspect to Paul’s garden in his clay soil acts as a reservoir of water and nutrients. Nice, because they won’t leach nutrients away and also all moisture is preserved.
I enjoyed reading your article. Is there a way to subscribe so I can read more?
Thanks
It seems like most of those who are using the wood chip cover for their garden are using freshly shredded tree limbs. Can anyone tell me if it would work the same if I used the commercial bagged wood chip mulch sold at stores like Lowe’s and Home Depot?
It does not! It is preferred to chip your own tree limbs/branches on sight with a wood chipper (so that you have both “green” and “brown” material instantly to break down) but I personally started at our currently location (we are an “active duty” home) with natural cypress from my local mulch yard.
where i live Eucalyptus trees are in abundance most of the “free” mulch comes from trees that have been cut down locally. Can i use Eucalyptus mulch for starting BTE garden ?
If I’m using wood chips as bedding inside my chicken coop and then transferring it outside to the chicken run to have kitchen scraps and yard waste added into the mixture and letting the chickens “compost” this so to speak, should I wait a certain amount of time for the chickens to compost this mixture? How long would you leave this mixture in the chicken run to breakdown before using it in the garden? a month or 2
Yes! Let me know about the juglone. I just watched BTE a few days ago and am blown away. My husband and I just literally just built 12 8×4′ beds and now I’m so tempted to dismantle them and throw away the (big) money we spent. Oy vey. Anyway. I just sent a letter to paul about Walnut chips and many other questions regarding implementing this into our unique space.
I adore Paul and personally love that he is able to spread the Gospel through gardening. It’s such a wonderful testament of His love for us.
Good luck on your experiment and let us know how it all works out.
Me too, I love everything about what he teaches, especially God.
I wouldnt get rid of your expensive raised beds yet. My plan is to start small with this method and try one bed at a time, replacing as I go. Most of the gardeners I watch on Youtube have a variety of different styles of beds in their garden from no till to square foot, to full on tall raised beds.
What’s wrong with a strong, religious tone? Just curious? God gave us this earth to garden in, right. I love the Lord and all provides!
Some folks really dig strong religious tones. Some don’t. I am glad that we are able to do our own thing with respect to religion.
Well here’s the thing. I completely respect your right to your beliefs. But often times I see them forced into discussion about self-sustainment and homesteading. It’s FINE if religion is your main motivation for doing this, but I think we want to be welcoming to everyone who is interested in being more self-sufficient. And you may not mean it to, but it starts to make the lifestyle feel very exclusionary of those who aren’t into your religion. Religion isn’t why I’M doing this.
And let’s clarify here, it’s always Christianity we’re talking about. So if I’m, say, Wiccan, atheist, hindu… why turn all those people off? It would be very much like my pushing my political preference into every discussion about homesteading.
I’m not sure what you’re trying to say Lori. I’m an atheist and I was merely pointing out that although there is a strong Christian message in the video, I found it very helpful and educational. I don’t feel I was saying there was any connection to religion and sustainability/self-sufficiency.
what does GOD have to do with religion?
Religion is Man’s attempt to control GOD
Wow, this is all so exciting. I first saw BTE about 3 years ago, and decided then I was going to buy a piece of property, and try my hand in farming. Well, I just purchased 4 acres in Northern Ca, for me, it wont be hard, this is farming county, but all the old ways. I am looking forward to using BTE…
The research shows not only that you don’t need compost, but just woodchips works even better
“This study confirms the fact that wood chip mulch is the best mulch for the garden. Over time it loosens compacted soil, adds organic matter, keeps moisture levels up and slowly adds nutrients to the soil.
Compost works too, but it can add too many nutrients to soil. This problem is being seen by more and more organic gardeners who are experiencing very high nutrient levels, even to the point of becoming toxic. You can have too much organic matter.”
http://www.gardenmyths.com/mulch-how-does-it-affect-soil/
I live way across the country in NM. In watching some of the other videos with Paul he said that given enough time he could turn the desert green. We had just started using the BTE garden method in Indy when we moved to NM. We had lived here before-many years ago. We live just on the NW corner of Albuquerque in a village called Corrales. 9000 people, 2000 horses. There are 3 sets of acequias (water ditches) coming from the Rio Grande that run N and S. There are men who open and close the water gates so everyone–in the lower parts of Corrales can have access to flood irrigate their land. I happen to live about 200 ft above the valley floor along with 1/2 the population of Corrales. We do not have access to these waters. But we all have wells. Mine is almost 300 ft deep and tastes so good! It comes from a mt range 50 miles away. We can use all the water we want. When we came we were excited to try out the BTE method here, in the high desert. We live in sand with some clay-but not much. (Unlike those on the valley floor) We had a tough time at first getting someone to give us their chips. We have alot of trees along the Rio Grands and in Corrales. You could almost think you were out east! We had to use alot of mushroom compost, potting soil, and alpaca poop in order to have something to plant in. It was a miserable failure, except for spaghetti squash and finally carrots. The alpaca poop, which is not hot, unfortunately gave our tomatoes alfalfa mosaic virus. Alpacas here eat nothing but alfalfa-which is all GMO. During the fall we got a lot of chips that we spread after laying several layers of paper down. Toward winter we dug down to look–full of grubs!!!!! Found out that grubs will only eat plant roots when there is no dead matter to eat. They were breaking down the chips! We don’t have worms here. We would spread chips 6 inches deep. Now, for the lessons. Chips need water to break down. We never got rain and only a few inches of fast disappearing snow last winter. We never thought about having to water the chips. If they don’t get water-alot of water-they will just sit there and bleach in the sun. So now, we water the ground heavily before laying the paper, water the paper, put an inch or 2 of chips, water heavily, and lay more chips that we then water. Once a week I water my whole 1/8 acre garden heavily in the hopes that they will break down. I still can not go more than 2 days without watering everything as the air temp sucks the leaves dry and they use everything under the chips. Oh yeah, I did what Paul suggested for strawberries:cover with 6 inches of chips and the following year the mothers will die off and you will have a ton of daughter plants that come up the following spring. NOT EVEN. Less than 1/4 of my strawberries regrew and have produced nothing. I was so disappointed. They are our favorites. I also had leaves die on everything whenever they would touch the chips. We carry on in the hopes of making some soil. We have a very large 3 compartment compost, 8 laying chickens, and a co-op which gives us their overripe vegetable and fruit trimmings, and coffee grounds. The chickens get what they can eat, we cull what is still usable for us, and the compost gets the rest! We also found a source for worm castings by the 5 gal bucket! Hopefully within a few years (before I die) we will have a great market garden!
Oh my! I too live in NM I live west of Albuquerque. The soul here is horrible. I have been working my garden for 3 years and still have a hard time growing things. It has been so disheartening. I can grow potatoes fairly well haha this year I ordered some seeds from bakers creek. The magnolia sweet pea is growing really well. I have some barnside runner beans growing ( not as well as I think they should ). I have some chickens and where they have abundantly pooped I now have some beets growing. Potatoes are doing great. Maybe next year will be even better haha
Thanks for this post! We just moved into our own house about a month ago, so I’m definitely on the spring-starting end of Back to Eden Gardening. I just put a thick layer of oldish horse manure from the farm down the road on a layer of cardboard right on top of the grass… I guess my uneducated combo of lasagna and BTE methods? I’m planning on planting beans right into the manure because they put nitrogen in the soil, and maybe some simple things like zucchini too. Does that sound like a good idea, from your experience?
Hi, love your blog and this article has interested me for a while and I’m trialling a patch here soon. How do you know when to stop watering the seedlings and when to water later? Thankyou
Just watch your plants and they will let you know. With seedlings, I like the soil to stay damp. You will see them really take off and that’s when you can cut back on watering.
The thing that confuses me, is using from the chicken area without a composting period. I understand that the chickens do the work. Yet the chickens are still pooping on everything until right when he puts it on. What about ecoli?
We do the same with our hens here, but I have always felt the need to compost it six months away from the animals for safety. It would be so nice to just use it straight from the coop.
Often people “compost” the manures for 6 months because chicken manure is hot and you risk burning tender plants. Having said that, we free range often and since my chickens aren’t diapered, there are obviously many fresh droppings throughout the garden. We’ve never become ill from food consumed from the garden and our plants have never suffered (at least not due to hot manure – more often it’s crops wiped out from overzealous scratching). As far as e coli, I don’t worry too much. Healthy hens have a very low incidence of e coli. Most backyard hens are healthy. It’s the factory hens that often carry e coli.
The thing about E. coli is that it is, literally, everywhere- on your clothes, on your phone, on your shoes, in the air you breathe, on your chair, in your mouth. In a healthy adult with a decent immune system, it won’t hurt. The strains of E. coli that make people so sick are the ones typically found in beef intestines from cows that aren’t fed grass like they should be. It can found in their manure as well, which is often where it shows up on produce. Wash your veggies before you eat them, and you should be just fine.
I’ve met Paul (I live in Washington and he lives in Squim…he has a tour you can take on Sundays at his house… we did the method and the first year it produced like CRAZY…but I think your having chickens (and the poop) helps a lot. He just takes a wheelbarrow and dumps the poop on his garden, orchard, etc…it looks great… helps tremendously…We didn’t put manure or compost on the wood chips over the winter and after 3 years it hasn’t produced as well so I would use the manure and compost maybe after the season is over and let it cook over the winter…I was also told by a nursery to plant beans and peas in Sept and let it go into the soil over the winter and that should help the soil with nutrigen… I also have the wood around my trees… had TONS of peaches, pears, cherries, but this year, NO apples… strange. With that said my strawberries have gone all over the place! Paul also doesn’t give his chickens any bedding…less mess he sais…even in winter~ He is quite a character!
My chickens certainly make a big difference in our gardens. I also compost in the chicken run, so it’s a great multi-purpose system out there 🙂
Everyone misses this. Not just wood chips. Branchs with leaves. The minerals are in the leaves. If your using straight chips add leaf mulch, needles. Plus wood ash in the chicken pen, yard waste, egg and kitchen waste, and the chicken beding is chips.
Don’t add pine needles . nothing much grows in a pine forrest because there are inhibiting chemicals in them!
Don’t use pine needles for anything except blueberries. Pine needles are a must for blueberries, just let them decompose right beneath the bushes
Paul does use his chicken soil on his vegetable garden, but it is not absolutely necessary. It will encourage more production and sooner, especially if you are just starting out. But keep in mind he has never used any fertilizer on his orchard. We have a back-to-eden garden at our church and in three years we’ve never used fertilizer (or water, except to start seed if the ground is dry) We started with a layer of compost beneath the chips as the film recommends from the garden started in Pennsylvania. But once the chips are breaking down, there is no need to fertilize.
Look up Emilia Hazelip’s film about synergistic gardening. Plants synthesize most of what they need from the atmosphere as long as the soil is healthy and remains uncompacted. The woodchips provide protection for the soil life as well as prevent compaction, which is why you can walk all over Paul’s garden without compacting the soil. The b-t-e method takes time to establish and I think most people are in a hurry to see a result. Using a little manure to feed the soil is fine, but the principle operating in the method is one of creating healthy soil using a covering. It will work without manure.
Thanks for promoting this transformational method of gardening! Blessings on your blog and all your gardening!
Great post! We’ve been meaning to get this started this year but time gets away from us lol. Luckily we aren’t doing any gardening this year so it’ll have lots of time to decompose once it gets done, Thanks for the info!
So far I’ve been very happy with it. Especially the watering. I’ve only had to water a few times.
You’ve touched on one of the questions I had after watching the documentary. The ongoing addition of manure or compost. I’m very curious where you found the answer. He never actually says that he puts manure or compost on top of the wood chips, does he? Or did I miss it??? Your comments about the tea make sense, but I wonder about burying the wood chips.
Thanks!
He mentions it briefly when he talks about how all plant scraps and kitchen scraps go to the chickens. There are YouTube videos that go a bit more in depth with interviews with Paul. As soon as I remember the name of the guy that does interviews with him, I’ll send you a link to the guy’s page.
L2Survive has alot of personal interviews with Paul on you tube.
I’m excited for your experiment. I had not heard of Back to Eden until a couple of years ago but we have been using some of his ideas for years. It gets so hot here that we have always put a layer of leaves on our garden.
Sounds awesome! Excited to hear your results, we have started a similar method with year old leaf mulch, chicken manure, and chips on top. Weeds are easy to pop out of the mulch.
Still not exactly sure how to add more chicken manure and compost, Are you going to pull the chips back, then add compost them cover back up? Or place it on top of the chips?
Thanks for the info, and Cheers!
I’ll add compost as I plant, but the rest of the season you just add it on top. It will filter through the chips every time it rains, creating wonderful compost tea. The best part about layering on top is if you have weed seeds that didn’t heat up enough during composting, the seeds will sprout on top of the chips for easy removal.